|
Disclaimer: This website makes use of sponsored and/or affiliate links. Please see this page for more information.
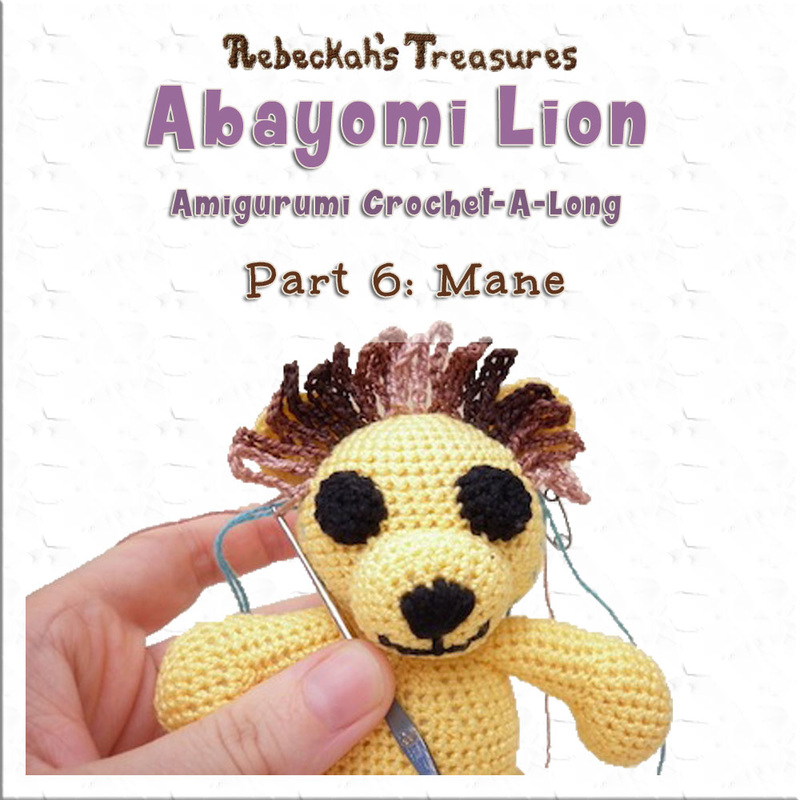
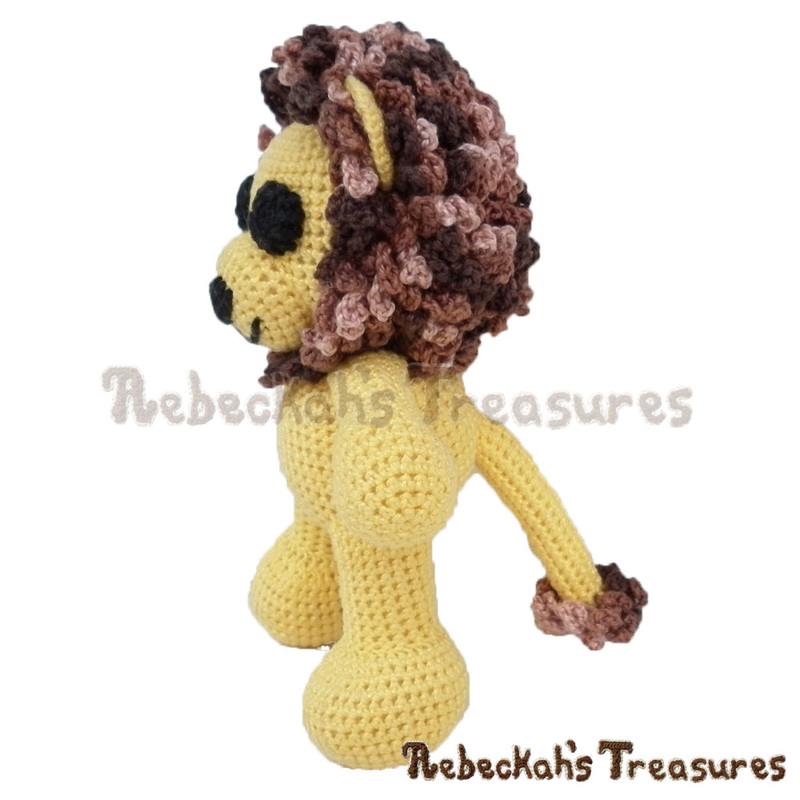
Welcome to part six of the amigurumi Abayomi lion crochet-a-long - the last step you need to complete your lion... Now, let's crochet Abayomi's mane and give him some finishing touches!
Are you just joining us today? Be sure to check out Amigurumi Abayomi Lion CAL Part 1, where we go over the pattern notes, abbreviations and gather our supplies.
Already completed this step? Share your finished Amigurumi Abayomi Lion with us for a chance to win free crochet patterns and discounts! Learn more about this contest here (link will activate on Sunday, September 20th, 2015), or check out the full schedule for this CAL below...
This pattern is copyrighted to Rebeckah Ferger of www.rebeckahstreasures.com. It is for personal use only. No part of this pattern may be copied or distributed in any way. If you sell what you make from this pattern, please credit me as the designer. All rights reserved, 2015.
REMINDER: Work in a counter-clockwise direction as you crochet the mane.
Lion Mane Instructions:
The following instructions for the mane are more of a guide than an exact direction. Feel free to make changes to add your own character to your lion
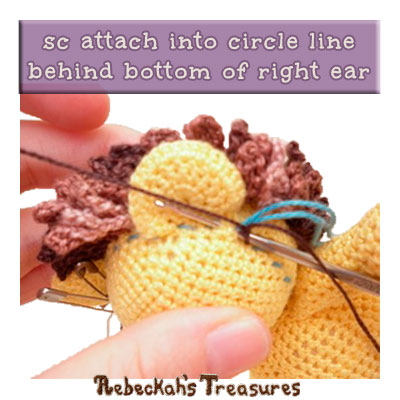
Basically, you will be using surface crochet to make the lion’s mane. You’ll do this by alternating between sc attaching to the lion’s head and chaining. You’ll want to alternate between using chs of 12, 10 and 8 – starting with the longer chs at the top section of the head and the tip of the chin, and using shorter chs on the sides of the face below the ears. NOTE: the number of chs you will make for your lion’s mane may differ from what is recommended. However you decide to do yours, you will need the longest ch to be roughly the same height of the ears when folded in half. The shortest ch you will use should have 4 sts less than the longest one... To help you see where you should start, take two scrap lengths of yarn and trace a circular border on both the front and back sides of the head, so that it is as close to the ears as possible on both sides. You’ll want to have roughly 20 st sps around the top of the head from bottom of left ear to bottom of right ear, 12 st sps on either side below the ears and 4 st sps along the bottom below the muzzle for a total of approximately 48 st sps.
Use these circle lines as a guide for the following instructions...
Lion Face Mane Instructions:
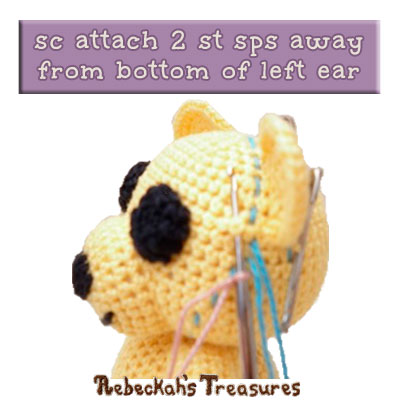
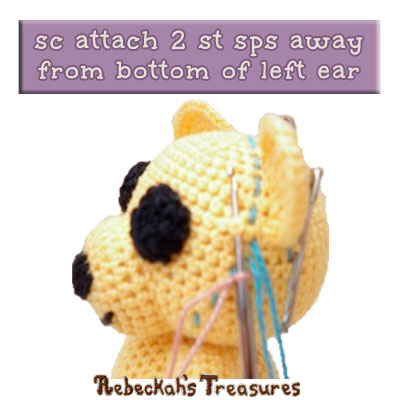
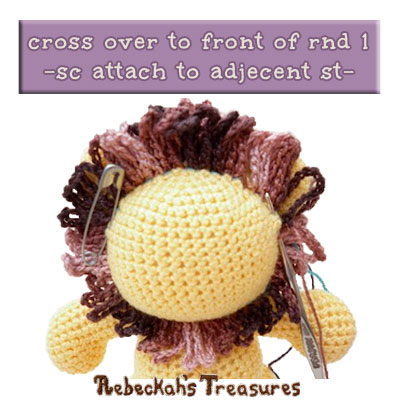
You will make 2 rnds of lion mane on the front of the face as close to the bottom of the muzzle and ears as possible. I recommend starting with the rnd closest to the center of the face and finishing with the rnd closest to the ears. For best results, work in a counterclockwise direction and start with the st sp that lines up with the bottom of the left ear.
*Use AC starting with a slip knot and working in a counterclockwise direction... rnd 1 (part 1): sc attach to the 2nd st sp away that lines up with the bottom of the left ear, ch 12 or as many chains as it takes to get the recommended height mentioned above, [sc attach to the next st sp, ch 12] rep about 18 times around the top of the head or until you get to the bottom of the right ear, sc attach to the st sp that lines up with the bottom of the right ear (you should have approximately 19 ch sps up to here)
rnd 1 (part 2): ch 10 or 2 chs less than your first ch in this rnd, [sc attach to the next st sp, ch 10] rep about 5 times, working down the side of face or until you reach the st sp that lines up with the bottom of the nose (25 ch sps up to here - including the last loose ch-10 made)
rnd 1 (part 3): [sc attach to the next st sp, ch 8 or 4 chs less than your first ch in this rnd] rep about 6 times, continuing to work down the side of face or until you only have 5 st sps below the muzzle - you can determine this by counting the st sps backwards from where you started this rnd so that you have the same number of sts sps as the number of ch sps you made from part 2-3 of this rnd (31 ch sps up to here - including the last loose ch-8 made) rnd 1 (part 4): sc attach to the next st sp, ch 9, sc attach to next st sp, ch 10, sc attach to next st sp, ch 11 (this is the center bottom ch), sc attach to the next st sp, ch 10, sc attach to the next st sp, ch 9 (36 ch sps up to here - including the last loose ch-9 made) rnd 1 (part 5): [sc attach to the next st sp, ch 8 or 4 chs less than your first ch in this rnd] rep about 6 times working up the side of face or until you reach the st sp that lines up with the bottom of the nose (42 ch sps up to here) rnd 1 (part 6): [sc attach to the next st sp, ch 10 or 2 chs less than your first ch in this rnd] rep about 6 times working up the side of face or until you reach the very first sc of this rnd, sl st join to that st, ch 1 (48 ch sps) Keep taller chain loops on top of head and on a few of the bottom center stitches. Keep shorter chain loops to the sides and towards the bottom of head.
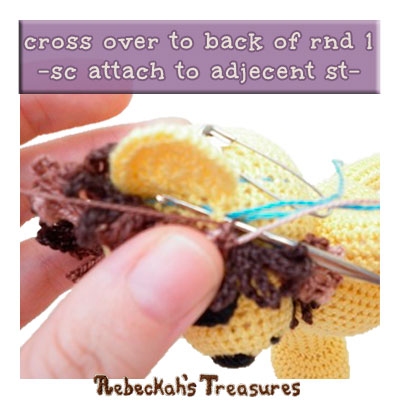
rnd 2: Working behind the first rnd and directly into the circle line you made, rep rnd 1, f/o, weave in all ends.
Lion Back of the Head Mane Instructions:
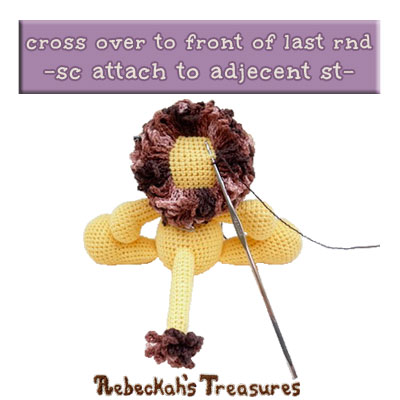
The back of the lion’s mane is worked similarly to the face mane, only this time you will start working directly into the circular line you made that is closest to the back of the ears. From there, you’ll continue to work in circles –each time you’ll get closer to the center of the head’s back.
*Use AC starting with a slip knot and working in a counter clockwise direction... rnd 1: Follow directions for rnd 1 of the Lion’s Face Mane. This time, start in the first st sp away that lines up with the bottom of the right ear. (48 ch sps) rnd 2: Follow directions for rnd 1 of the Lion’s Face Mane again. This time, work this rnd in front of the rnd you just made, or the st sps closest to the last rnd. (48 ch sps) rnd 3+: For the rem rnds, you will follow the same process as the first rnds, continuously working new rnds inwards. From here on, the number of ch sps per round will dec. Match the number of chs for each st in the new rnds with the rnd before. Then, when you get closer to the center, eliminate working the longer chs of 12 and work the middle length chs of 10 in its place. Finally, when it only looks like one or two rnds can be made, only work the smaller chs of 8. F/o, weave in ends.
Weave in and tuck away any ends still poking out.
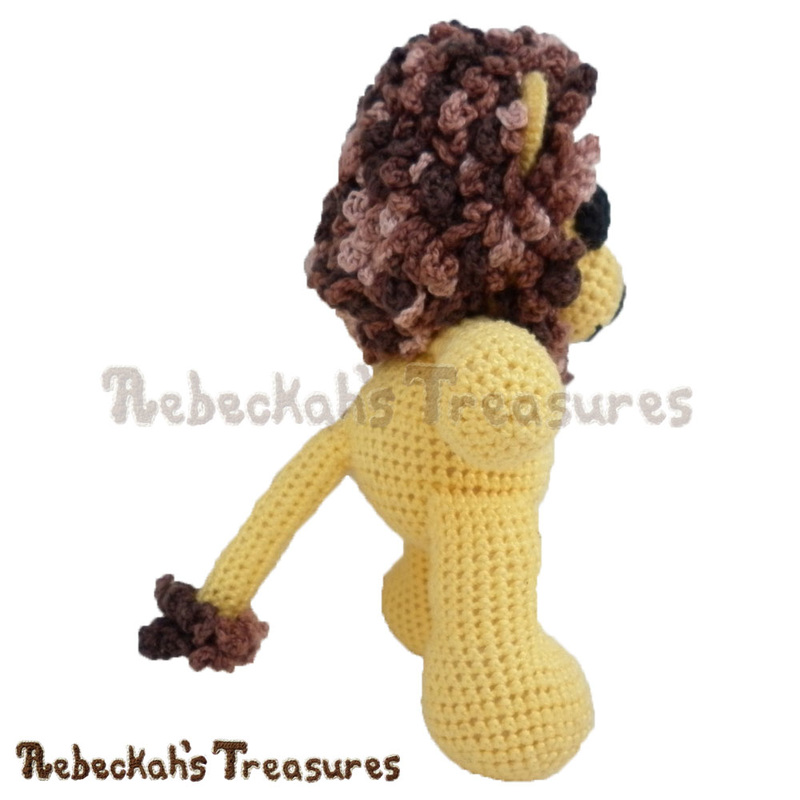
Enjoy your new amigurumi Abayomi Lion!
Did you enjoy this Abayomi Lion CAL? Tell me what you think either by commenting below, by visiting this pattern on ravelry, or by giving this pattern a star-rating…
Amigurumi Abayomi Lion CAL Schedule & Links to Each Part:
See you soon for the Share Your Amigurumi Abayomi Lion CAL Contest (link activates Sunday, September 20th, 2015 and you have until Sunday October 4th, 2015 to share your Lions for a chance to win).
If you enjoyed this CAL, then you'll love Sharon's lion pattern too!
Make a lion cub with Sharon Ojala's
|
Hello, my name is Rebeckah.
I hope my crochet inspires you to create your very own treasures! Learn more about me... Categories
All
Archives
October 2021
© 2012-2021 Rebeckah Ferger
All rights reserved. Disclaimer: This website makes use of sponsored and/or affiliate links. Please see this page for more information.
|
- Home
-
-
- Special Offers
- New Releases
- Accessory Crochet Patterns
- Afghan Square Crochet Patterns
- Amigurumi Crochet Patterns
- Applique Crochet Patterns
- Baby Crochet Patterns
- Dolly Crochet Patterns
- Fashion Doll Crochet Patterns
- Free Downloads
- Holiday Crochet Patterns
- Tapestry Crochet Patterns
- Under the Sea Crochet Patterns
- Wedding Crochet Patterns
- Disclaimer and FAQs
-
-
- Free Crochet Patterns
- New Free Releases
- Free Accessory Crochet Patterns
- Free Afghan Square Crochet Patterns
- Free Amigurumi Crochet Patterns
- Free Applique Crochet Patterns
- Free Baby Crochet Patterns
- Free Dolly Crochet Patterns
- Free Fashion Doll Crochet Patterns
- Free Guest Crochet Patterns
- Free Holiday Crochet Patterns
- Free Tapestry Crochet Patterns
- Free Under the Sea Crochet Patterns
- Free Wedding Crochet Patterns
- Free Crochet Patterns Coming Soon
Welcome Visitor! I hope you enjoy my treasures.









 RSS Feed
