|
Disclaimer: This website makes use of sponsored and/or affiliate links. Please see this page for more information.
Welcome to lesson four of the Website Shop 101 tutorial series for crafters. If you'll be selling handmade items, or if you want to run your store with fewer costs, PayPal allows you to create your own shop and product buttons. This lesson will show you how you can do this and how you can combine it with the buttons you designed in lesson two.
First things first, you'll need to make sure you have your PayPal account set up as a Business account, rather than as a Personal account, so you will have access to the Merchant Tools.
If you're already set up with a PayPal Business account, continue with this lesson. If not, go and set up an account now (see how here on YouTube) or upgrade now (click here to upgrade). Upload Your Buttons to Your Website:
If you skipped lesson three, then first thing you will need to do is upload the shop buttons you designed from lesson two onto your site, so that you can grab the image URL from each of them. If you've already done this, you can move onto the next step below... Weebly Users: You'll need to create a page, where you can drag the IMAGE element onto it. When you create your page, make sure you CHECK the "Hide page in navigation" BOX to hide this page from the navigation menu and your users, and in the Advanced Settings for the page, you'll also need to CHECK the "Hide this page from search engines" BOX to keep others from finding the page accidentally. Now that you have your page created, click Save & Edit to go to the page.  Image & Gallery Elements Image & Gallery Elements
Drag either the IMAGE or GALLERY elements onto the page and UPLOAD your buttons.
Next, right-click each image and copy the image URL. Paste and save each URL to a spreadsheet or notepad for future reference. Proceed to the next step below... Wordpress Users: You guys have it easy. Go to the Media section of your editor, click Add New and UPLOAD your buttons. Next, click on each image and copy the image URL from the URL field. Paste and save each URL to a spreadsheet or notepad for future reference. Proceed to the next step below... Other Users: If you have a place to upload your media like Wordpress users, do it this way. Otherwise, create a page where you can place your images, copy the URL of each image and save it to a spreadsheet or notepad for future reference. Proceed to the next step below... Where to go for PayPal Buttons:
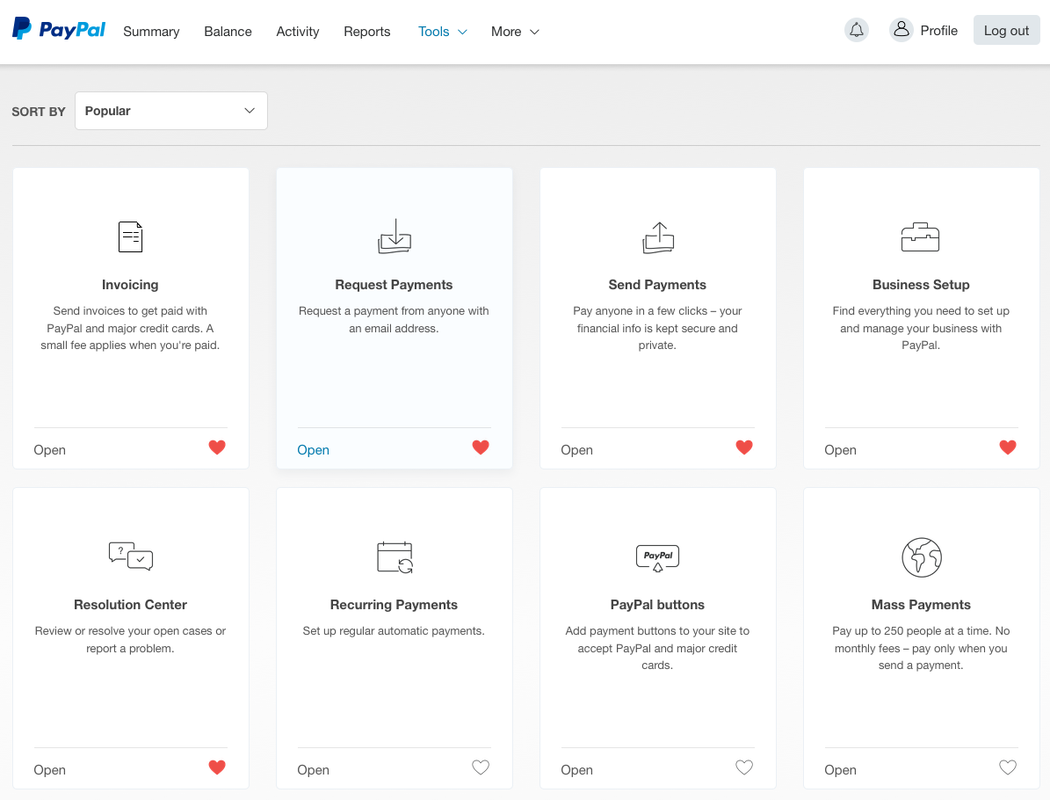
To make your PayPal buttons or view the code for the buttons you have already made, you will need to log into your PayPal account and go the "Tools" tab in the top navigation menu. Once there, you'll want to click on the PayPal Buttons icon...
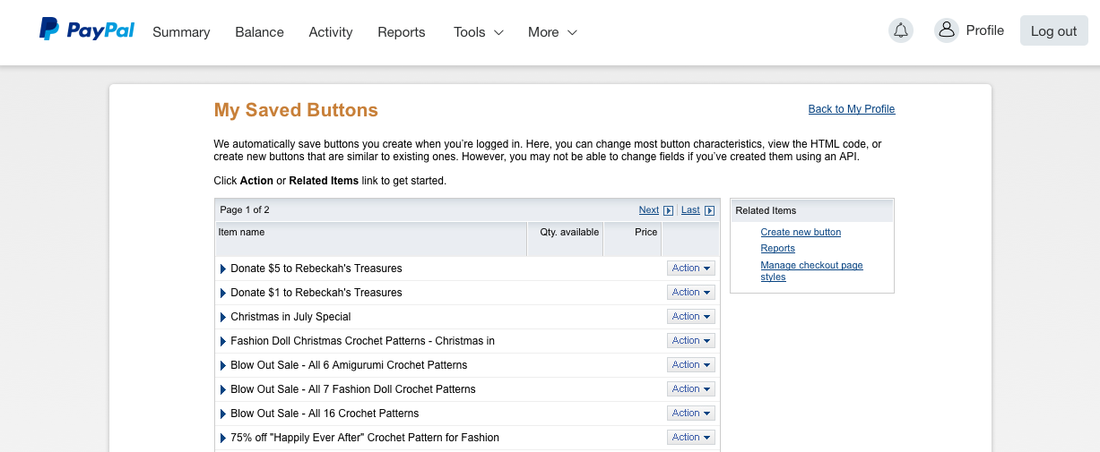
Clicking on the PayPal Buttons icon will take you to you "My Saved Buttons".
Here's where you can edit or grab codes for buttons you've already created, or make new ones. To edit or grab the code for one you've already created just click on action button next to it and choose the action you wish to do. To create a new button, click on the link that says "Create new button" to the right of the page and proceed to the next step. Creating a Product Button:
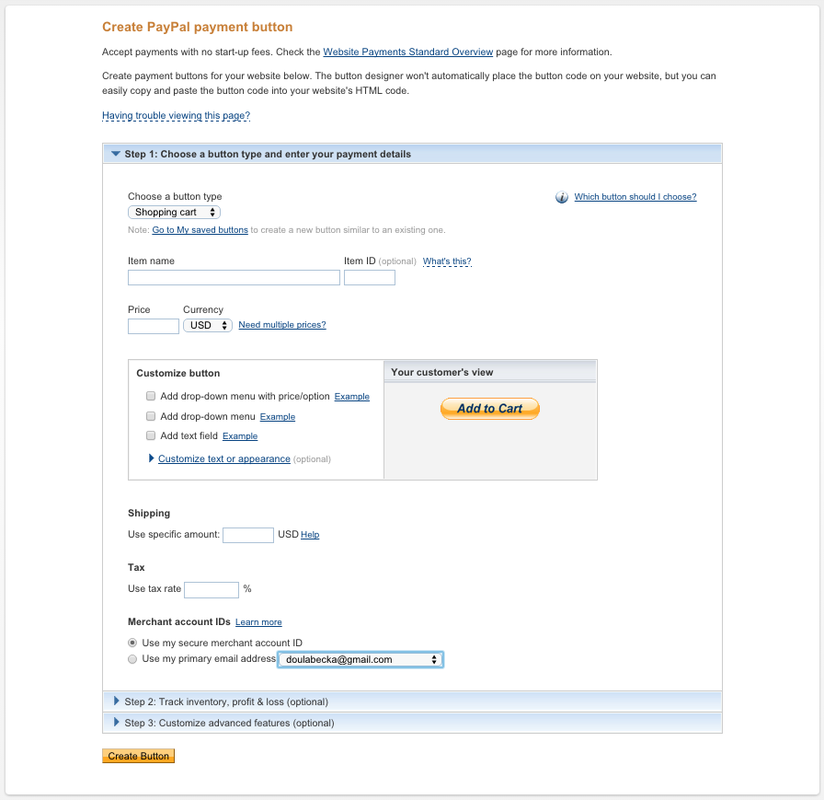
Clicking on "Create new button" will take you to the page where you can create various shop buttons and manage existing buttons. The page looks like this...
Let's start creating a shop button for your physical or digital good.
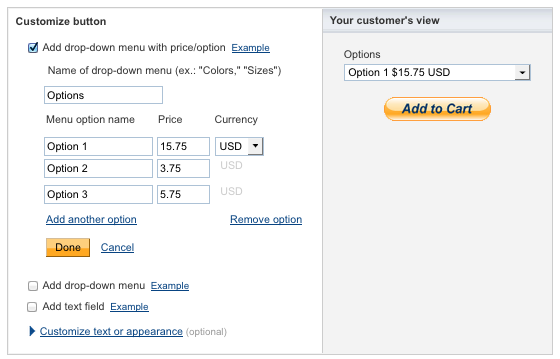
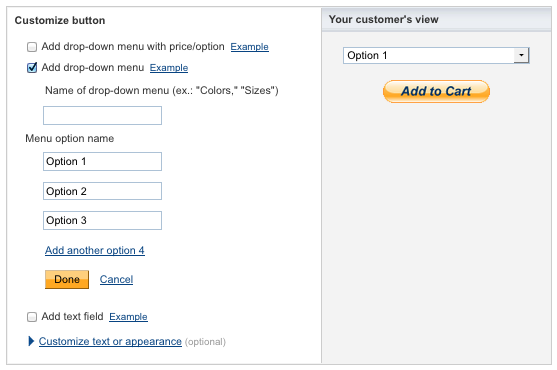
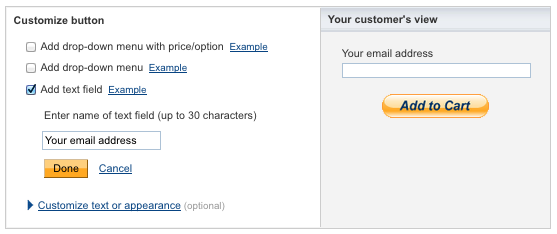
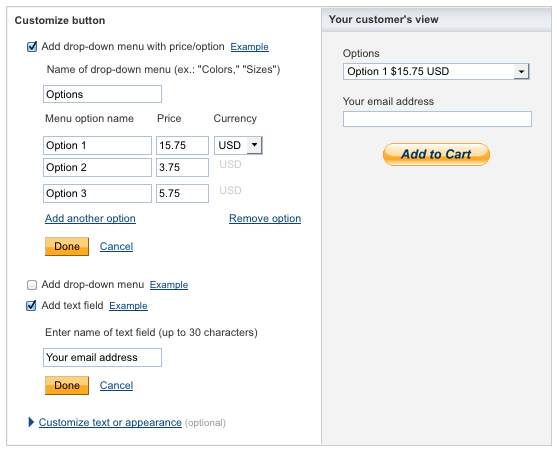
Step 1: Choose a button type and enter your payment details For an item in your shop, you will want to either select "Shopping cart" or "Buy Now" from the "Choose a button type" drop-down menu. The Shopping cart option is intended for multiple purchases and the Buy Now is intended for instant singular purchases. That said, it doesn't make a huge difference which one you select as they both will accomplish the same goal and both have the same button customization options. So, select the one you like best. Once you have made your selection, you need to give your item a name. It can be whatever you'd like, but remember to give it a good, descriptive name as that is what will appear in the shopping cart. Next, give your item an ID. This can be a short code of numbers and/or letters that you can use to keep track of your items. It is not a required field. The next field asks for you to give your item a price. Simply type it into the field and select the correct currency from the drop-down menu next to it. If you need multiple prices for this time, leave this field blank. Now it's time to customize the look and options for your button!
Let's move on to the next step of creating your PayPal payment button...
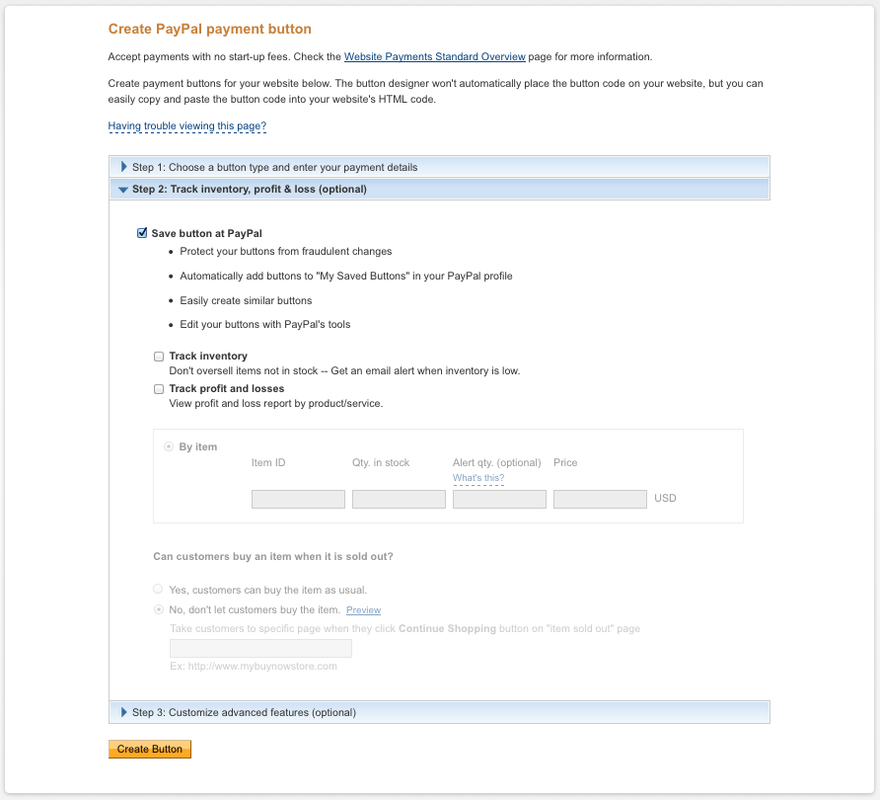
Step 2: Track inventory, profit & loss (optional) The second step is optional, but one thing you will want to make sure is check is the "Save button at PayPal". This will keep this button handy for whenever you need it later on. I have never needed to use any of the other fields in this step, but you may find them to be useful tools for your product type. They are pretty self explanatory...
Only one more step of creating your PayPal payment button remains before you can grab the code and add it to your site...
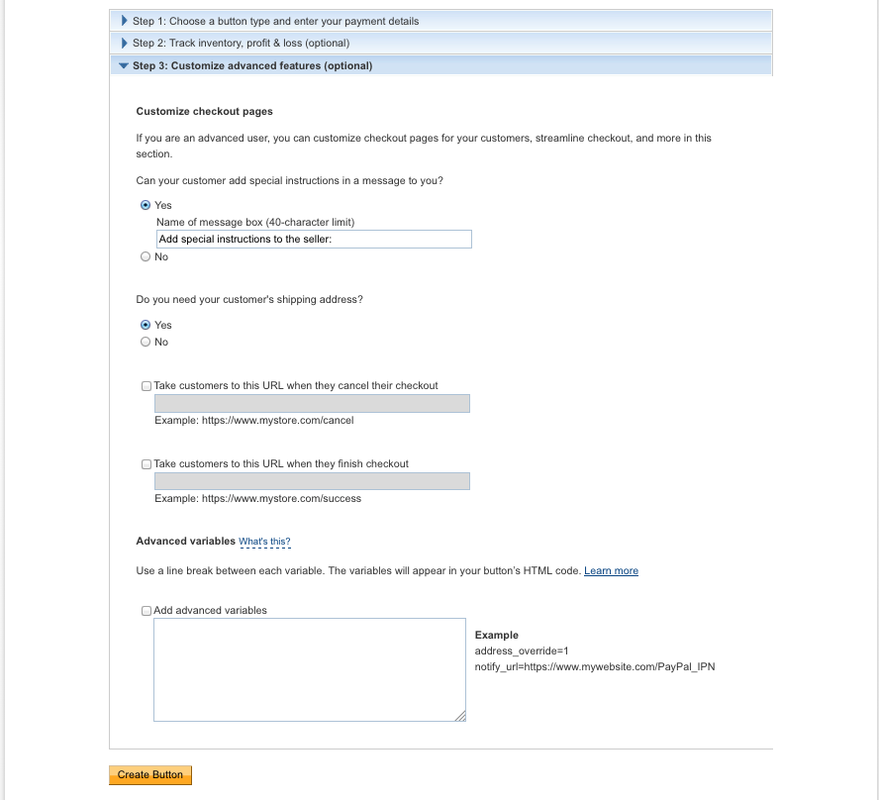
Step 3: Customize advanced features (optional) This step is also optional, but there are some extremely handy tools in this step! For instance, you can make it possible for you customer to leave you a note. If you don't want them to have this ability, just select "No". Are you selling a physical good? Then you'll need a shipping address. If you're selling a digital item, you can select "No". The next two fields are by far the most useful. The first "Take customers to this URL, when they cancel their checkout" makes it possible to direct your customer back to your website if they decide they would rather not make a purchase. You can make it be your Home page or your Shop page. Whatever you like! The next "Take customers to this URL, when they finish checkout" helps you direct your customer back to your website or to a page you've created with special instructions and to thank them for after they've made their purchase. I recommend creating a page on your website that is hidden from the navigation menu. On this page, you'll want to thank your customer for their purchase and let them know when they will be hearing from you. You can create a unique one for each product, or a standard one that suits all. If you want to sell an instant downloadable digital good, you will want to create a unique page with the item available to download. Link to this URL page in that field or link directly to the URL of the PDF, so they can download it upon purchase (more on making things downloadable is coming up in the next lesson). *There is just one little precautionary thing I am going to mention about this option. It is very easy for someone with access to this link to share it with others. So, your digital download would not be entirely risk free from theft. If this is not a problem for you, by all means give it a go. I know that there is a way to adjust the security of the digital good using some additional coding, I am just not very knowledgeable on it at this time. Finally, the last thing you can do to customize your button, is add Advanced Variables. I am not too familiar with this option, but you might like to explore it.
Once you're happy with all of your button's settings and customizations, click on the yellow button at the bottom that says "create button".
Grabbing the Code and Adding it to Your Website:
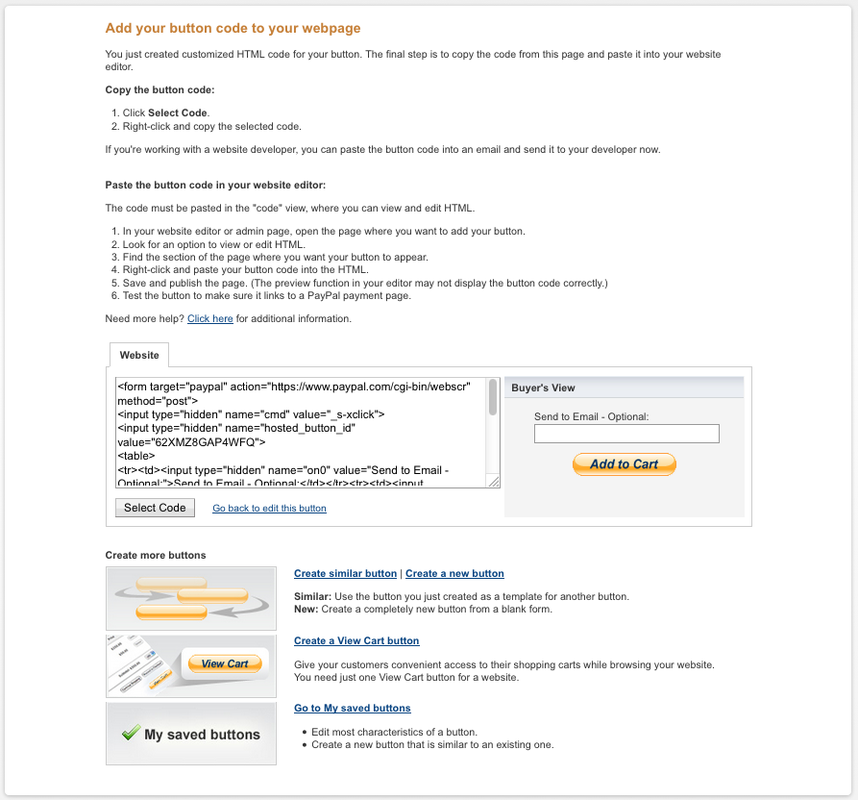
If you've just created a button, you will be directed to the following page.
If you're looking to add the code for a previously saved button, just go to your saved buttons (via tools in the top navigation menu and via paypal buttons on that page). Click on the button in question and selection the option to grab the code. Follow the instructions on this page to add the code to your website (see where to paste the code below). And voila, you've now got a brand new shop product button! All you need to do is repeat the process again for all your remaining buttons, or if you want to make another with all or most of the same features, simply click on the option found on this page that says "Create similar button". This option can also be found under "Actions" for each of your saved buttons.  embed code element embed code element
Where to paste your button codes:
Weebly Users: Locate the "EMBED CODE" element from the sidebar and drag it into position. Paste your shopping cart code into the element and align accordingly. Wordpress Users: Simply paste the code onto your page where you'd like it to go. Other Users: If you have an element website builder, drag the embed code element onto the page and paste your code into into it. If not, simply paste the code onto your page where you'd like it to go. Creating a View Cart Button:
Once you've got your product buttons, you'll need to create a view cart button. This way your customers can keep track of their cart and make their purchases.
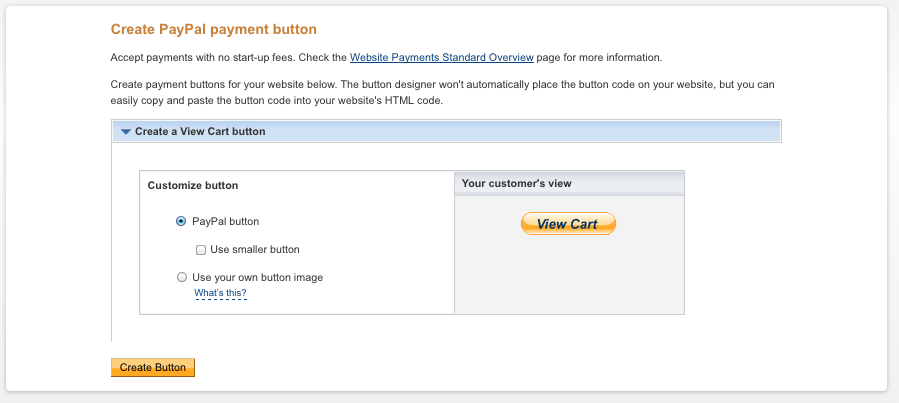
This option can be found on the same page as the one where you grab the code for your product buttons. Simply click on "Create a View Cart button" and it will take you to this page...
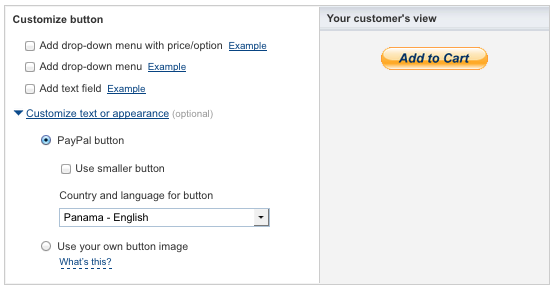
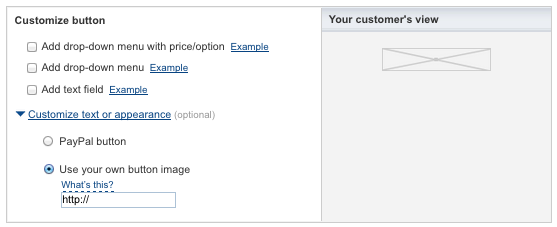
Just like the product buttons, you have three options.
*If you would like to use one you personally designed. You will need to go to the source on your website editor for the image, copy the image address or URL and paste it into the field. Select the option you prefer. Then, click on the yellow button at the bottom that says "create Button". You will be taken to a similar grab code page. All you need to do is follow the instructions on that page and you'll be all set. Customizing Your Payment Page:
Only one final thing remains for getting your PayPal shopping experience sorted, and that's customizing your Payment Page or the Checkout Page.
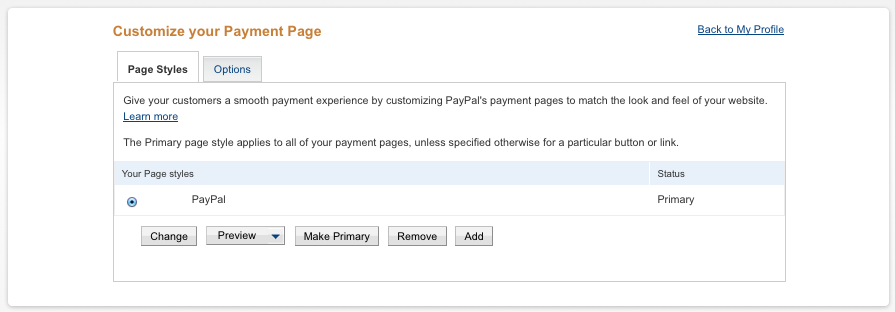
To do this, go to your "My Saved Buttons" page, and click on the link that says "Manage checkout page styles" which can be found on the right side of the page.
There are two basic preview options: "Preview Enhanced Checkout", and "Preview Classic Checkout", which can be changed and previewed by clicking on the "Preview" button drop-menu.
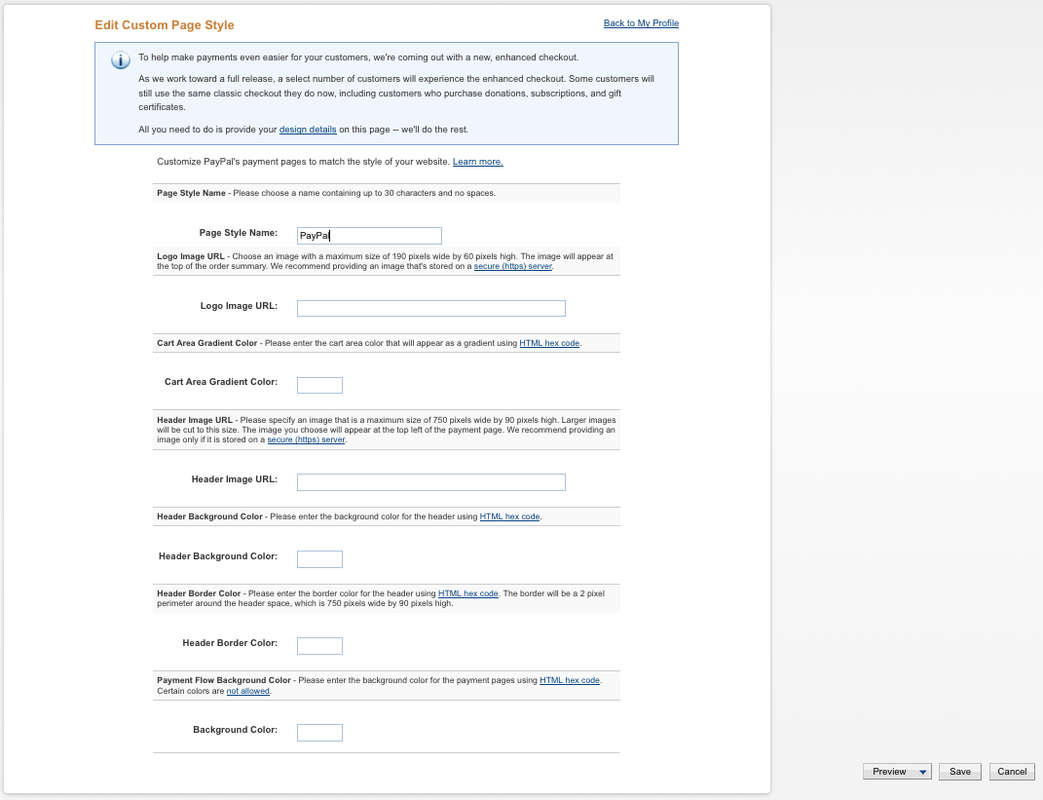
You can make your changes to these layouts by clicking on the "Add" button. It will take you to a page that looks like the following, where you can call it whatever you like, add your Logo Image, a Header Image and/or adjust the page colours to match your site. When you're ready to see how it looks, simply click on either or both of the options in the "Preview" button drop-menu located at the bottom right of the page. It will open new tabs so you can see it and decide whether you wish to make further changes. Once you are satisfied, select the preview option you prefer and click "Save". All that remains is to make it your primary payment page. To do this, simply click on the "Make Primary" button. *You can learn more about Editing a Custom Page Style by clicking on the "Learn more" link.
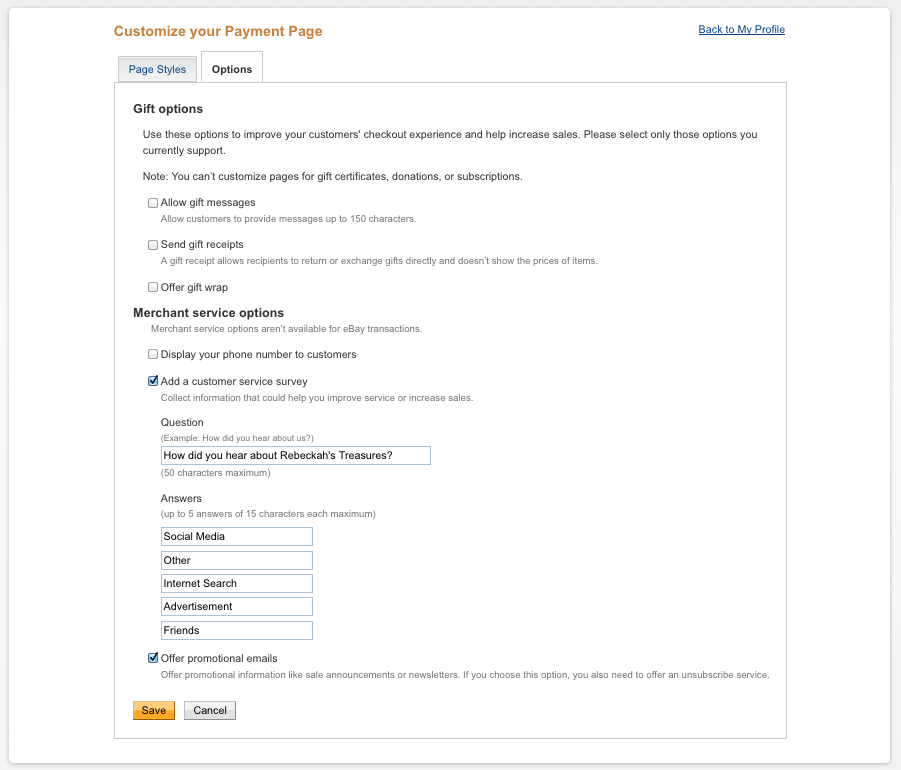
There is another fun service option you might like to have and that's a mini customer service survey. You can ask your customers whatever you like and give them five answers to choose from.
You'll find it on the "Options" tab of "Customize your Payment Page". Then, whenever a customer makes a purchase and they fill out the survey, you should be able to see the results on the transaction page.
There are many more tools on PayPal that you can explore, though now you have all the tools you need to add PayPal shop buttons to your site!
Thanks so much for visiting today! Tell me what you thought about the fourth lesson of the series by commenting below or giving this a rating...
Additionally, please let me know if you have any questions or concerns. I will be happy to help in any way I can. Comment below, or visit my Website Shop 101 facebook support group...
Be sure to check out the intro to this series for upcoming lessons or lessons you may have missed! Wishing you a terrific day. See you again soon for lesson 5, where we'll make Download buttons with Google Tracking... 
Hello Visitor and Welcome to Rebeckah's Treasures... I am a Norwegian/Canadian currently studying Midwifery in the UK. I love to crochet! At Rebeckah's Treasures, I share my crochet patterns and treasures. I hope they inspire you to crochet your own little treasures too... 
Comments
|
Hello, my name is Rebeckah.
I hope my crochet inspires you to create your very own treasures! Learn more about me... Categories
All
Archives
October 2021
© 2012-2021 Rebeckah Ferger
All rights reserved. Disclaimer: This website makes use of sponsored and/or affiliate links. Please see this page for more information.
|
- Home
-
-
- Special Offers
- New Releases
- Accessory Crochet Patterns
- Afghan Square Crochet Patterns
- Amigurumi Crochet Patterns
- Applique Crochet Patterns
- Baby Crochet Patterns
- Dolly Crochet Patterns
- Fashion Doll Crochet Patterns
- Free Downloads
- Holiday Crochet Patterns
- Tapestry Crochet Patterns
- Under the Sea Crochet Patterns
- Wedding Crochet Patterns
- Disclaimer and FAQs
-
-
- Free Crochet Patterns
- New Free Releases
- Free Accessory Crochet Patterns
- Free Afghan Square Crochet Patterns
- Free Amigurumi Crochet Patterns
- Free Applique Crochet Patterns
- Free Baby Crochet Patterns
- Free Dolly Crochet Patterns
- Free Fashion Doll Crochet Patterns
- Free Guest Crochet Patterns
- Free Holiday Crochet Patterns
- Free Tapestry Crochet Patterns
- Free Under the Sea Crochet Patterns
- Free Wedding Crochet Patterns
- Free Crochet Patterns Coming Soon
Welcome Visitor! I hope you enjoy my treasures.











 RSS Feed
