|
Disclaimer: This website makes use of sponsored and/or affiliate links. Please see this page for more information.
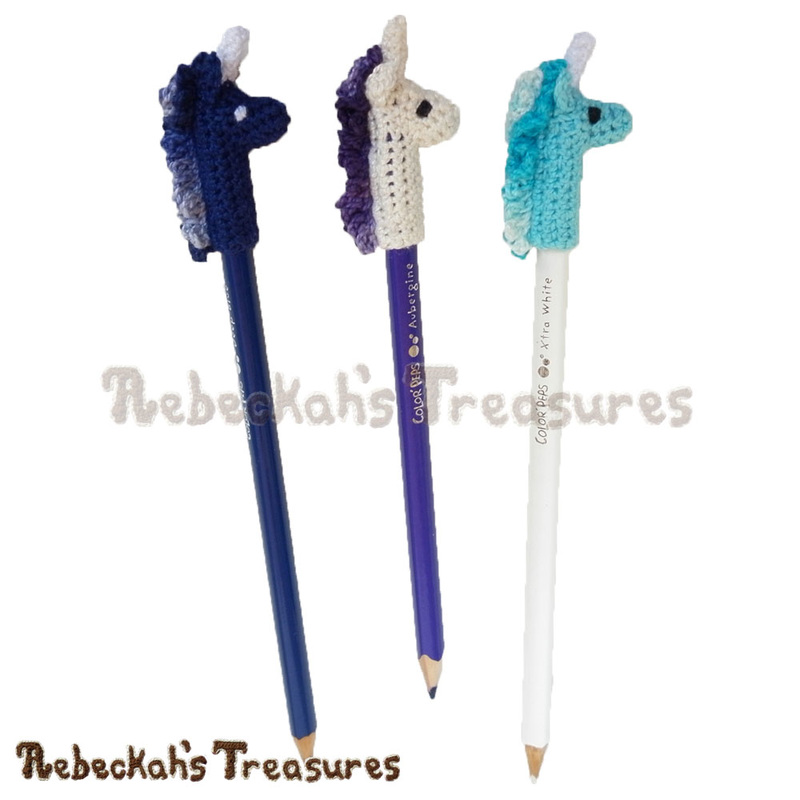
Looking for quick and easy last minute gifts to crochet?
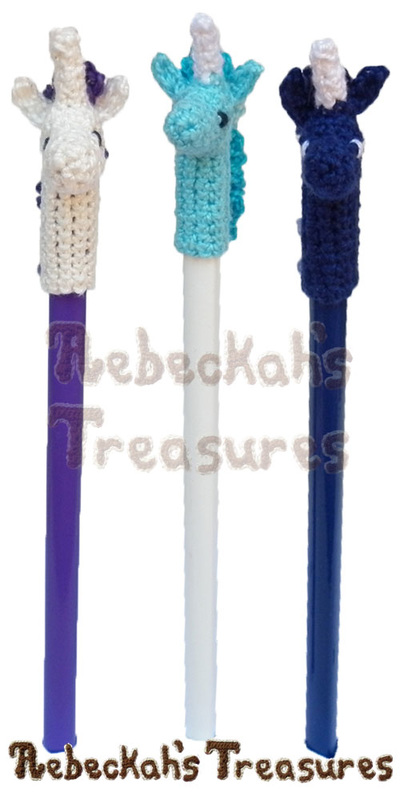
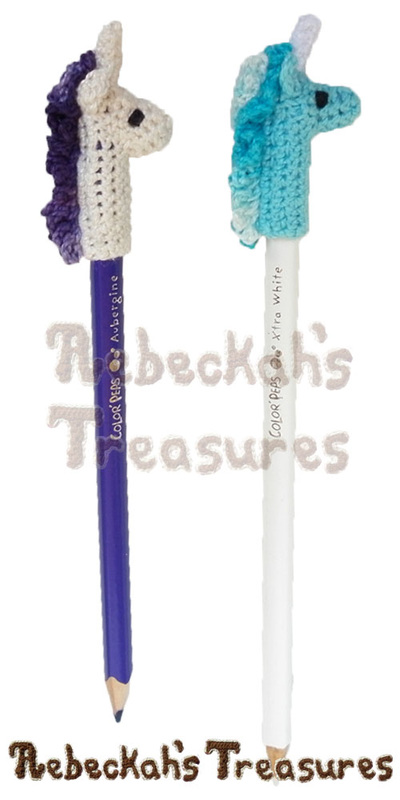
Try this adorably Sweet Unicorn Pencil Topper pattern. It's perfect for all ages and works great for last-minute or bulk gifting events!
This minutes-to-make pattern includes written instructions and a 30+ photo tutorial for crocheting this unicorn pencil topper for standard issue pencils and pens. Plus, tips are included for turning this topper into a finger pencil instead!
This project was inspired from an idea I had while dreaming. See Dreaming of Pencil Toppers for the full story and to see more pencil topper designs. Gifting ideas include stocking stuffers for Christmas, trick-or-treats for Halloween, party favours and back-to-school accessories. My favourite idea is to make several for a Teacher's appreciation bouquet with various stationary staples in a coffee mug! This crochet pattern is also available as a printer friendly, 10-page PDF download. GRAB IT HERE for only $1.75, OR SIGN UP for Rebeckah's Newsletter and grab this one or another pattern of your choosing (from the loyalty program list) for FREE in the next edition!
This pattern is copyrighted to Rebeckah Ferger of www.rebeckahstreasures.com. It is for personal use only. No part of this pattern may be copied or distributed in any way. If you sell what you make from this pattern, please credit me as the designer. All rights reserved, 2016.
You'll Need:
Sizing:
Designed to fit a standard pencil or pen when using lace weight yarn. The base of this pencil topper, the part that slips onto the pencil, is approximately 1” (2.5 cm) in height.
Sizing can be adjusted by changing the yarn weight and hook size. Gauge:
20 single crochet stitches x 24 rows = 2” (5 cm), or 10 single crochet stitches fit around the pencil snuggly but not too tight.
TIP: Thread/Yarn weight and hook size are flexible. Most lace or fine weight yarns will work well for creating a pencil topper. Whereas, thicker yarn weights such as DK or WW work great for turning it into a finger puppet. All you have to ensure before you begin, is 10 single crochet stitches wrap snuggly, but comfortably around the pencil, pen, chalk, finger or whatever staple you wish to accessorize! Pattern Notes:
You should be familiar with basic crochet stitches (chs, sl sts, sc, hdc), working in rows, rounds, and how to do increases and surface crochet.
When a long starting or ending tail is suggested, simply fasten off where the wrapped thread reaches the side of your palm. If you would like to make the tails longer just to be safe, you can do that too! You should be familiar with hand sewing on crochet pieces by means of the whip stitch. Due to its small size, some parts may be challenging to work. So, take your time crocheting this unicorn pencil topper and use the photos as a guide. Additional notes are included below... Unicorn Pencil Topper Instructions:
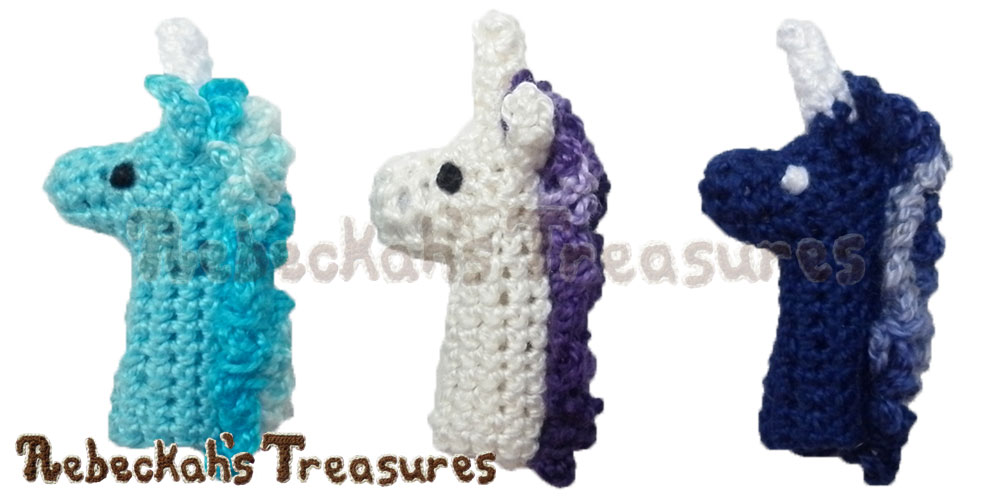
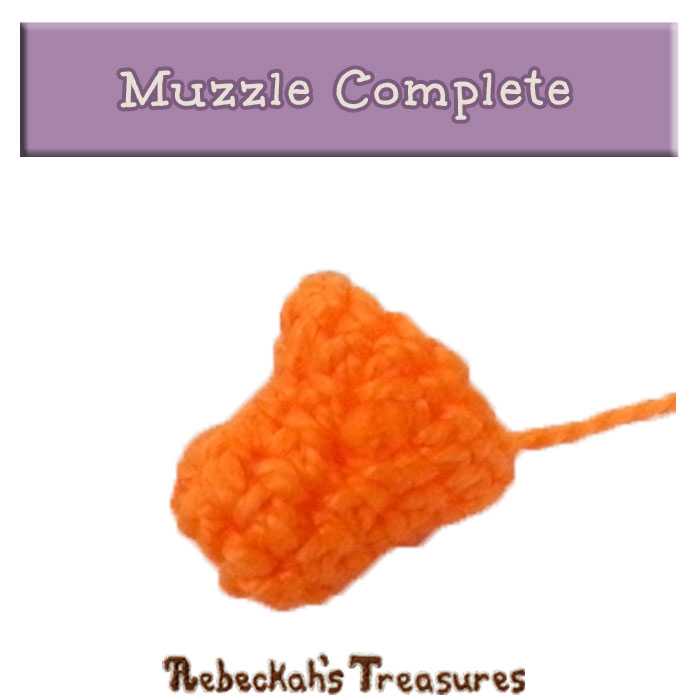
The unicorn pencil topper is broken down into four parts. The first part is the muzzle. The second part is the base or horn + head of the unicorn. The third part is the ears of the unicorn and the final / fourth part is the mane.
rnd 6: sc 2, sc 2 in each of the next 4 sts, sc 2, sl st, f/o (with a long tail if you prefer to sew the muzzle onto the base) (16 sts). *Last 3 sts after the sl st are left unworked. These 3 sts, plus the st where the sl st was worked are the bottom of the muzzle.
Set aside for now, and continue to the Unicorn Base.
*NOTE = You may find it easier to attach the muzzle and ears to the pony base before you have completed the rep rnds of the base. If this is your wish, crochet the ears first; next, attach the muzzle after completing rnd 13, followed by attaching the ears last.
Unicorn Base Instructions:
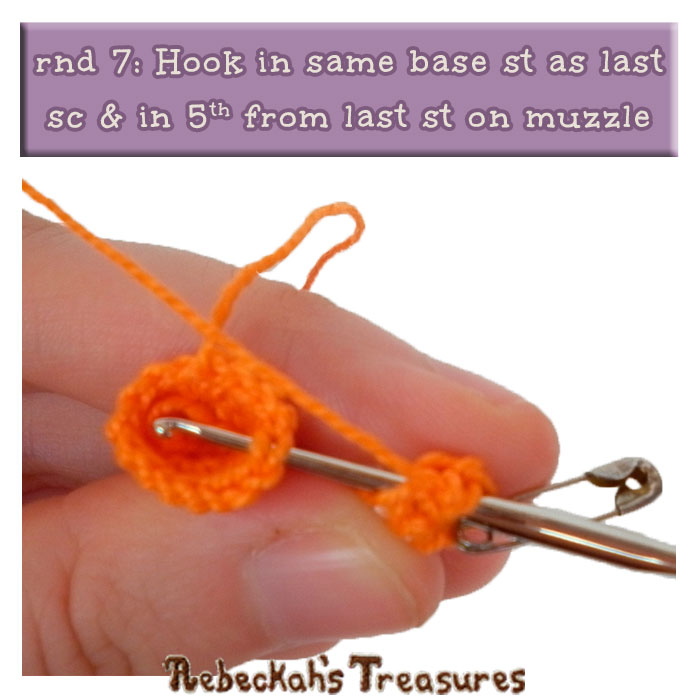
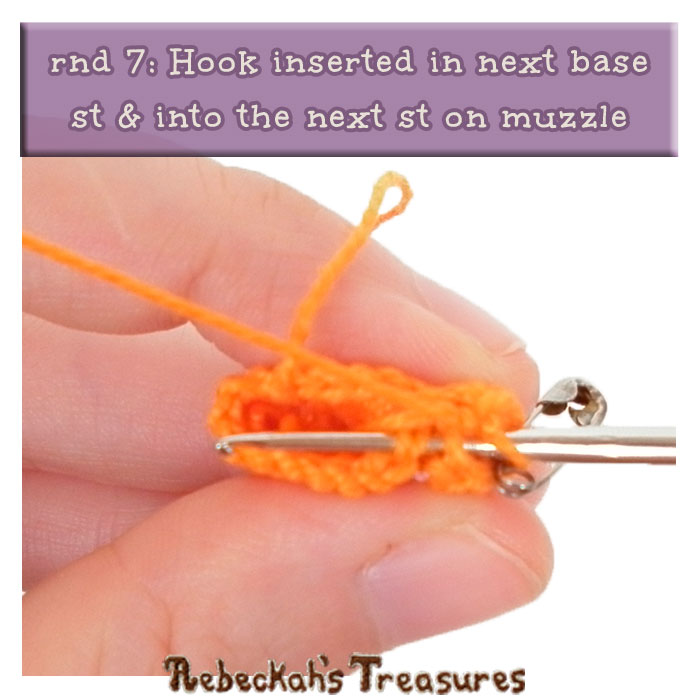
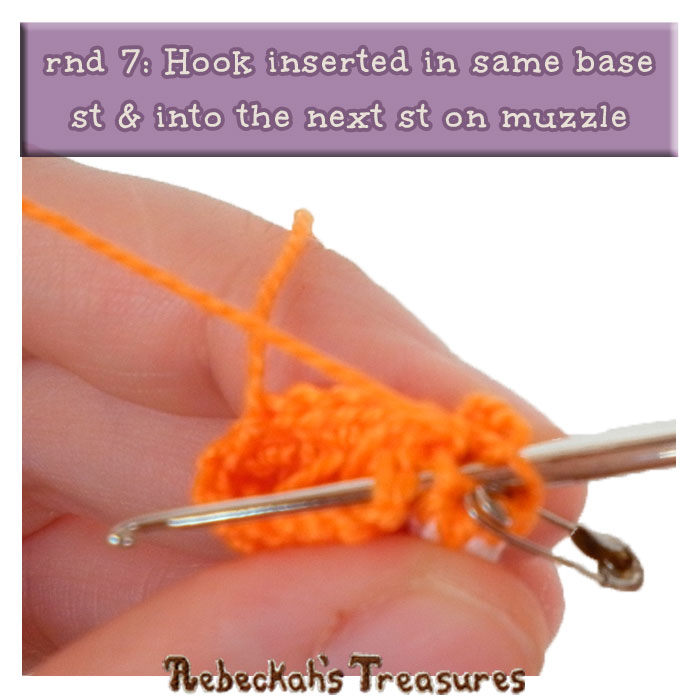
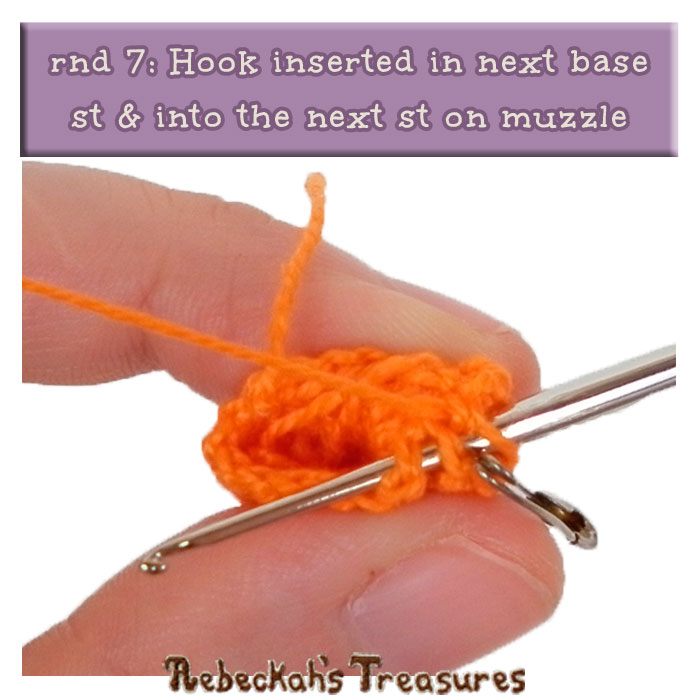
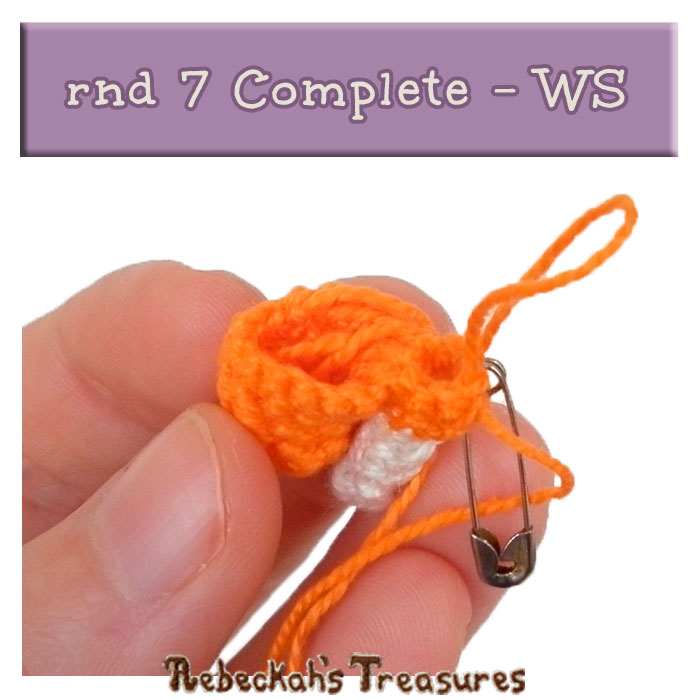
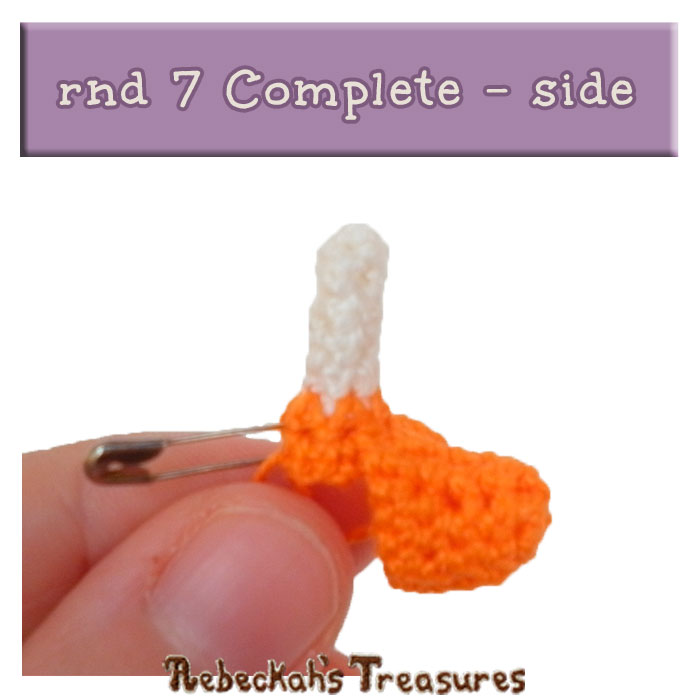
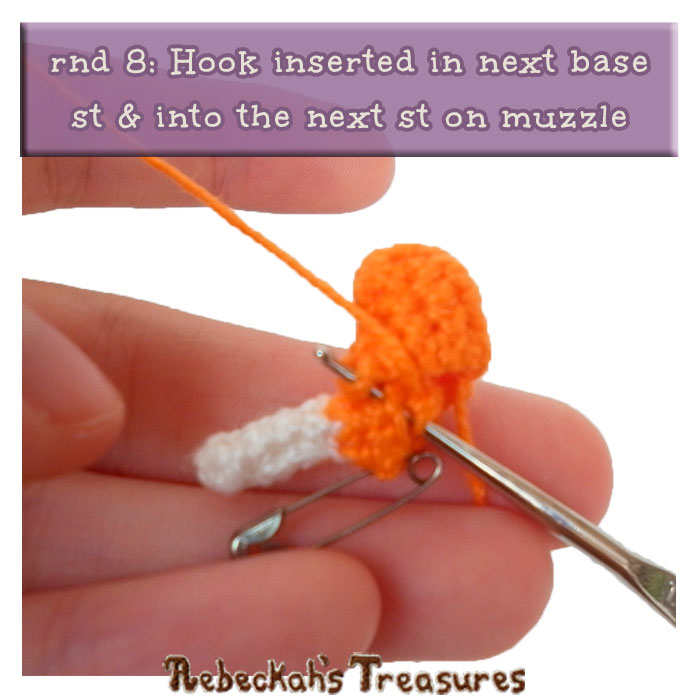
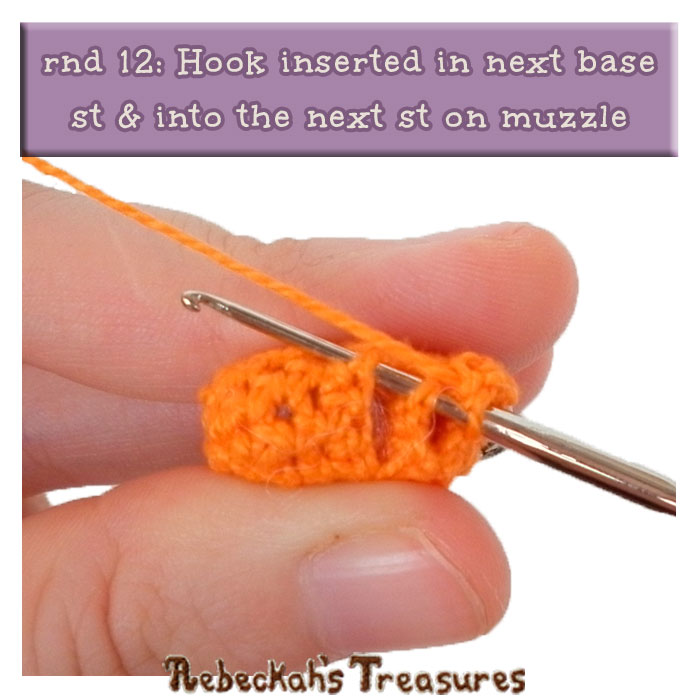
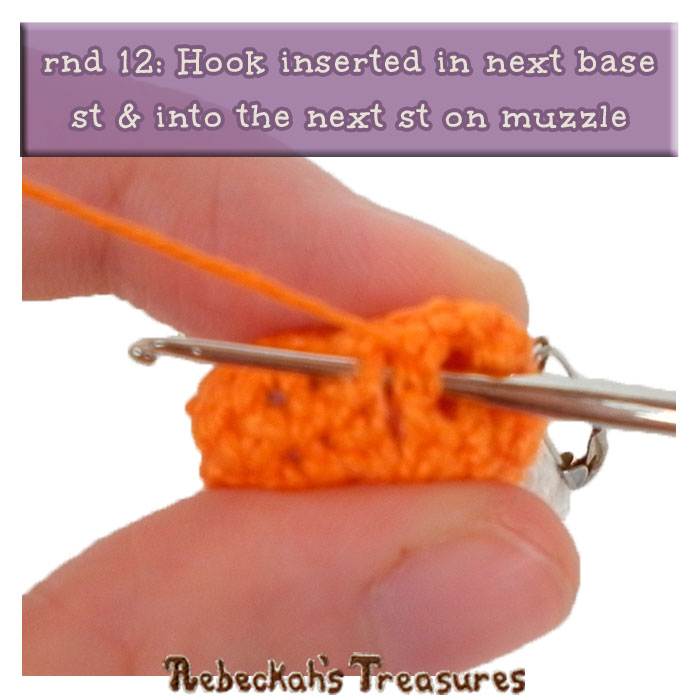
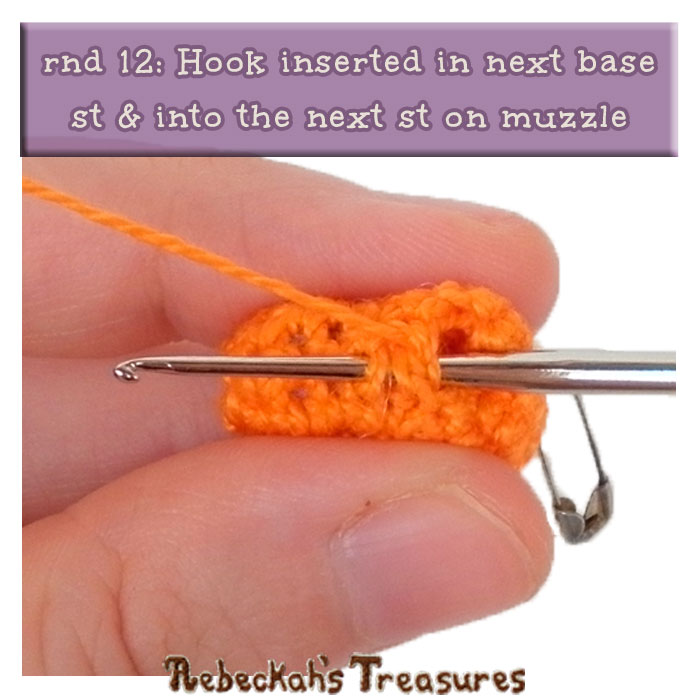
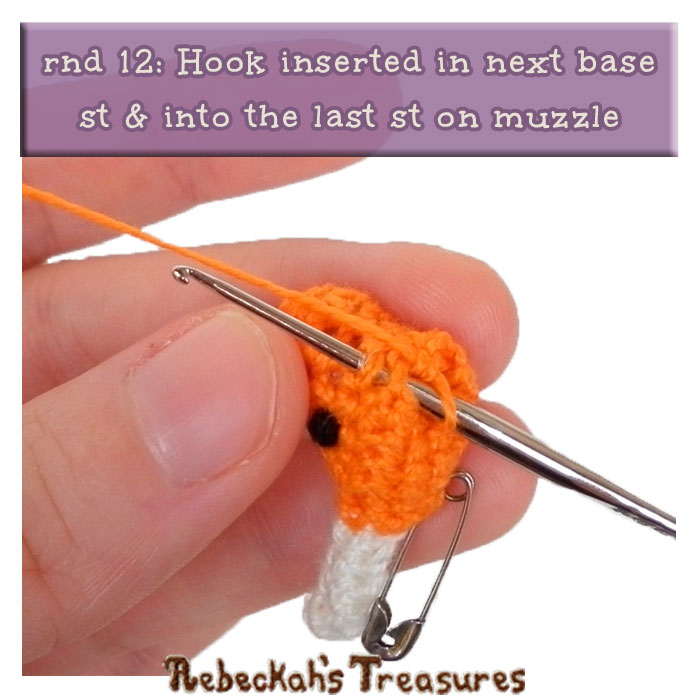
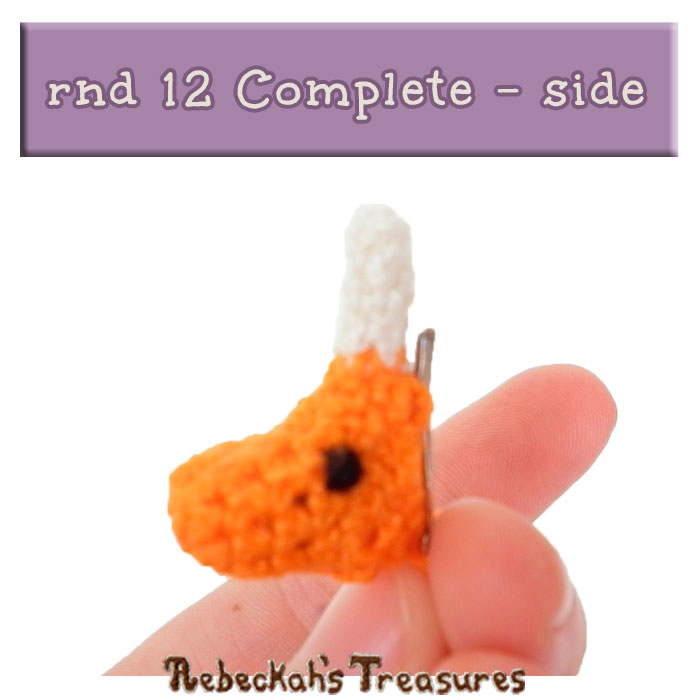
Make 1 in MC. The unicorn base is worked in continuous rnds from the top-down. You have the option to attach the muzzle as you go, or you can simply crochet the base and sew the muzzle on later. *Side facing you = WS. Option A - Sew Muzzle onto the Base Later: rnd 1: staring with horn colour → sc 3 into a magic circle (3 sts). rnd 2: sc 3 (3 sts). rnd 3: sc 2 in the next st, sc 2 (4 sts). rnd 4: sc 4 (4 sts). rnd 5: sc 2, sc 2 in the next st, sc → switching to the MC as you complete this last st (5 sts). rnd 6: sc 5 (5 sts). rnd 7: sc 2 in each st around (10 sts). rnd 8-21: sc 10 – 14 rnds or until desired height is reached, sl st & f/o at the end of the last rnd (10 sts). *The number of rnds you work here may vary according to your project and preference. *TIP = Take a spare strand of thread and mark the 4th to 7th sts from rnd 7 of the base – this is the top 4 sts of the muzzle attachment placement, and the same sts from rnd 12 – this is the bottom 4 sts of the muzzle attachment placement. Use these markings as a guide for sewing the muzzle onto the base. Using a whip stitch, sew the muzzle onto rnds 7-12 of the base - lightly stuff before closing the opening. Next, embroider eyes onto each side of the muzzle nearest to the base/head. Crochet and attach the ears now if you haven’t already done so. Then, proceed to the Mane... Option B - Attach the Muzzle as you go - Recommended Option: rnd 1-6: rep rnds 1-6 of Option A of the Base. rnd 7: sc 2 in the next st, sc, insert hook into the same sp as the last st made AND into the 5th from last st made on the last rnd of the muzzle so that the RS of both pieces are pressed tog → work a sc here, insert hook into the next st on the base AND into the 6th from last st or next avail st of the muzzle → work a sc here, insert hook into the same sp on the base AND into the 7th from last st or next avail st of the muzzle → work a sc here, insert hook into the next st on the base AND into the 8th from last st or next avail st of the muzzle → work a sc here, work another sc into the same sp on the base only this time, sc 2 in the next st (10 sts). *Click on WIP pictures to enlarge them...
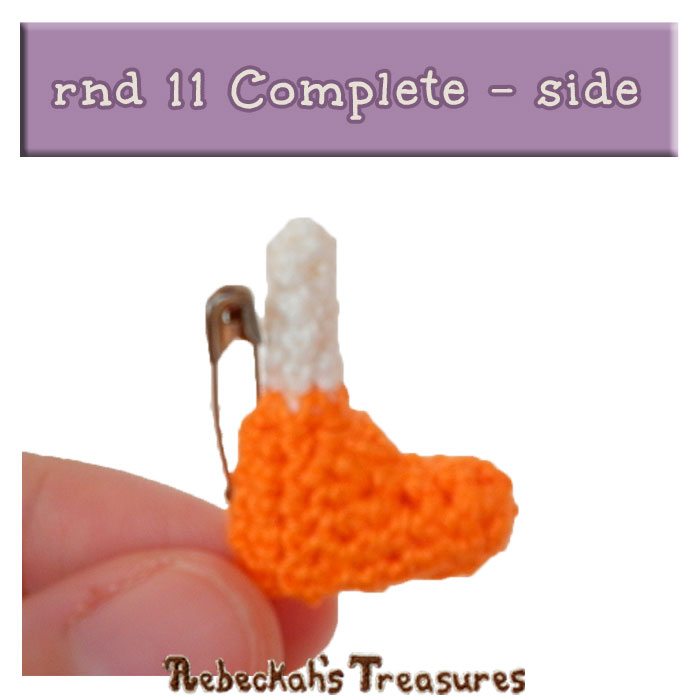
rnd 8: sc 3, insert hook into the next st on the base AND into the nearest avail st of the muzzle → work a sc here, sc 2 over the next 2 base sts only, insert hook into the next st on the base AND into the next avail st of the muzzle → work a sc here, sc 3 over the next 3 base sts only (10 sts).
rnd 9-10: sc 2, insert hook into the next st on the base AND into the nearest avail st of the muzzle → work a sc here, sc 4 over the next 4 base sts only, insert hook into the next st on the base AND into the next avail st of the muzzle → work a sc here, sc 2 over the next 2 base sts only – 2 rnds (10 sts).
rnd 11: rep rnd 8.
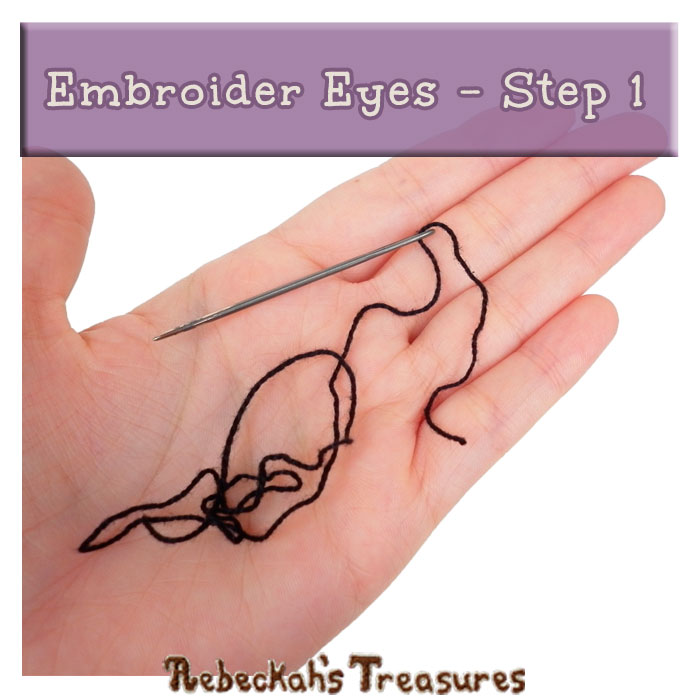
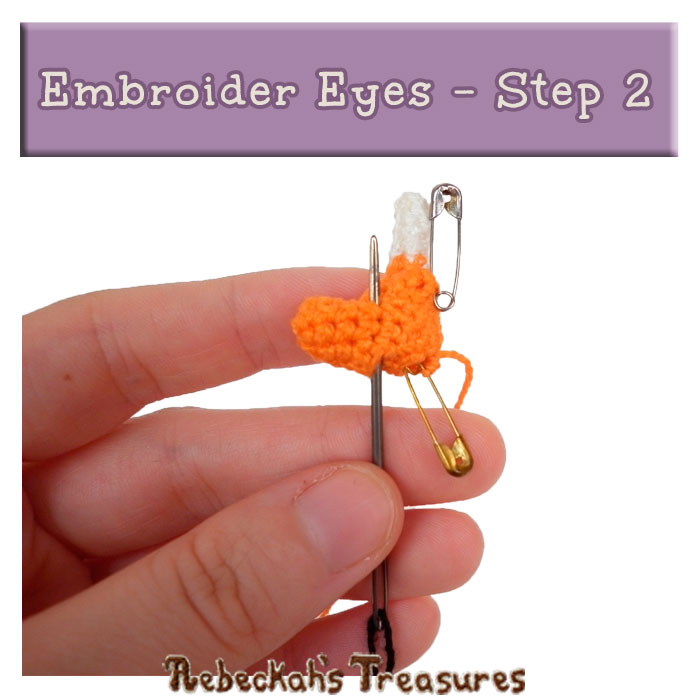
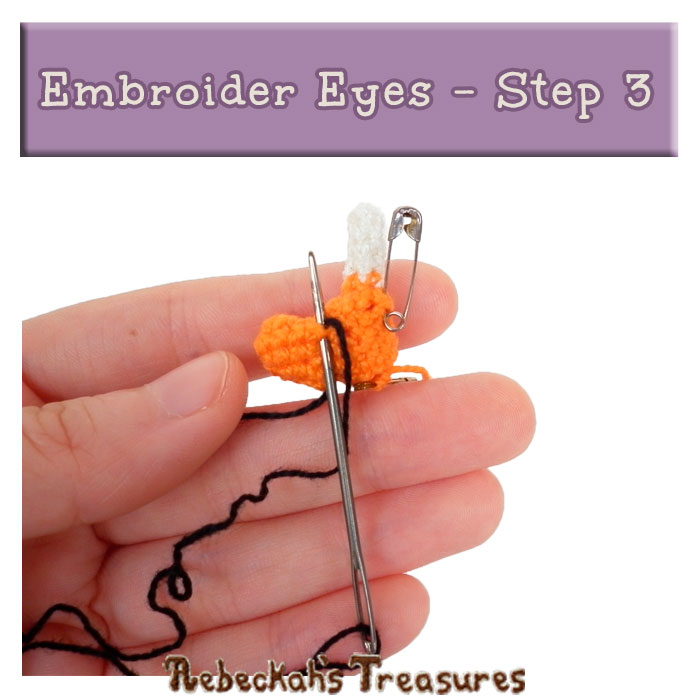
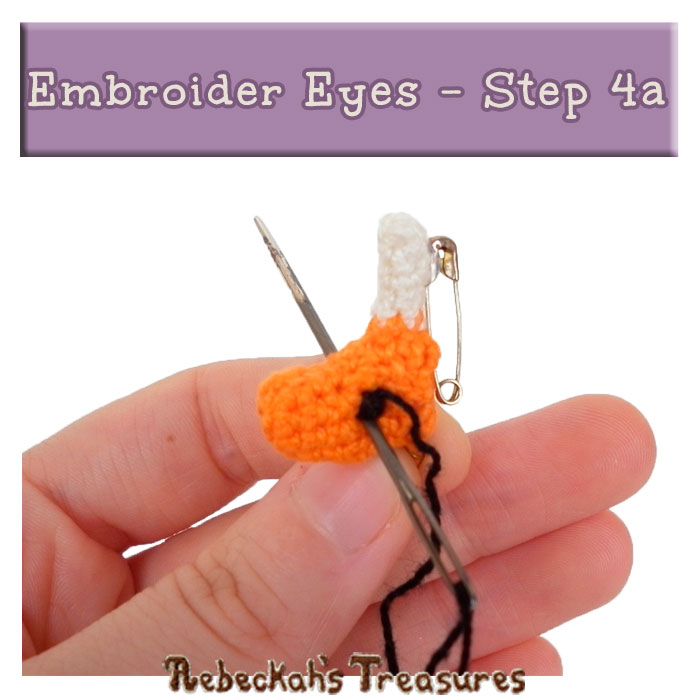
Pause here to embroider eyes into place...
Step 1: Thread needle with black, but do not tie the ends tog; instead, leave them loose. Step 2: Insert threaded needle through the bottom muzzle opening and come out through a st sp on the top side of one side of the muzzle – this will be the top of the first eye. Step 3: Insert needle into the st below and come back out through the same st above – rep for a total of 6 times.
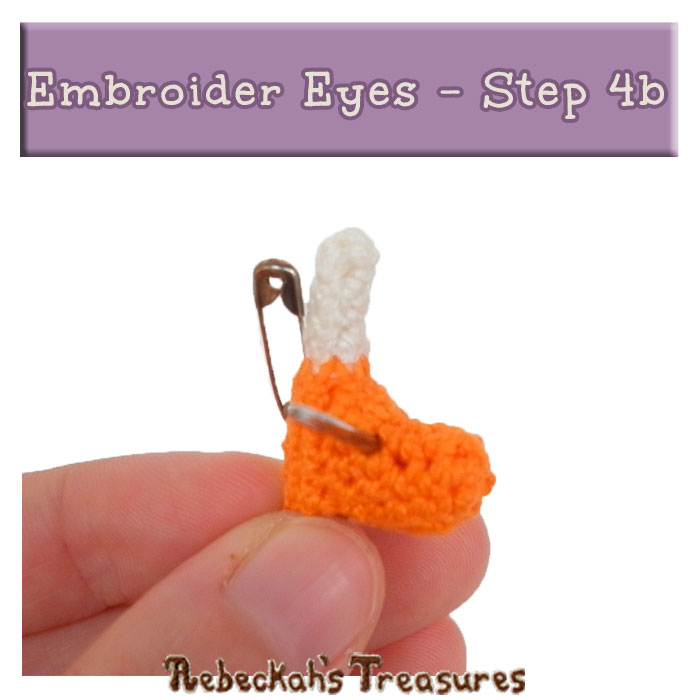
Step 4: Rep Step 3 once more, but this time cross over to the other side of the muzzle and come out at the top side of the other side of the muzzle – this will be the top of the second eye.
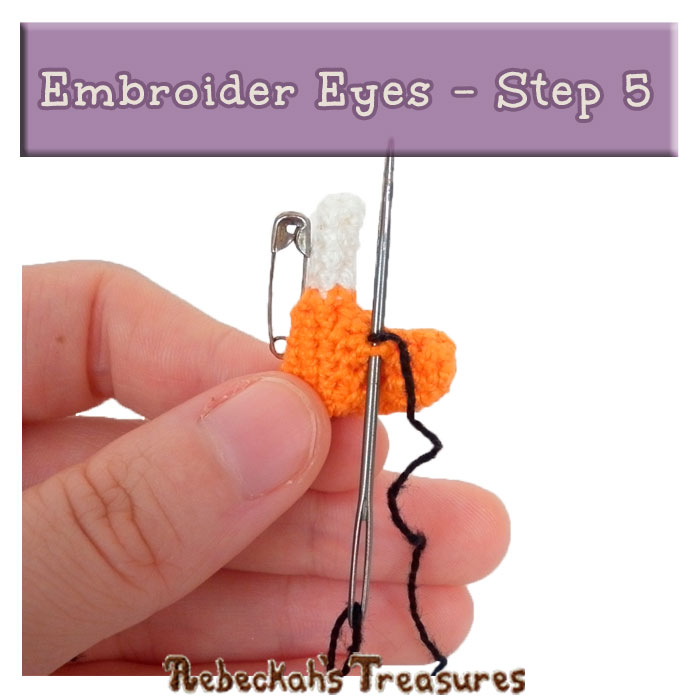
Step 5: Rep Step 3 for this side.
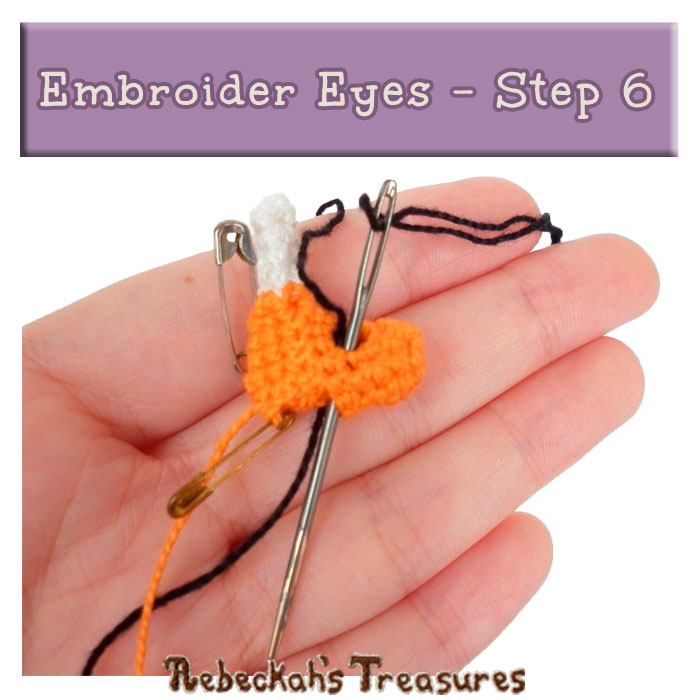
Step 6: Rep Step 3 once more for this side, but this time come back out through the bottom muzzle opening.
Step 7: Tie ends of the thread tog and trim ends, so only small tails rem.
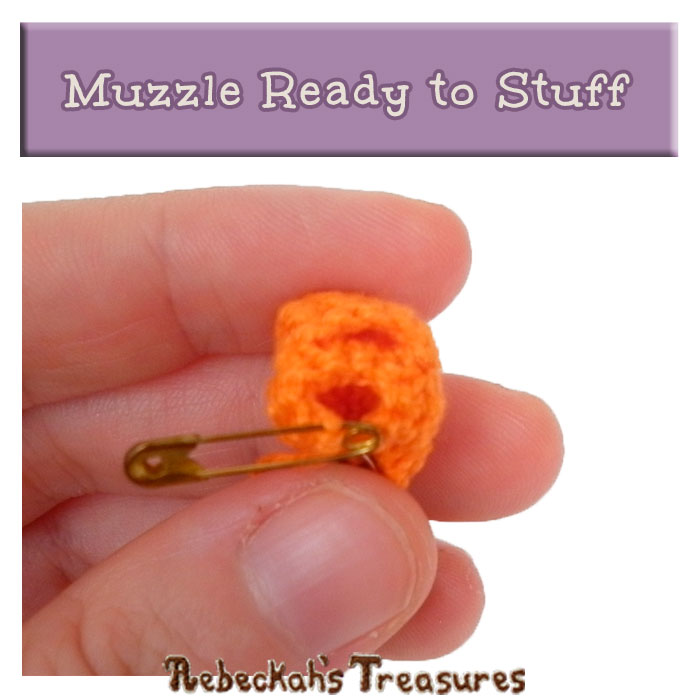
Lightly stuff the muzzle, tucking in the tails from the eyes in as you go...
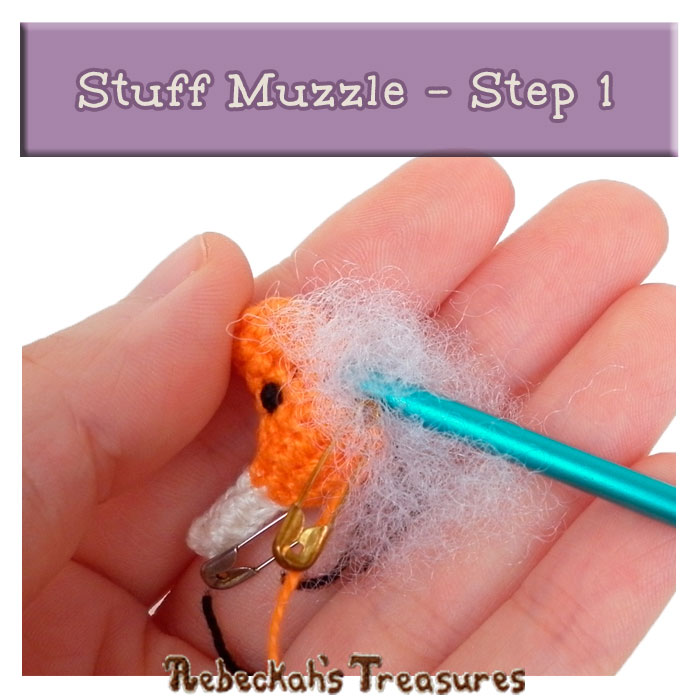
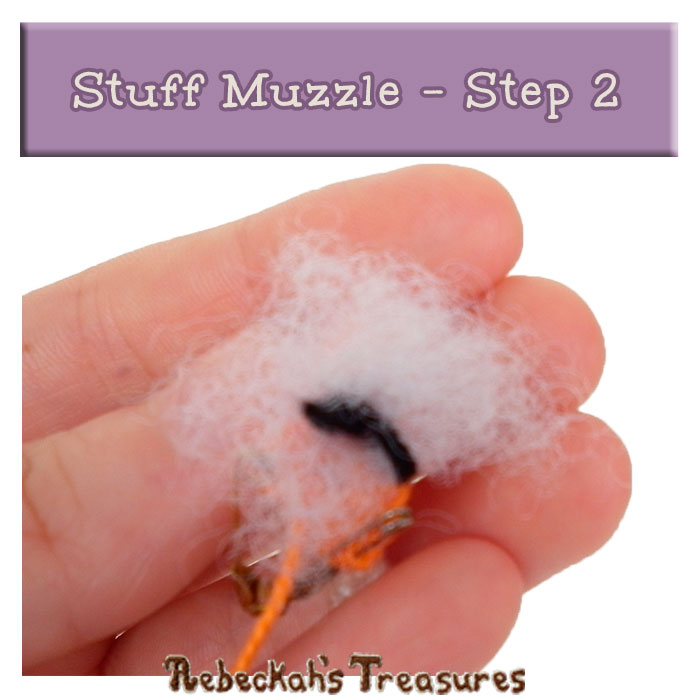
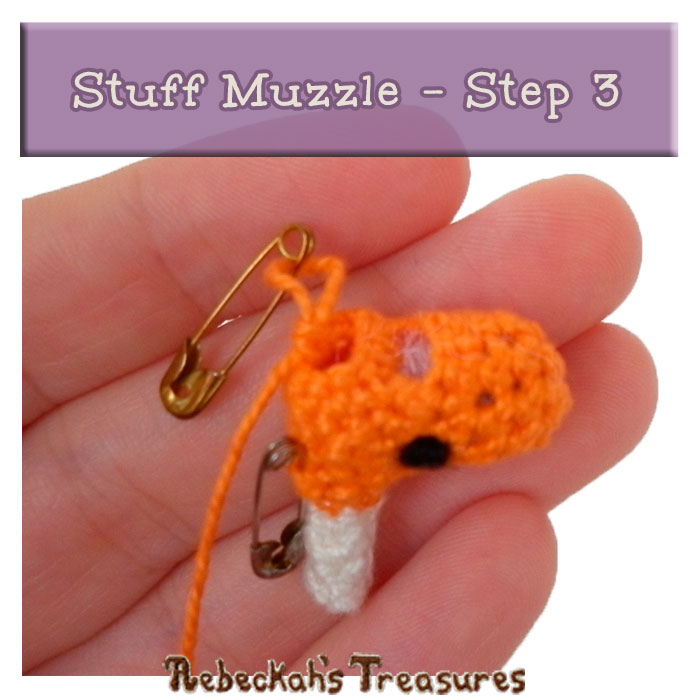
Step 1: Grab a pinch of polyester fiberfill & use the bottom of a bigger hook to start stuffing the muzzle. Step 2: Once stuffing is halfway inserted into the muzzle, bunch up the loose tails from the eyes and place into the center of the fiberfill. This will help keep the tails hidden from the tiny holes the stitches make. Step 3: Finish stuffing the muzzle, but be careful not to over stuff it too much.
Ear Instructions:
Make 2 The unicorn ears are worked in one row. Start and end with long tail. *Side facing you = RS. ch 4 in MC... row 1: work this row in the bottom lp (a.k.a. back hump) of the chs – sc in 2nd ch from hook, hdc 2, ch 1, f/o (3 sts). Use the starting and ending tails to attach the ears into position on the top of the base/head. Weave in all ends.
Mane Instructions:
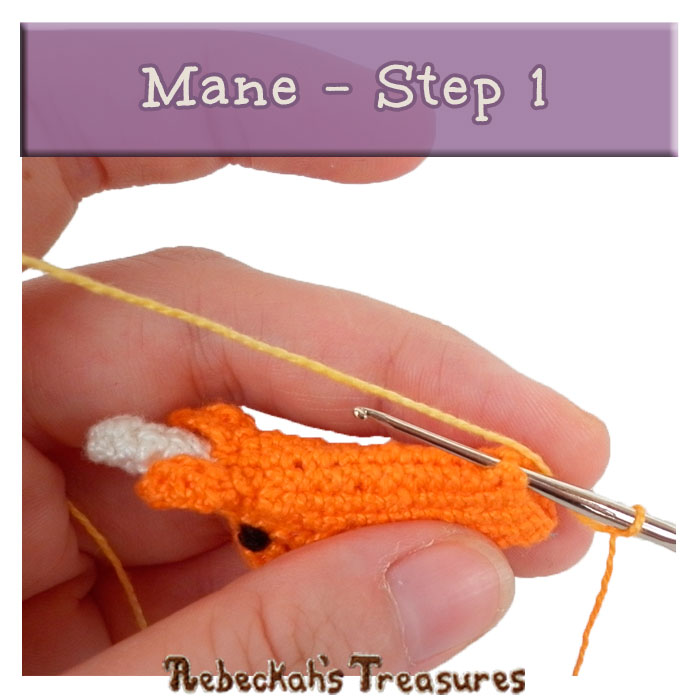
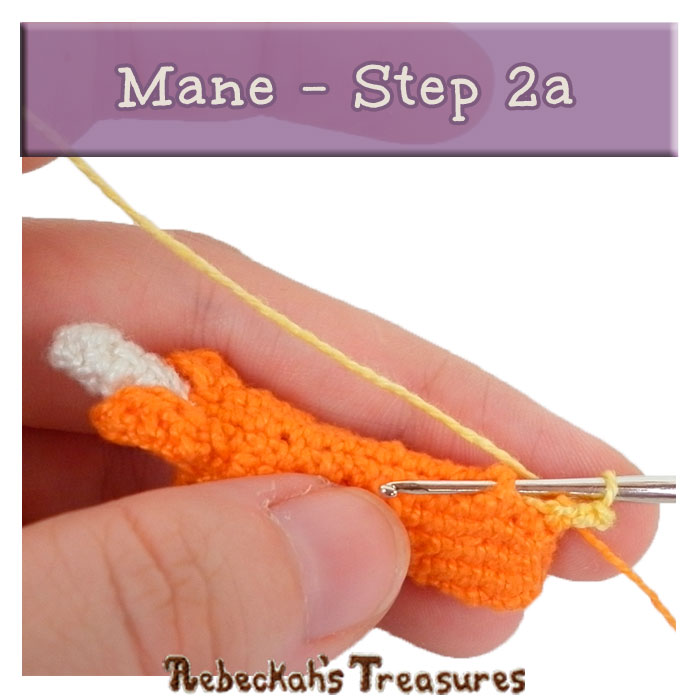
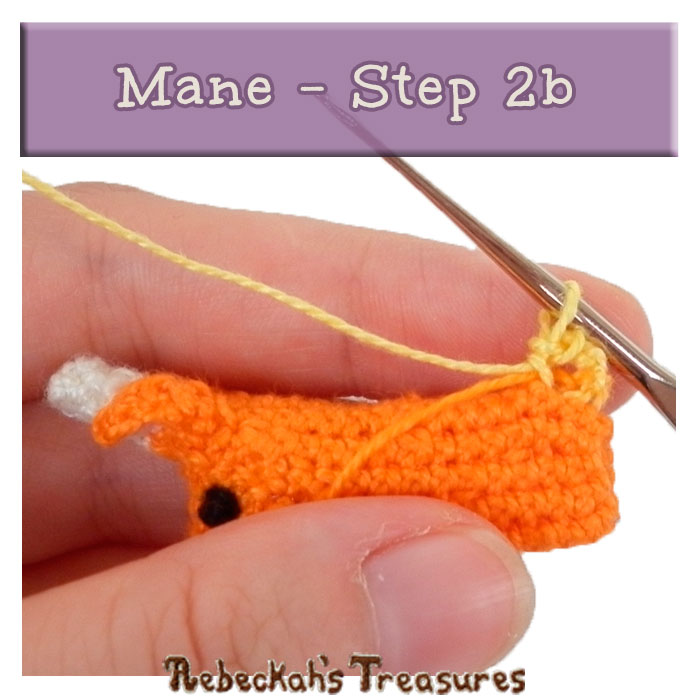
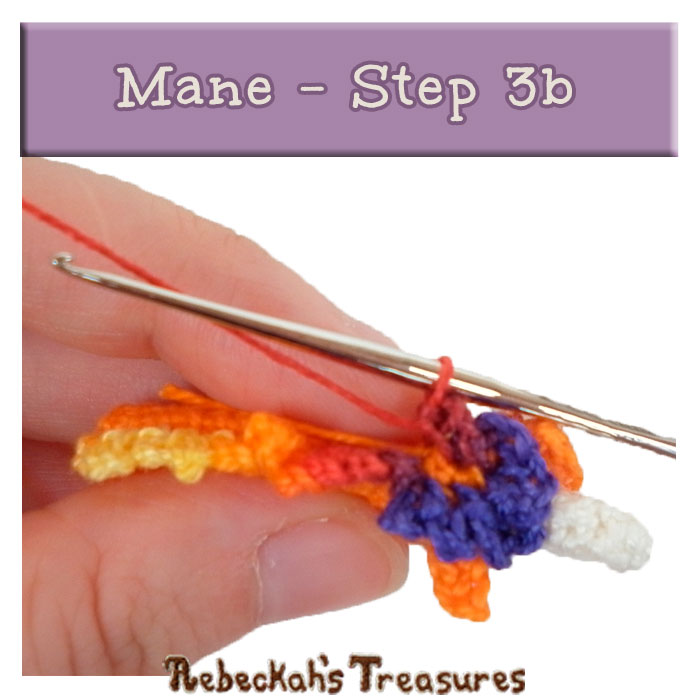
Make 1 The mane of this unicorn is flexible. It is worked by means of surface crochet, where you insert your hook into one st sp, come out another and work a st into that sp or post. The best way to achieve this, is to work up the center back of the unicorn, around the top of the head a couple times and back down the center back of the unicorn. The following instructions are more of a guide and the number of sts worked varies from unicorn to unicorn. You can work it however you like. *Side facing you = RS. make a slip knot in chosen mane colour AND with the RS and back of the unicorn facing you... Step 1: Sc attach to the first post or two sps from the last two rnds of the base, so that your hook goes into the st sp closest to the bottom of the base first and the next st up next. *Pick the vertical line of sps directly in the center back of the unicorn. Step 2: (Ch 3, sc) rep this process approx. 11 times as you work your way up the rnds to the top of the head.
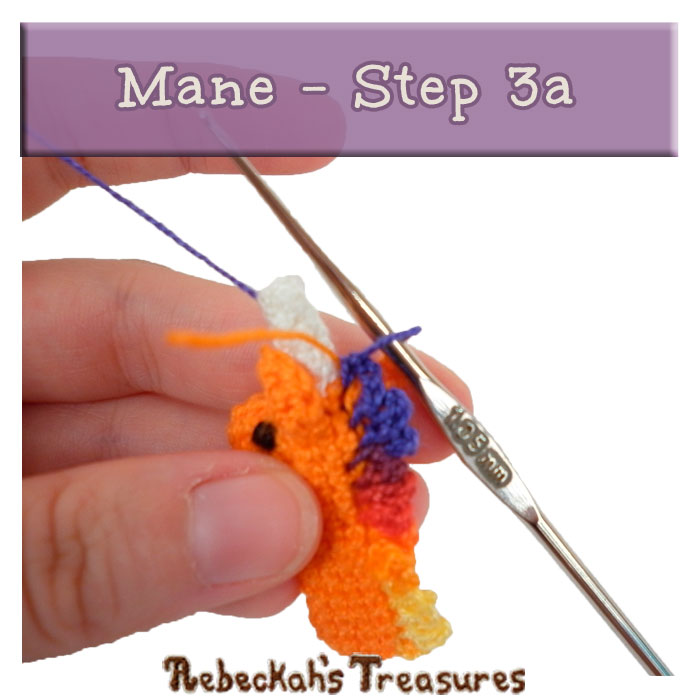
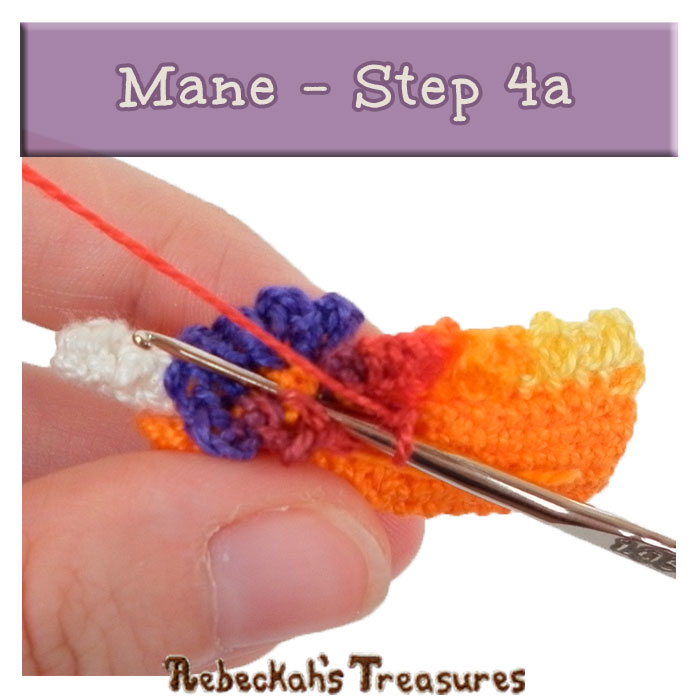
Step 3: Once you are close to the ears – rep the same (ch 3, sc) diagonally up one to your right, then swoop around the top brim of the head up to the sides of the horn repeating the same (ch 3, sc) around.
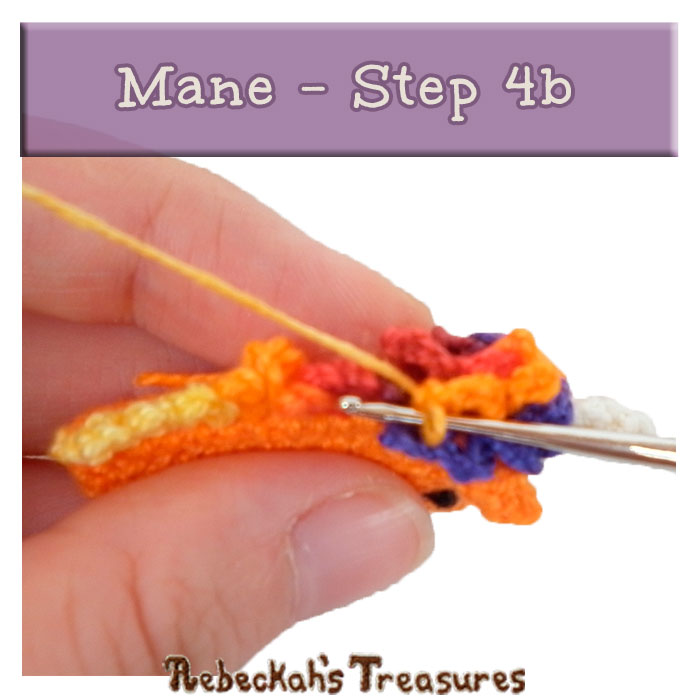
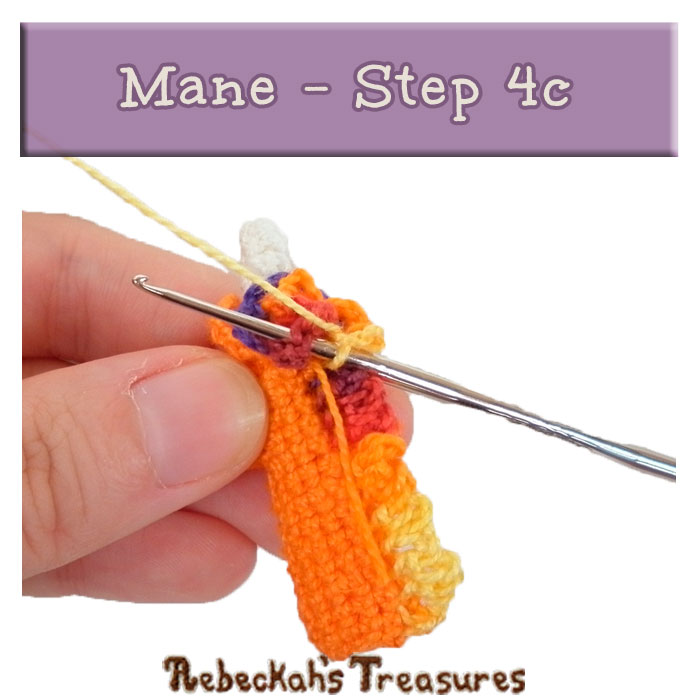
Step 4: Once you reach the back of the other ear – turn back around; now working in the opposite direction AND into the same top of the head sts sps → rep the same (ch 3, sc) as you make a circle and bring it back to the turning point, sl st join to that sc before the turn.
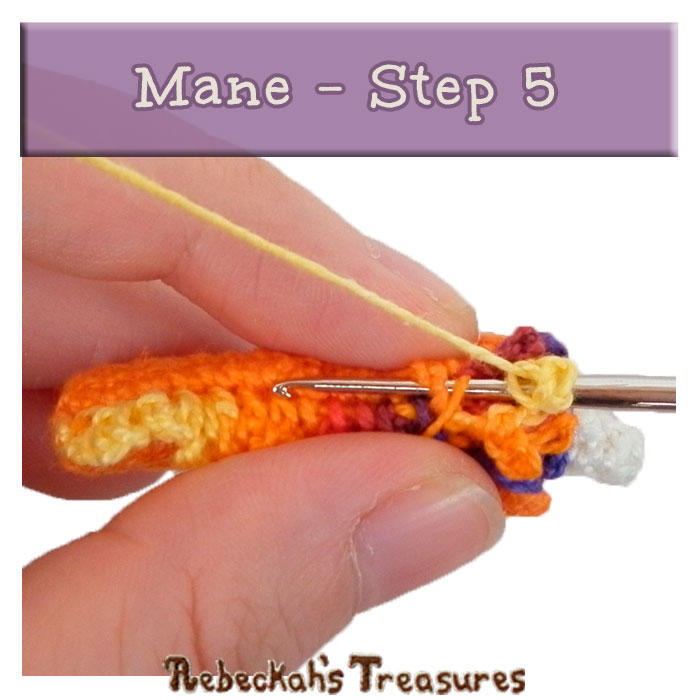
Step 5: Finally, rep the same (ch 3, sc) as you work your way down the rnds into the same sps as you did when you worked up the back of the unicorn base, ch 1, f/o (roughly 32 ch-sps give or take a few).
Weave in all rem ends. Attach to your favourite stationery staple!
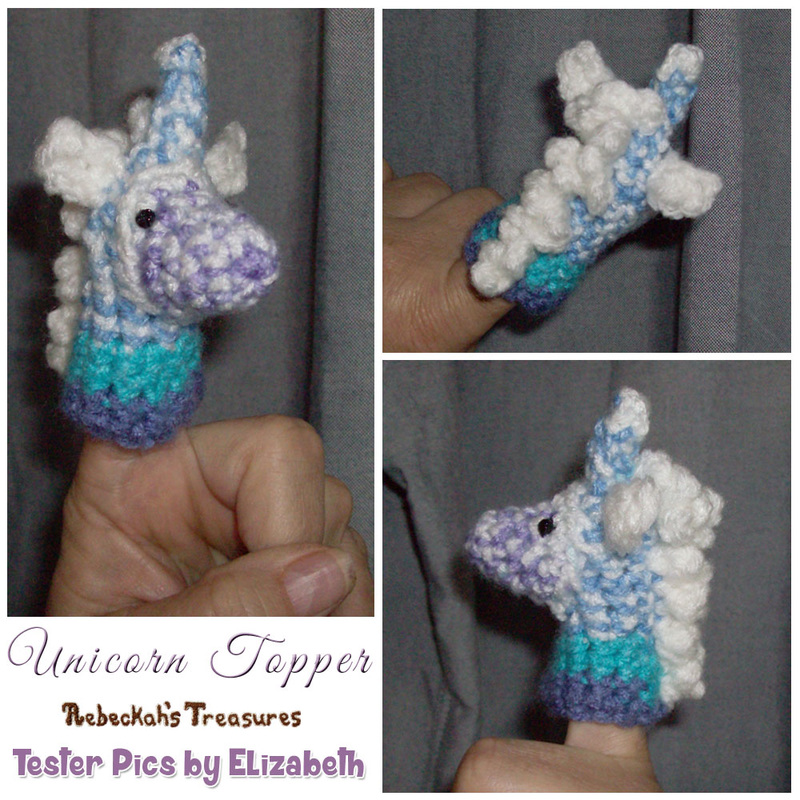
Thanks Elizabeth M. for testing the Pony Pencil Topper/Finger Puppet crochet pattern for me, and a huge thanks to both Theresa P. and Margie E. for your help tech editing this pattern too!

Hello Visitor and Welcome to Rebeckah's Treasures... I am a Norwegian/Canadian currently studying Midwifery in the UK. I love to crochet! At Rebeckah's Treasures, I share my crochet patterns and treasures. I hope they inspire you to crochet your own little treasures too... 
Comments
|
Hello, my name is Rebeckah.
I hope my crochet inspires you to create your very own treasures! Learn more about me... Categories
All
Archives
October 2021
© 2012-2021 Rebeckah Ferger
All rights reserved. Disclaimer: This website makes use of sponsored and/or affiliate links. Please see this page for more information.
|
- Home
-
-
- Special Offers
- New Releases
- Accessory Crochet Patterns
- Afghan Square Crochet Patterns
- Amigurumi Crochet Patterns
- Applique Crochet Patterns
- Baby Crochet Patterns
- Dolly Crochet Patterns
- Fashion Doll Crochet Patterns
- Free Downloads
- Holiday Crochet Patterns
- Tapestry Crochet Patterns
- Under the Sea Crochet Patterns
- Wedding Crochet Patterns
- Disclaimer and FAQs
-
-
- Free Crochet Patterns
- New Free Releases
- Free Accessory Crochet Patterns
- Free Afghan Square Crochet Patterns
- Free Amigurumi Crochet Patterns
- Free Applique Crochet Patterns
- Free Baby Crochet Patterns
- Free Dolly Crochet Patterns
- Free Fashion Doll Crochet Patterns
- Free Guest Crochet Patterns
- Free Holiday Crochet Patterns
- Free Tapestry Crochet Patterns
- Free Under the Sea Crochet Patterns
- Free Wedding Crochet Patterns
- Free Crochet Patterns Coming Soon
Welcome Visitor! I hope you enjoy my treasures.

















 RSS Feed
