|
Disclaimer: This website makes use of sponsored and/or affiliate links. Please see this page for more information. 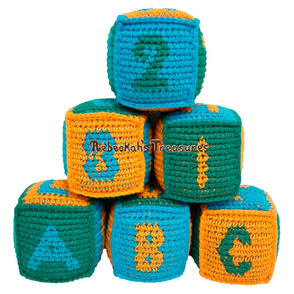
Welcome to Part 10 of the ABC blocks series!
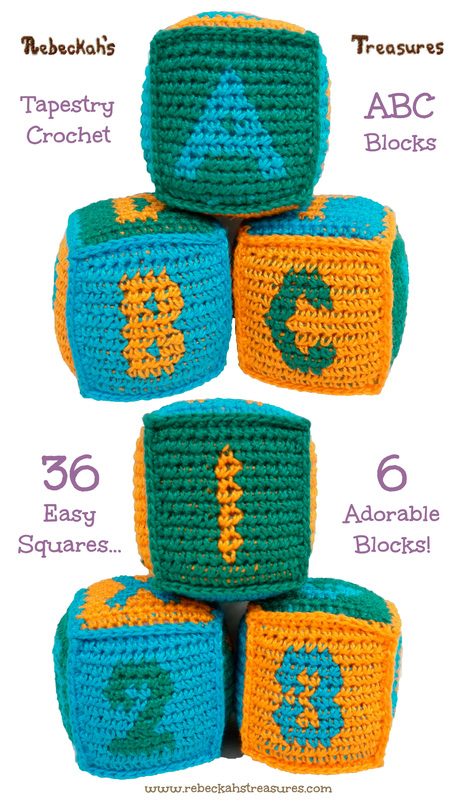
You're here because you have completed all your Tapestry Crochet ABC squares, OR you have a bunch of other crochet squares you wish to turn into baby blocks. This tutorial will show how to do that via written instructions and a video tutorial. Let's get started!
This pattern is copyrighted to Rebeckah Ferger of www.rebeckahstreasures.com. It is for personal use only. No part of this pattern may be copied or distributed in any way. If you sell what you make from this pattern, please credit me as the designer. All rights reserved, 2015.
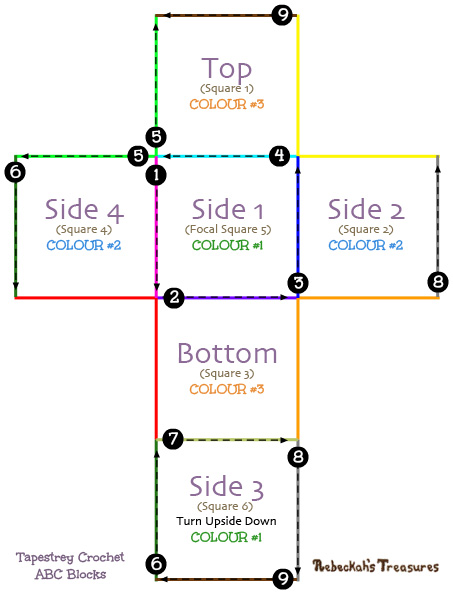
Step 2: Starting with a slip knot in Focal Square Background Colour (or whatever colour you choose for the block’s edging), sc 13 tog across the side of squares that line up with the Yellow lines on the diagram – make sure WS are pressed tog, ch 1, f/o. Rep for Orange and Red Lines.
*The remaining lines / edges will be crocheted continuously. Step 3: Starting with a slip knot in edging colour, *sc 13 tog across the side of the squares that line up with the Pink (1)line(s) on the diagram – again, make sure WS are pressed tog, sl st join to one of the edging corner sts available*. Rep from * to * for the next 7 lines by following the order and arrow directions on the Diagram – Purple (2), Blue (3), Aqua (4), Green (5) *no sl st required at the end of line 5 since it is the first time that corner is reached, Dark Green (6), Olive (7), Gray (8). *Make sure you tuck tails of squares and first edges inside the square as you crochet. Step 4: Continuing in the same fashion as for Step 3, sc the first sts of the Brown (9) lines tog. Pause here to stuff block before crocheting the block closed. ***Here’s where you’ll want to insert the nylon stocking (if using it). Insert one closed end of the stocking into the opening. Wrap open ends of stocking around block to open it up*** Stuff your block until it is slightly bulgy. ***Close end of stocking, tuck into block*** Finish crocheting the rem sts tog to close block. Sl st join to one of the edging corner sts available, f/o and tuck in rem ends. *Put more stuffing than you think it needs because over time the stuffing will condense. Step 5: Rep Steps 1-4 for rem blocks. That’s all there is to it! Need help putting your blocks together? Check out the following video tutorial...
In this video tutorial, I will show you how you can turn your Tapestry ABC Squares (or basically any crochet squares) into baby blocks - No Sewing Required!
Table of Contents for Video *Clicking the following links will open them up in a new YouTube tab 0:00 - Intro 0:20 - Supplies 0:50 - Laying Out Your Squares 3:50 - Crocheting the Individual Sides 11:24 - Crocheting the Continuous Sides 30:37 - Stuff Your Block 32:34 - Crocheting the Final Side Closed 34:27 - Finishing Off Block
More in the Tapestry Crochet ABC Baby Blocks Series:

Hello Visitor and Welcome to Rebeckah's Treasures... I am a Norwegian/Canadian currently studying Midwifery in the UK. I love to crochet! At Rebeckah's Treasures, I share my crochet patterns and treasures. I hope they inspire you to crochet your own little treasures too... 
Comments
|
Hello, my name is Rebeckah.
I hope my crochet inspires you to create your very own treasures! Learn more about me... Categories
All
Archives
October 2021
© 2012-2021 Rebeckah Ferger
All rights reserved. Disclaimer: This website makes use of sponsored and/or affiliate links. Please see this page for more information.
|
- Home
-
-
- Special Offers
- New Releases
- Accessory Crochet Patterns
- Afghan Square Crochet Patterns
- Amigurumi Crochet Patterns
- Applique Crochet Patterns
- Baby Crochet Patterns
- Dolly Crochet Patterns
- Fashion Doll Crochet Patterns
- Free Downloads
- Holiday Crochet Patterns
- Tapestry Crochet Patterns
- Under the Sea Crochet Patterns
- Wedding Crochet Patterns
- Disclaimer and FAQs
-
-
- Free Crochet Patterns
- New Free Releases
- Free Accessory Crochet Patterns
- Free Afghan Square Crochet Patterns
- Free Amigurumi Crochet Patterns
- Free Applique Crochet Patterns
- Free Baby Crochet Patterns
- Free Dolly Crochet Patterns
- Free Fashion Doll Crochet Patterns
- Free Guest Crochet Patterns
- Free Holiday Crochet Patterns
- Free Tapestry Crochet Patterns
- Free Under the Sea Crochet Patterns
- Free Wedding Crochet Patterns
- Free Crochet Patterns Coming Soon
Welcome Visitor! I hope you enjoy my treasures.










 RSS Feed
