|
Disclaimer: This website makes use of sponsored and/or affiliate links. Please see this page for more information.
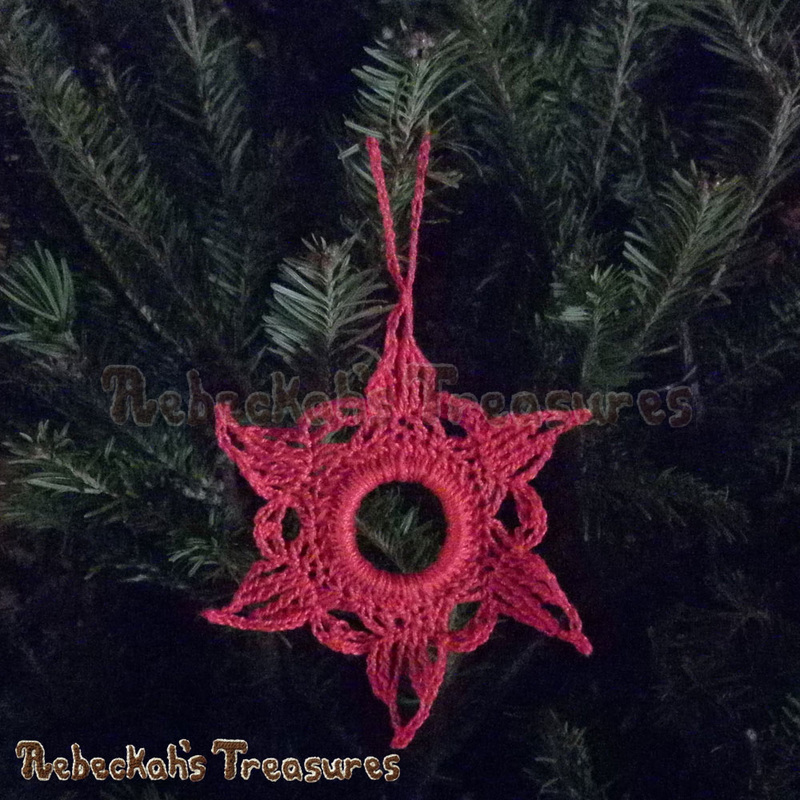
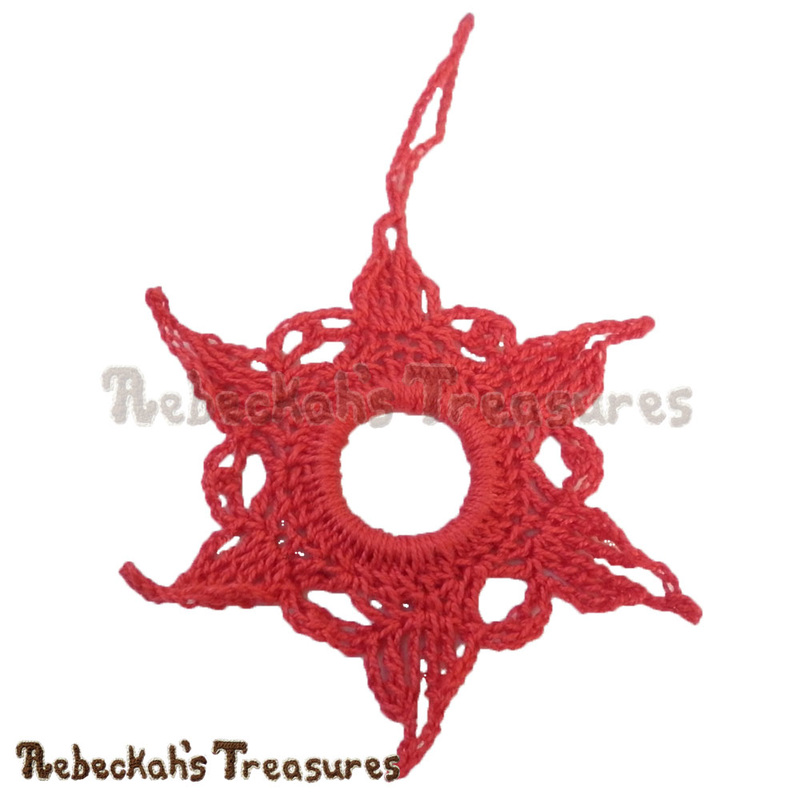
I was inspired the other day by these christmas wreaths that were floating around on facebook to crochet some christmas stars using the same technique. Here's the first star ornament of two I designed just for you this Christmas...
I must have frogged this star several times before I got the look just right. I wanted to give the star pointed tips. Each time I worked the third rnd, the points I had created in the previous rnd disappeared into the design and new points were too short. It wasn't until I thought of using taller stitches that I was able to accomplish it.
The best part about this radiant star ornament is it's fast, easy and beautiful! Depending on how quickly you crochet, you can have one of these made in half an hour or less. So, if you're looking for that final touch for your Christmas tree, this will be just the ticket for you. All you need is a ring (can be plastic, metal, crochet, elastic, whatever you like), yarn and a hook and soon you'll have many radiant stars for your tree...
This pattern is copyrighted to Rebeckah Ferger of www.rebeckahstreasures.com. It is for personal use only. No part of this pattern may be copied or distributed in any way. If you sell what you make from thispattern, please credit me as the designer. All rights reserved, 2015.
Pattern Notes:
You should be familiar with basic and tall crochet stitches (ch, sl st, sc, dc, tr, dtr, trtr), working in the round, and starting your crochet piece by attaching to an object. A special stitch used here is a variation of the bobble (instructions are included below).
TIP: If your ring isn’t perfectly smooth, just use some tape or a hot glue gun to smooth out the ridges. Star Instructions:
Make 1
This star is worked in non-continuous rnds, where each rnd is worked in the same direction with a pause at the end of each one. Do not turn at the end of rnds. First st of the rnd is the same sp where the sl st join is made. *Side facing you = RS. *BO of 2 (bobble of 2) = leaving the last 2 lps from each st on the hook, work 2 dc into one st or sp, yo & pull through all 3 lps. (I have a video tutorial for a bobble of 2 here...). TIP: If you don’t have a ring, simply ch 12 & sl st join to first ch to made to complete the circle. rnd 1: make a slip knot – sc attach to the ring, ch 2. Now working around the ring – BO of 2 for a total of 36 times (OR if using a thicker yarn, dc 36 instead), sl st join to the first BO/dc of this rnd, ch 1 (36 sts). *The BO sts make it so you can add more sts around the ring (effectively hiding it from view) and still keep the star flat. rnd 2: [sc, sk 1 st, dc, (tr, ch 5, sl st in 3rd ch from hook, ch 2, tr) into next st of rnd, dc, sk 1 st] rep around for a total of 6 times, sl st join to first st of this rnd (6 star points). *The sl st in 3rd ch from hook creates a picot. rnd 3: ch 11, sl st in 3rd ch from hook, ch 2, trtr in the same first st as the ch 11, *[**dtr in next st of rnd, ch 4, sl st in next st of rnd, ch 3, sk ch-2-sp, sc in the top of the picot, ch 3, sk ch-2-sp, sl st in the next st of rnd, ch 4, dtr in next st of rnd,** (trtr, ch 5, sl st in 3rd ch from hook, ch 2, trtr) in next st of rnd] x 2,* rep from ** to **, (trtr, ch 33, sl st in 30th ch & next ch from hook, ch 2, trtr) in the next st of rnd, rep from * to *, rep from ** to **, sl st join to the top of the first trtr of this rnd, ch 1, f/o (6 star points). *The ch 11 counts as a trtr + ch 5. Weave in all ends. Depending on your preference, you may want to block or starch your star to keep the points from curling inwards. Simply follow your favourite method or leave it as is, and you’re done!
A huge thank you to Amy B., Debra C., Margie E., Sharon E. and Theresa P. for quickly going over this pattern for me! I couldn't ask for better testers and tech editors. :D
Thanks for visiting! See you again tomorrow for another free star ornament pattern...

Hello Visitor and Welcome to Rebeckah's Treasures... I am a Norwegian/Canadian currently studying Midwifery in the UK. I love to crochet! At Rebeckah's Treasures, I share my crochet patterns and treasures. I hope they inspire you to crochet your own little treasures too... 
Comments
|
Hello, my name is Rebeckah.
I hope my crochet inspires you to create your very own treasures! Learn more about me... Categories
All
Archives
October 2021
© 2012-2021 Rebeckah Ferger
All rights reserved. Disclaimer: This website makes use of sponsored and/or affiliate links. Please see this page for more information.
|
- Home
-
-
- Special Offers
- New Releases
- Accessory Crochet Patterns
- Afghan Square Crochet Patterns
- Amigurumi Crochet Patterns
- Applique Crochet Patterns
- Baby Crochet Patterns
- Dolly Crochet Patterns
- Fashion Doll Crochet Patterns
- Free Downloads
- Holiday Crochet Patterns
- Tapestry Crochet Patterns
- Under the Sea Crochet Patterns
- Wedding Crochet Patterns
- Disclaimer and FAQs
-
-
- Free Crochet Patterns
- New Free Releases
- Free Accessory Crochet Patterns
- Free Afghan Square Crochet Patterns
- Free Amigurumi Crochet Patterns
- Free Applique Crochet Patterns
- Free Baby Crochet Patterns
- Free Dolly Crochet Patterns
- Free Fashion Doll Crochet Patterns
- Free Guest Crochet Patterns
- Free Holiday Crochet Patterns
- Free Tapestry Crochet Patterns
- Free Under the Sea Crochet Patterns
- Free Wedding Crochet Patterns
- Free Crochet Patterns Coming Soon
Welcome Visitor! I hope you enjoy my treasures.











 RSS Feed
