|
Disclaimer: This website makes use of sponsored and/or affiliate links. Please see this page for more information.
You may have heard about this really neat tool called "InLinkz"...
If you've followed any of my CALs (crochet-alongs), you know that I host a fun photo competition at its close. Or maybe you've seen my Saturday Link Parties or other fun link parties on your favourite blogs and wondered how you can join in the fun. InLinkz is a fantastic tool for hosting both of the above, and in this post, I am going to show you how you can optimize your photos and link up to parties and contest that use it! How to Optimize Your Photo:
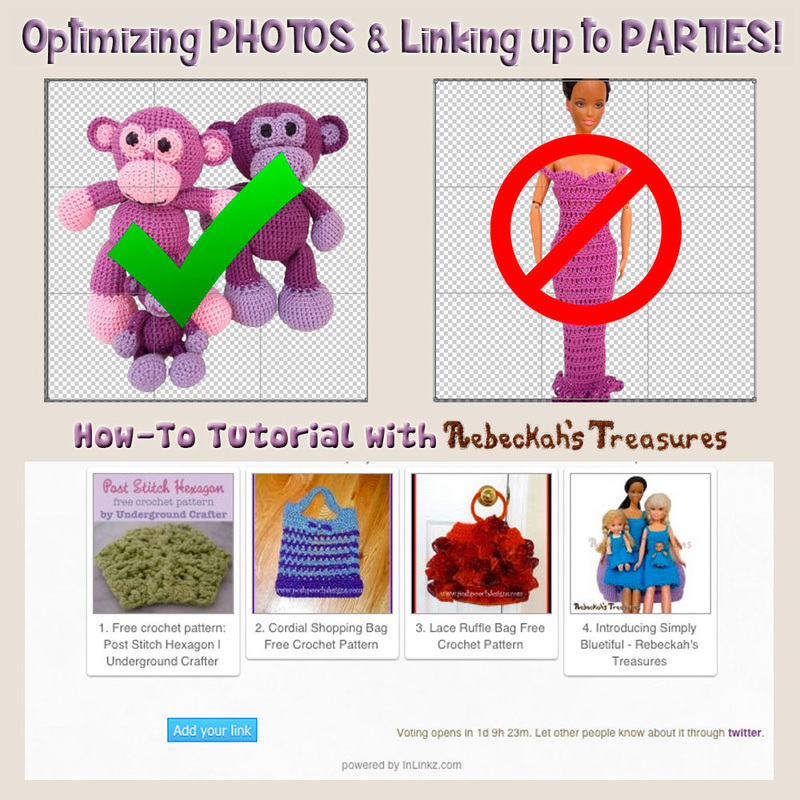
InLinks uses square thumbnails and will automatically crop your photos to be square. This square thumbnail is all you and others can see once your photo has been shared. This is why it is important for you to get a good, square cropping of your picture.
If your picture is already square, you don't have to worry about a thing. However, if your picture is not square, here are some tips to help you capture an optimized photo.
Once you have your optimized horizontal or vertical picture ready, all you have to do is link up, upload and let the cropping tool take care of the rest. Take a look at these 6 examples of what to do and what not to do...
This is great and all, but how do I make a square collage of my photos to showcase more than one angle? I am so glad you asked! Here's how...
You're collage is now ready to be uploaded to your favourite party! How to Link Up to a Photo Party or Contest that uses InLinks:
Yay! So, you've now got an awesome photo to showcase in a contest or party. How does one link up and join in on the fun? Here's how...
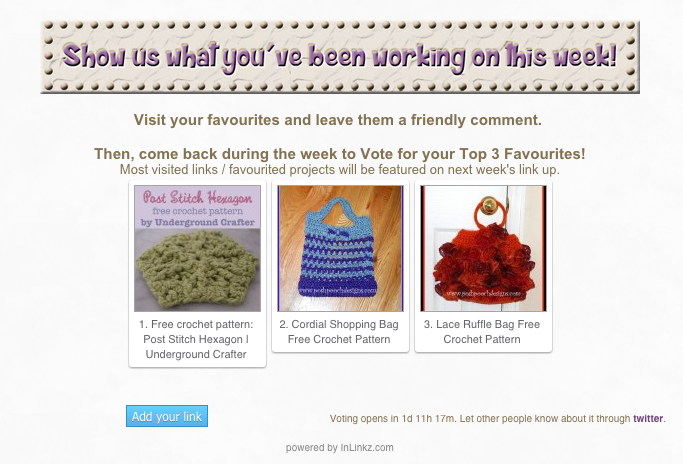
Step 1: Go to your favourite host's blog party or contest link. Step 2: Click on the BLUE button that says "Add your link". It is always positioned to your left below all of the photos/links that have already been added.
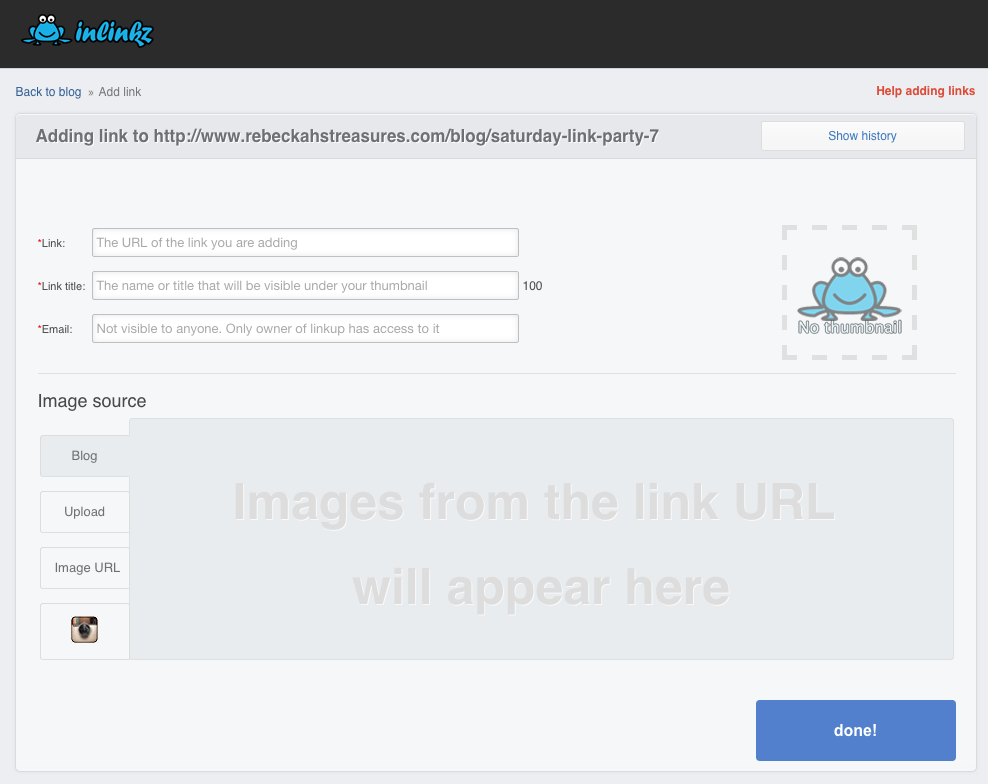
This will take you to a new page, where you will be able to add your photo and leave your info. Any field that has a red asterisk* beside it is a required field. If no asterisk is present, leave the field blank or fill it out according to your or the host's preference.
Step 3: Add your URL link (http://www.example-url-link.com) or the URL link where you want people to go in the "Link" field.
Here are some suggestions for URL links to add depending on the project:
Please note: For my photo contests, you will leave this field blank.
Step 4: Add your details to the "Link title" field. *The number next to the field is the maximum number of characters you may use.
When you have a link from Step 3 in place and then proceed to click on this field, it will automatically grab the SEO title of that specific link for you. You make like to keep what it says or change it according to your preference. Things I recommend you leave in this field for blog link parties are:
If you are linking up to one of my Photo Contests here on Rebeckah's Treasures, I require you to leave your name AND the name/title of your subject in this field.
For normal blog link parties, what you type in this field will be displayed under your thumbnail photo and will be visible for all to see. This helps to tell us what it is at a quick glance.
However, when you link up to one of my photo contests, it will not be visible to anyone except for Rebeckah the hostess of the contest. This helps to keep the voting from being biased and to encourage people to vote for their favourites. Whether or not the link title will be visible on the party or contest you are linking up to, will depend on the host or hostess' settings. It should let you know inside the field before you start typing.
Step 5: Type your email address in the "Email" field. *Your email address will only visible to the host or hostess of the blog link party or photo contest.
Step 6: Upload your photo using any of the options available.
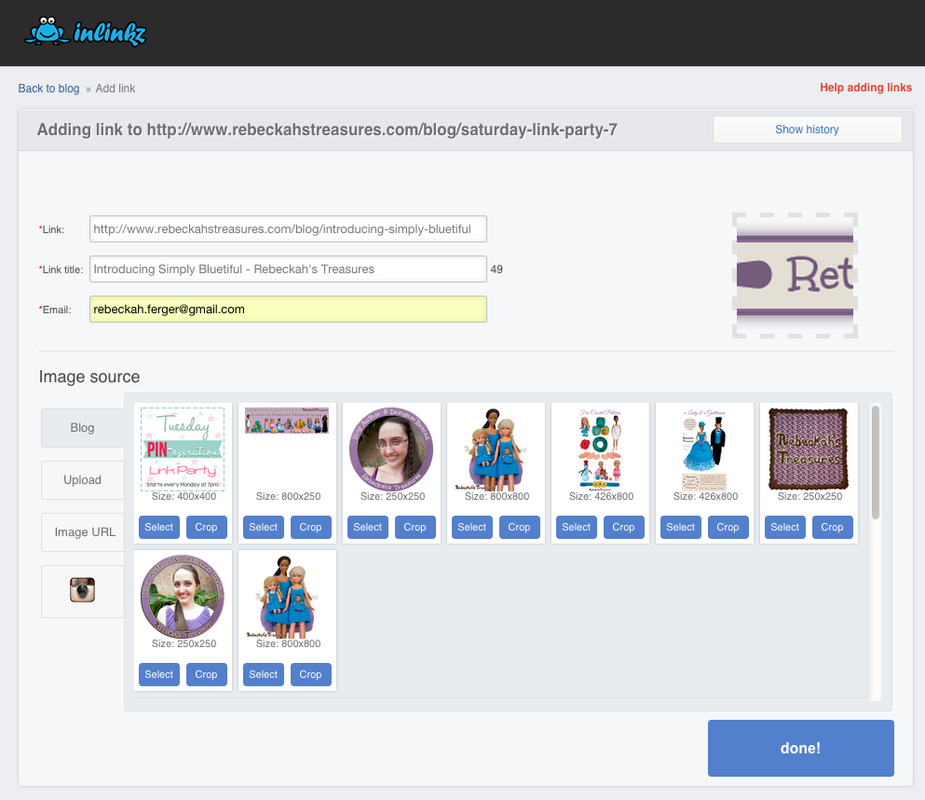
Option 1 - Grab images from a URL link If you added a link into the "link field" from Step 3, it will generate and grab all images from the site, so that you may select your preferred image. All you have to do is click on one of the blue buttons below the photo you want to grab that says "Select" or "Crop". Your new image will display next to the field section. Take a look at this example: See how it shows a list of photos I can select or crop to use as my thumbnail for the link up. Also, take notice of the thumbnail next to the fields. See how it has grabbed the wrong picture?
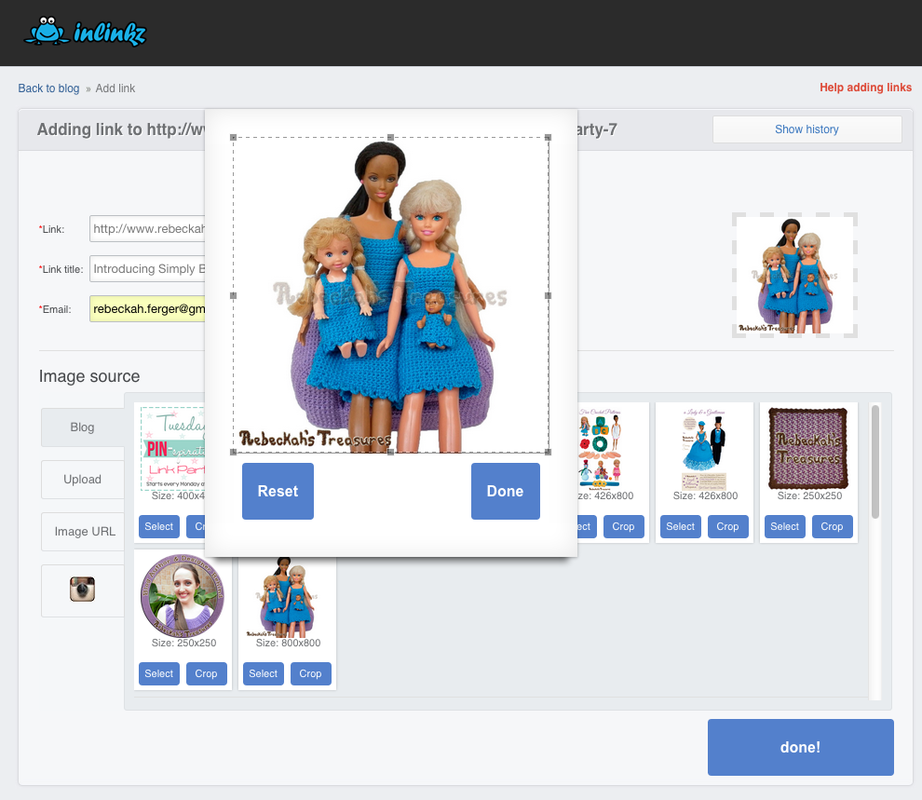
This is what happens when you click on "Crop". All you have to do is adjust the parameters of the photo and click on done when you are finished cropping.
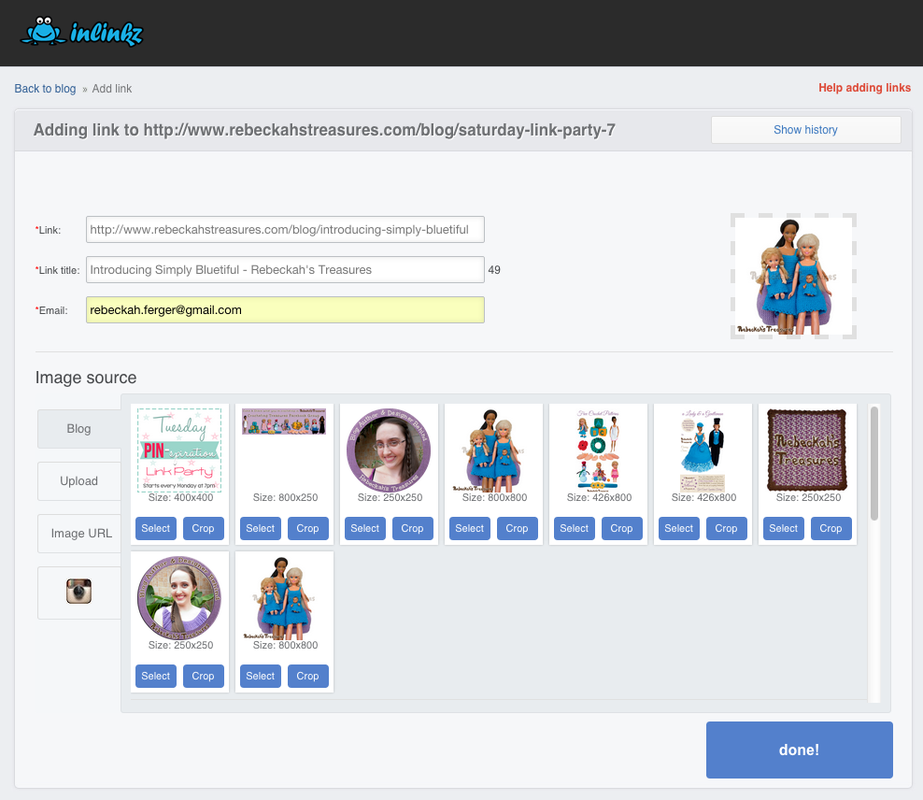
After you've finished cropping or selecting your thumbnail for the link party or contest. Check to make sure everything is how you want it to be. When you are satisfied with the results, click on the large blue button in the bottom-right-corner that says "done!" to finish adding your link and photo.
Option 2 - Upload pictures from your device
Option 3 - Grab a picture from an Image URL
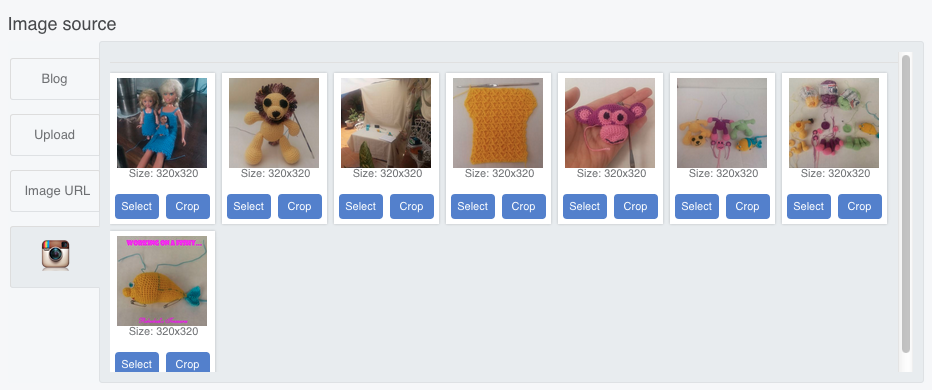
Option 4 - Grab images from your Instagram account
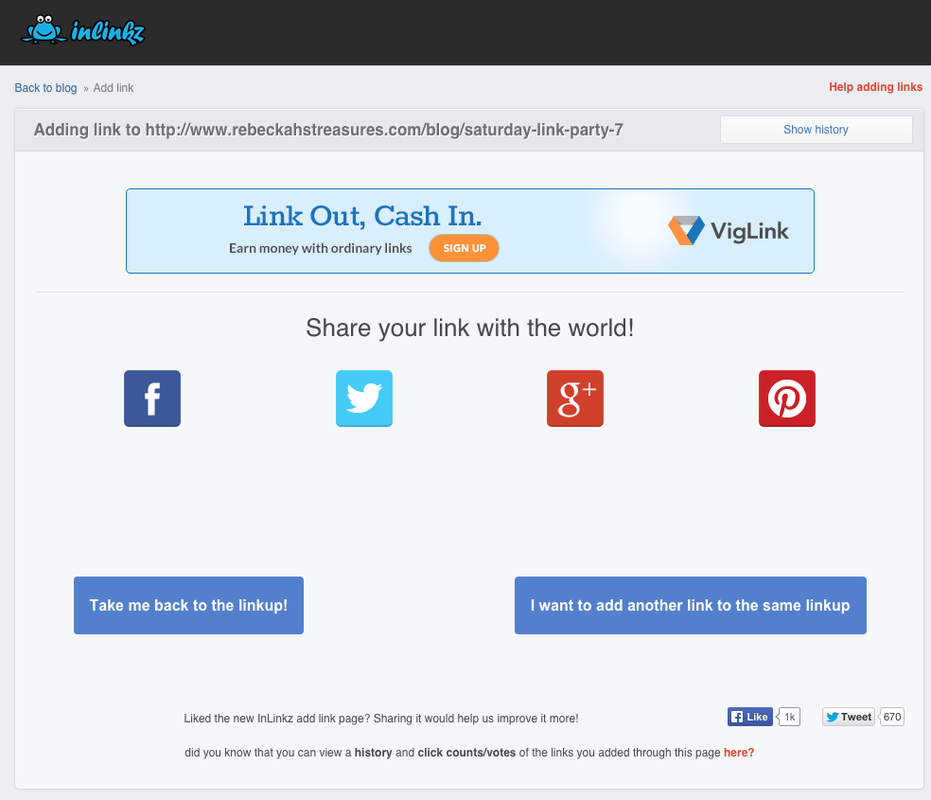
Once you click on the "done!" button, it will take you to this page where you can share your link with the world, go back to the link party, or add another link...
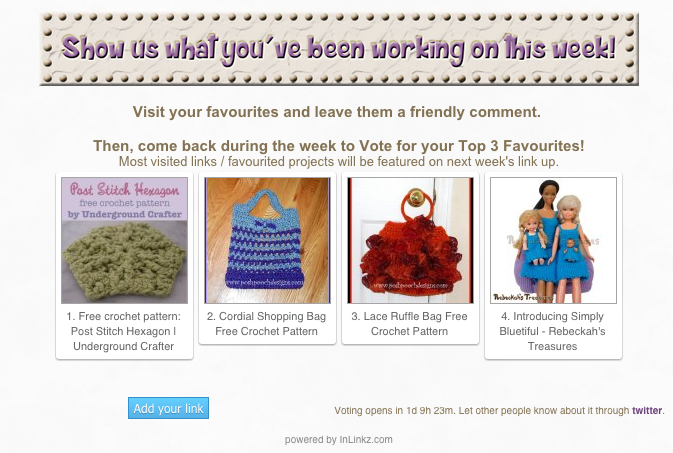
See here that my link as been added to the party!
That's all you have to do! Easy, right?
What did you think of this tutorial? Rate this tutorial or leave a comment below...
Thanks for visiting! See you again soon..
Hello Visitor and Welcome to Rebeckah's Treasures... I am a Norwegian/Canadian currently studying Midwifery in the UK. I love to crochet! At Rebeckah's Treasures, I share my crochet patterns and treasures. I hope they inspire you to crochet your own little treasures too... 
Comments
|
Hello, my name is Rebeckah.
I hope my crochet inspires you to create your very own treasures! Learn more about me... Categories
All
Archives
October 2021
© 2012-2021 Rebeckah Ferger
All rights reserved. Disclaimer: This website makes use of sponsored and/or affiliate links. Please see this page for more information.
|
- Home
-
-
- Special Offers
- New Releases
- Accessory Crochet Patterns
- Afghan Square Crochet Patterns
- Amigurumi Crochet Patterns
- Applique Crochet Patterns
- Baby Crochet Patterns
- Dolly Crochet Patterns
- Fashion Doll Crochet Patterns
- Free Downloads
- Holiday Crochet Patterns
- Tapestry Crochet Patterns
- Under the Sea Crochet Patterns
- Wedding Crochet Patterns
- Disclaimer and FAQs
-
-
- Free Crochet Patterns
- New Free Releases
- Free Accessory Crochet Patterns
- Free Afghan Square Crochet Patterns
- Free Amigurumi Crochet Patterns
- Free Applique Crochet Patterns
- Free Baby Crochet Patterns
- Free Dolly Crochet Patterns
- Free Fashion Doll Crochet Patterns
- Free Guest Crochet Patterns
- Free Holiday Crochet Patterns
- Free Tapestry Crochet Patterns
- Free Under the Sea Crochet Patterns
- Free Wedding Crochet Patterns
- Free Crochet Patterns Coming Soon
Welcome Visitor! I hope you enjoy my treasures.















 RSS Feed
