|
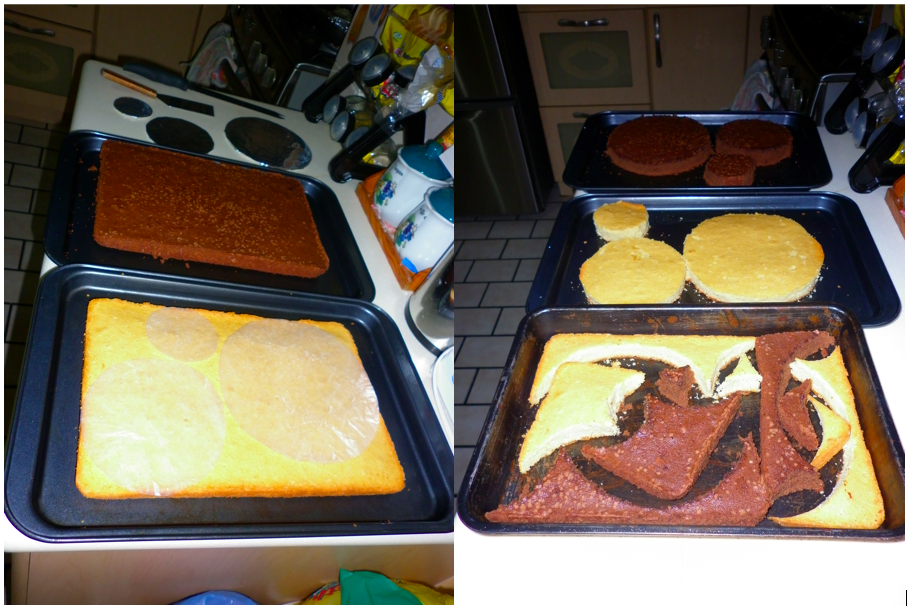
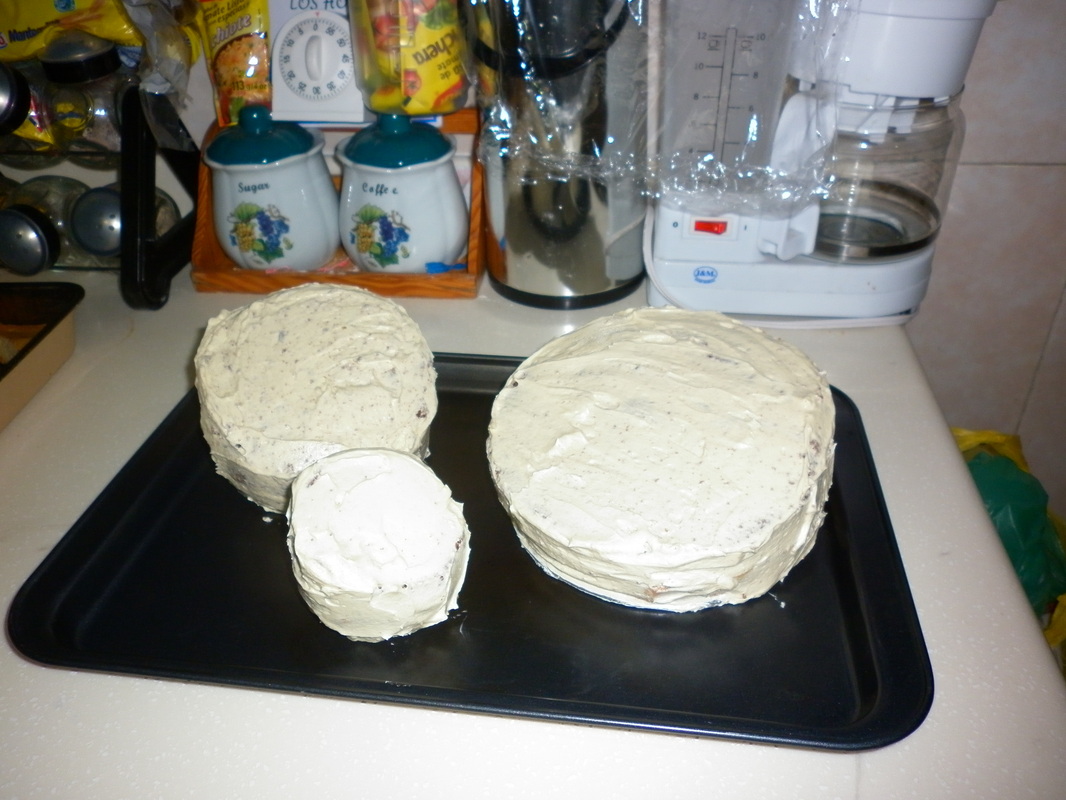
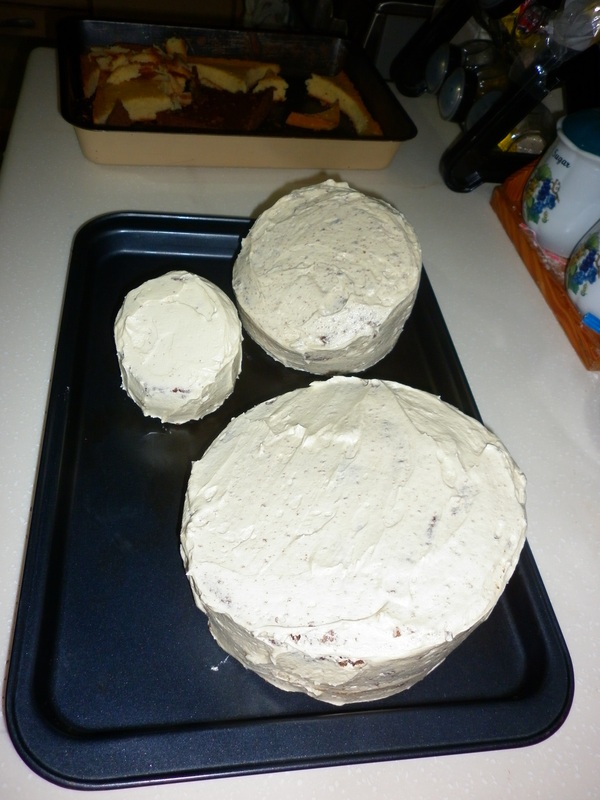
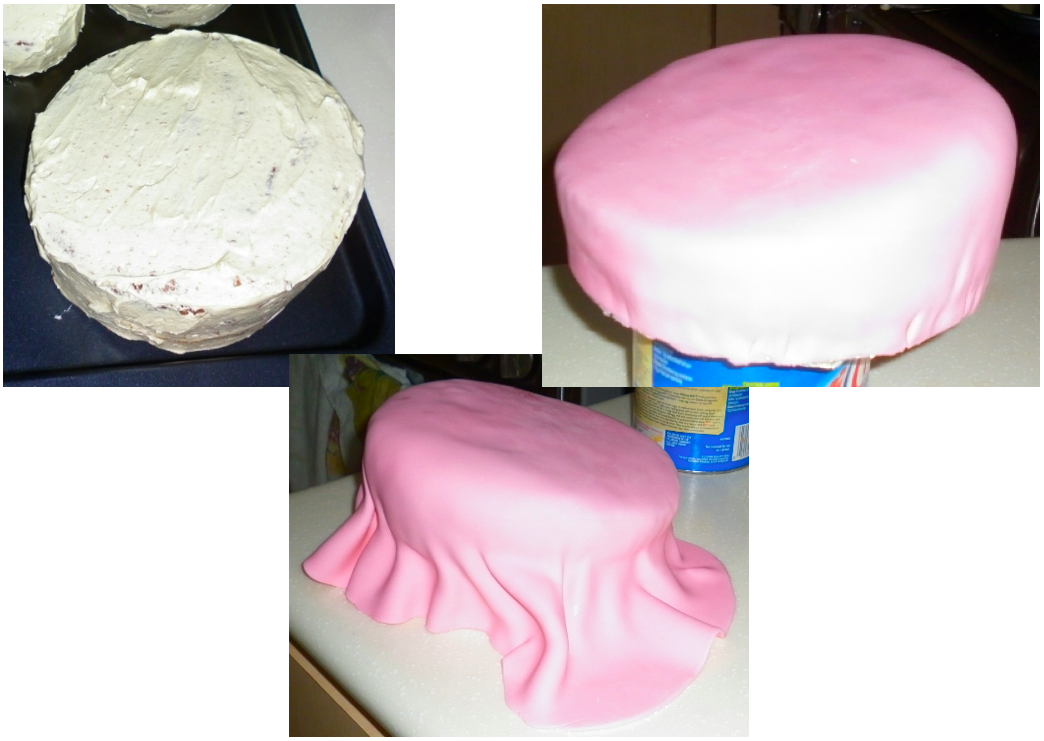
Disclaimer: This website makes use of sponsored and/or affiliate links. Please see this page for more information.  After a few years of longing to make a topsy turvy, I finally made one for Boo Bear's birthday in May. This is my first attempt at making a topsy turvy cake! It is by no means perfect, but I think it turned out nicely. Plus, my sister absolutely loved it! Each tier is about 2-3 inches tall, with the tiers being 3", 5", and 7" in circumference. Each tier has two layers with buttercream icing in the middle. The bottom layer is vanilla pound cake, whilst the top layer is chocolate pound cake. The top, middle and bottom tiers yield 2-3, 8-10, and 12-16 pieces of cake, depending on how big/small you cut your pieces. It took me 2 days to make this cake. On the first day, I made the vanilla and chocolate pounds cakes and the buttercream icing. I also cut and iced the cakes. On the second day, I made the marshmallow fondant, covered the tiers in the fondant, and finally added some decorative touches. Continue reading to see how I made the cake with pictures, and scroll down to the bottom to see additional views of the finished cake. Day 1In preparation for making the cakes, I cut cardboard circles to be the size of the bottom of each tier - 2", 4" and 6". These were covered in aluminum foil. I, also, cut circles (3", 5", and 7") out of wax paper to use to trace the cakes for cutting. I used the same pan to make the vanilla and chocolate pound cakes. First, I made the vanilla, let it cool, and then I made the chocolate and let it cool also. I used an 8x12 inch pan which was just the perfect size for cutting out my 3", 5" and 7" circle cakes. Ideally, I would have had the three different sizes of cake pans, but I can't have everything I want all the time.
Now before you freak at how much of the cake was left over, let me assure you that not a single crumb went to waist - even if it didn't all get used in the cake. All, that was not used on the cake, was eaten. Next, I used my aluminum-covered circles to cut away the bottom sides of the vanilla cake. This way the bottom of the cake is smaller than the top. Then, I took the chocolate layer and carefully cut it on an angle horizontally. It was rotated 180º and iced into place. This was placed on top of the vanilla layer with some buttercream spread in between them. Since it didn't quite have the slope it needed, I used the excess chocolate cake to build the angle up on the top of the cake. That is how it gets the tipsy look without actually falling over. I forgot to take a picture of these steps. I was really getting into it, so I missed a few picture opportunities. Oh well! You will get to see what I mean about how I did this when you see pictures of the cake after it has been cut at the bottom of this page.
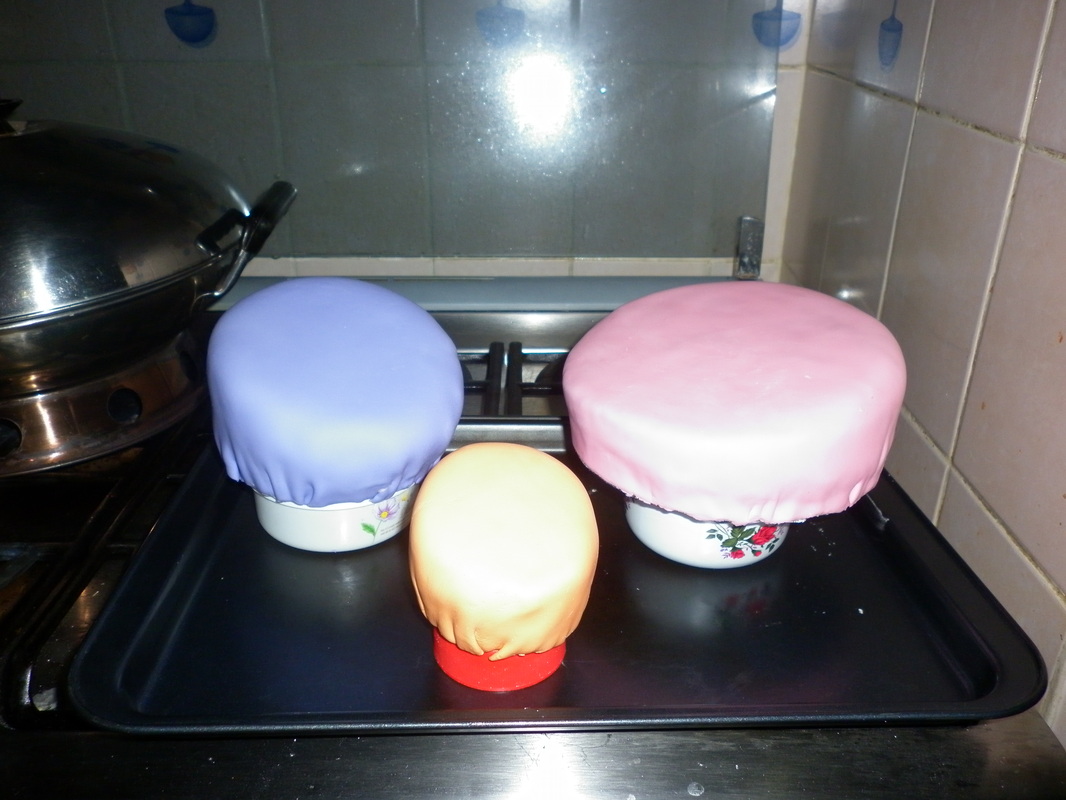
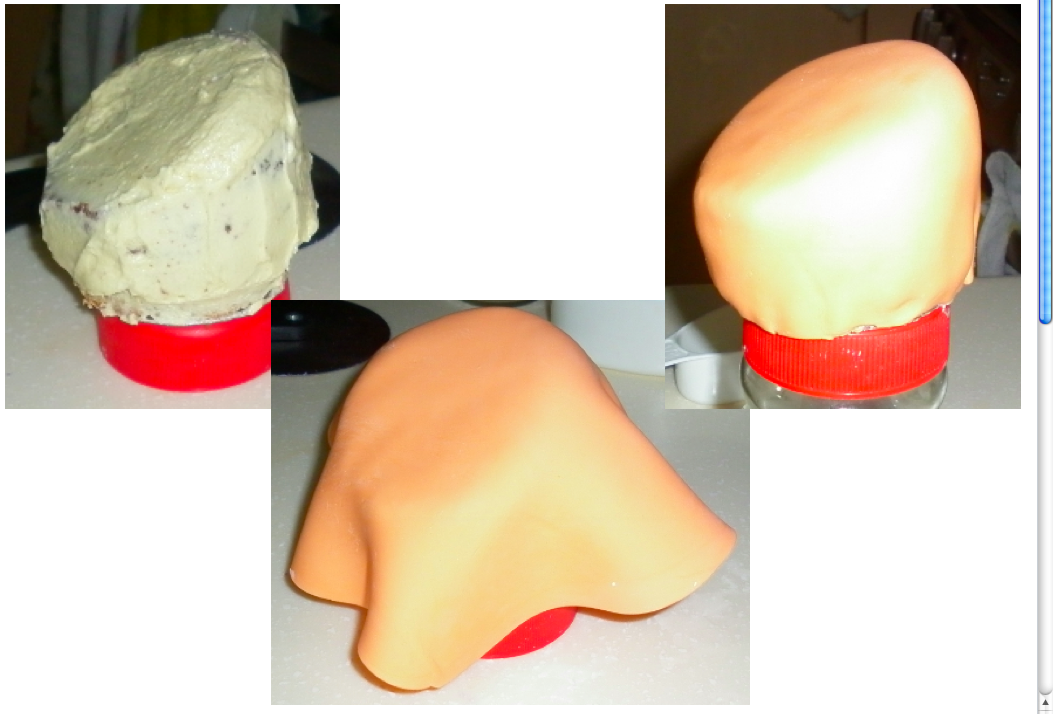
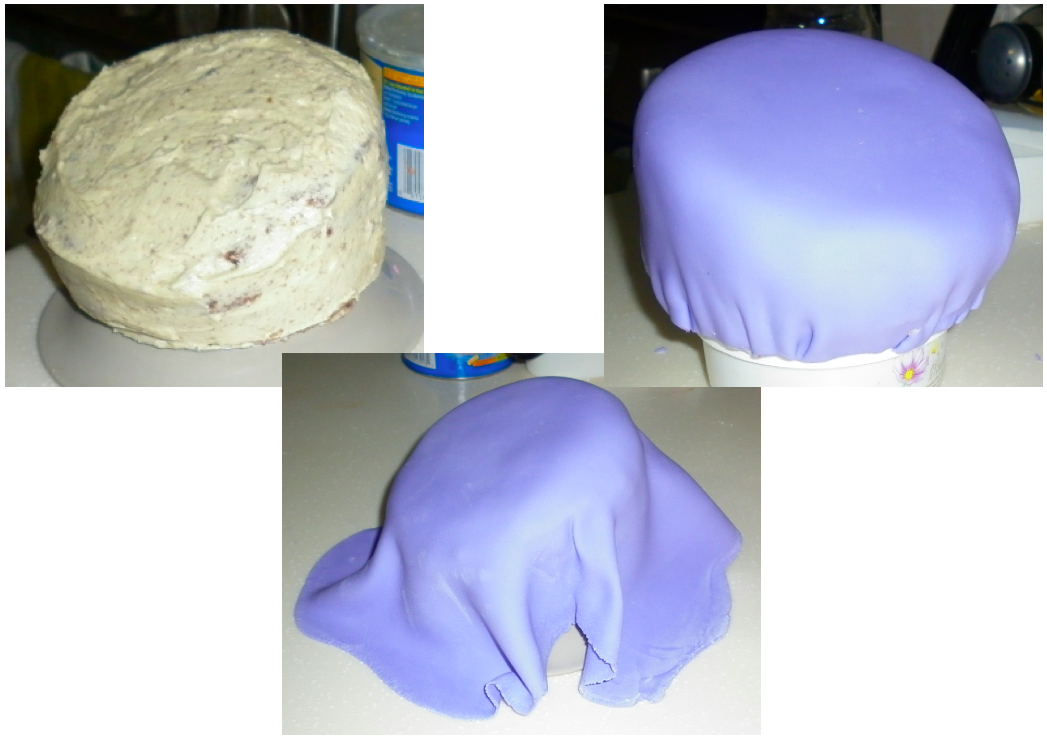
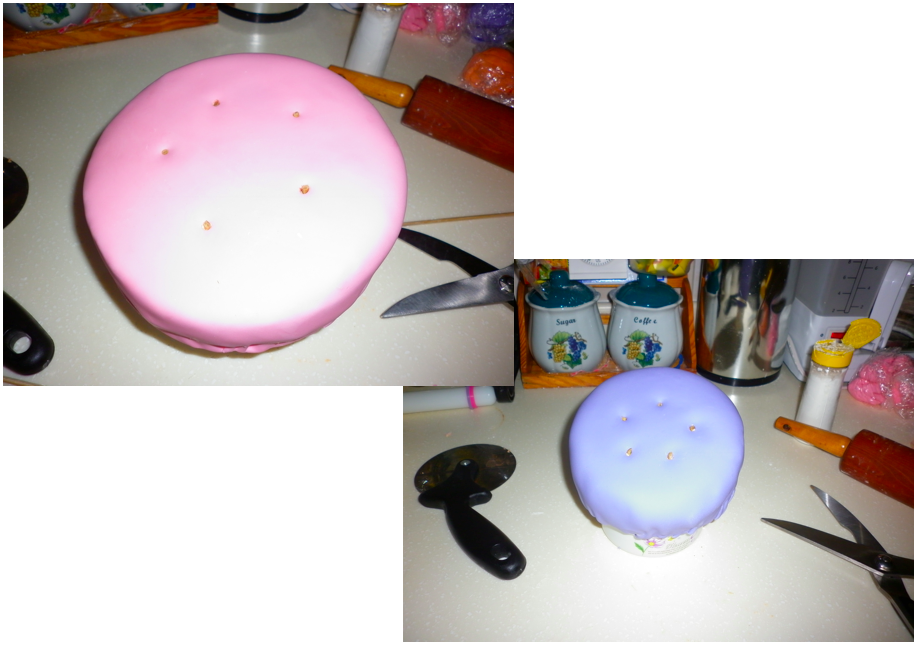
Day 2I took the cakes out of the fridge to bring to room temperature because according to my Fiance's sister, who was graciously helping me to make the fondant, "the marshmallow fondant adheres better to things that are room temperature. She then proceeded to show me and teach me how to make her marshmallow fondant. Together we made 3 different colours. Unfortunately, I didn't pictures of this step either.
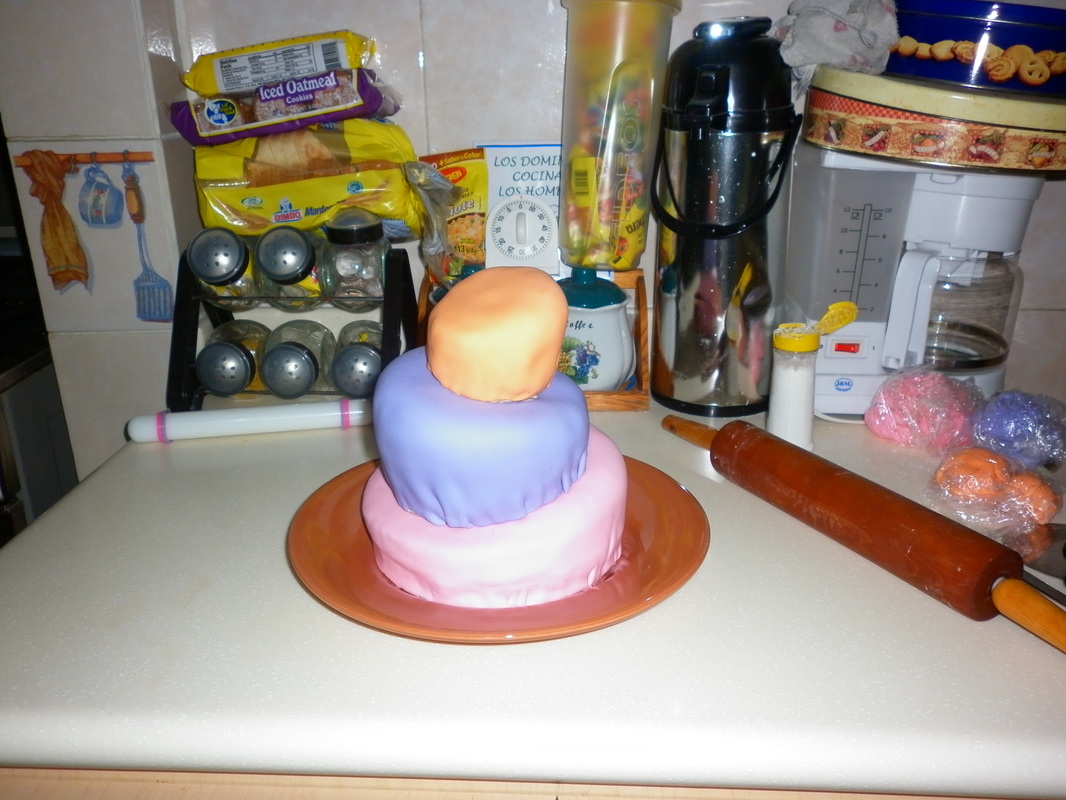
Gallery of Finished Cake 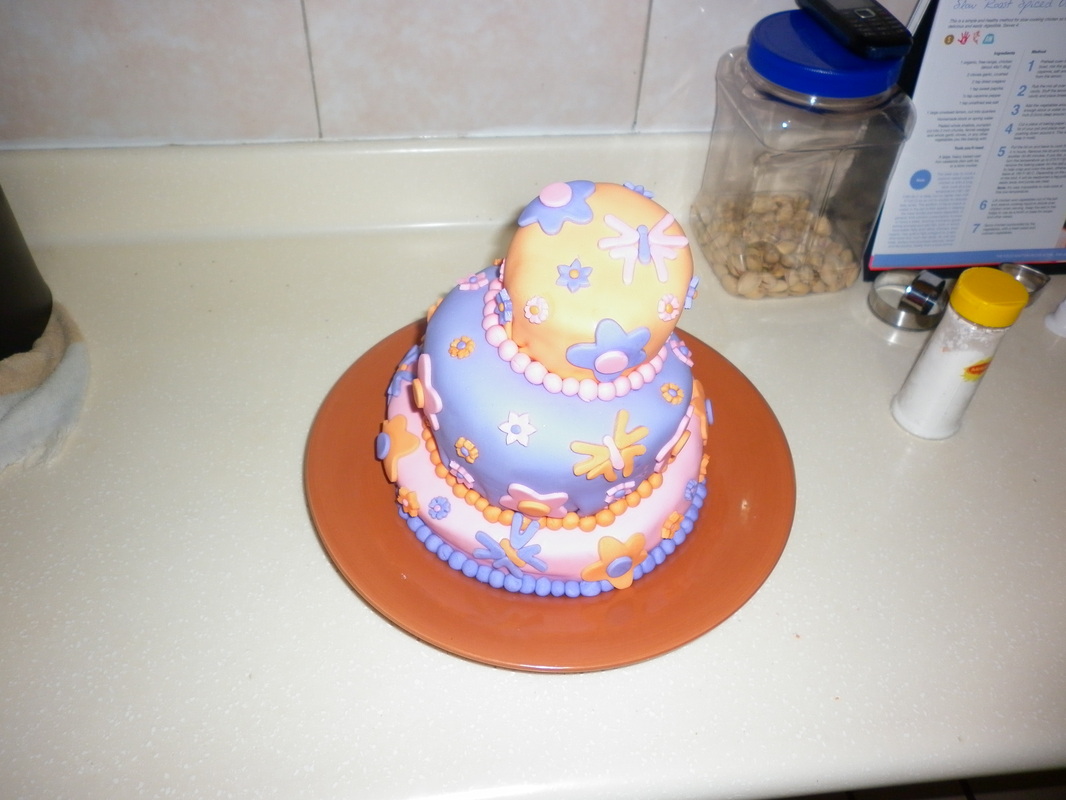 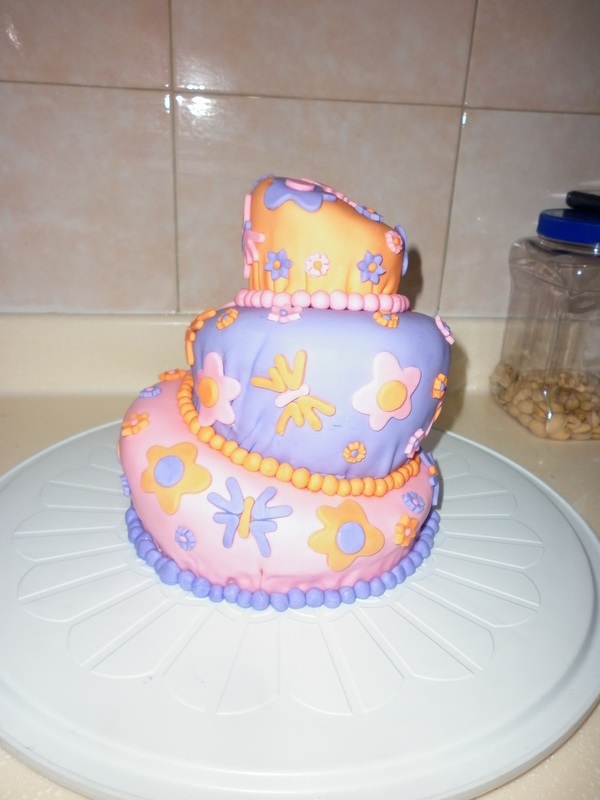 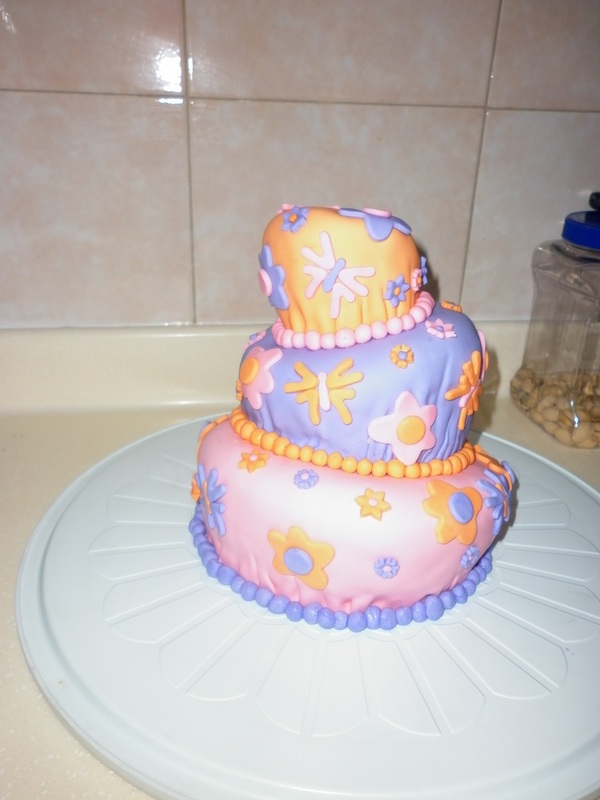 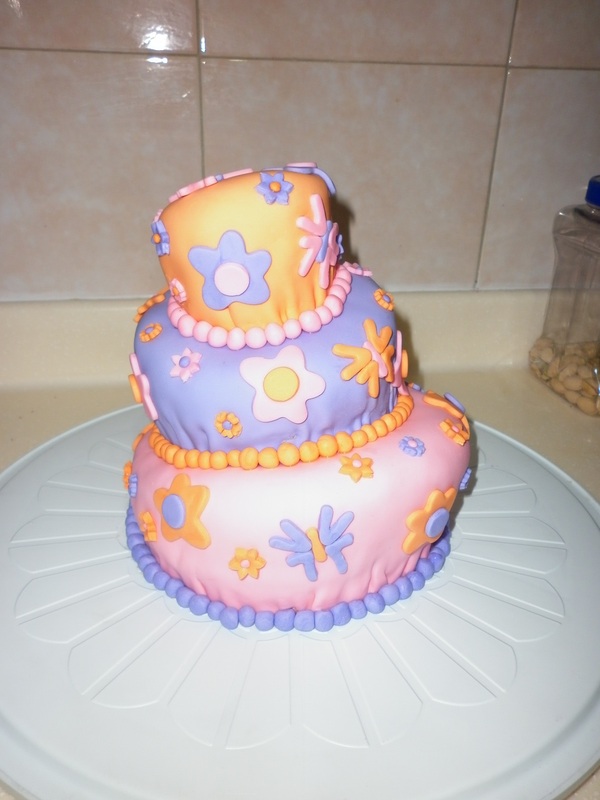 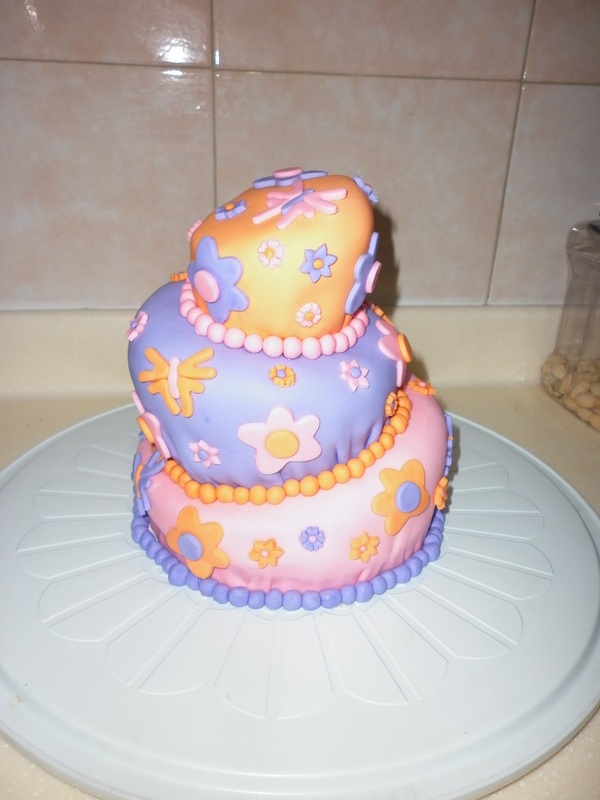 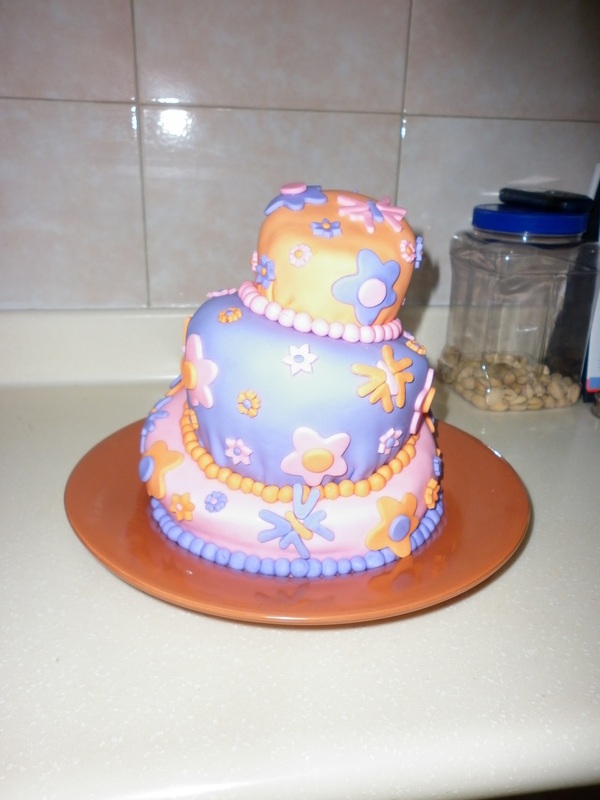  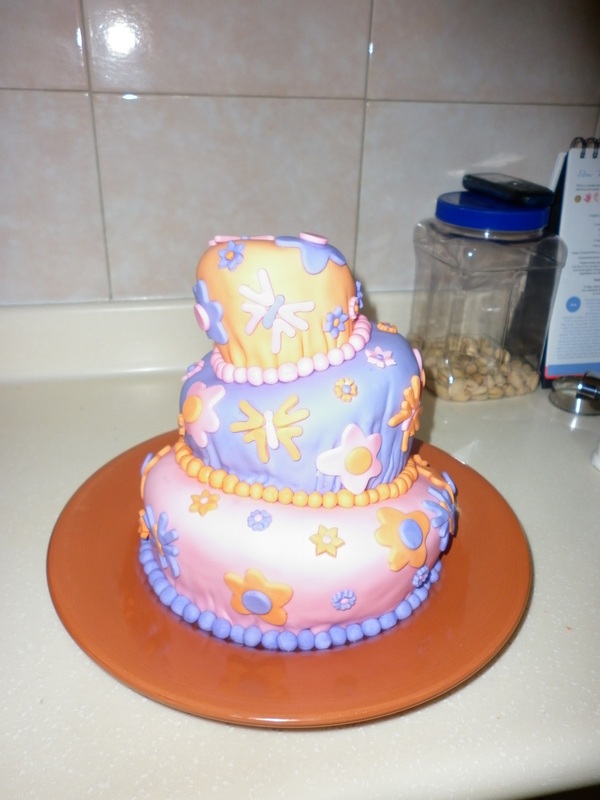 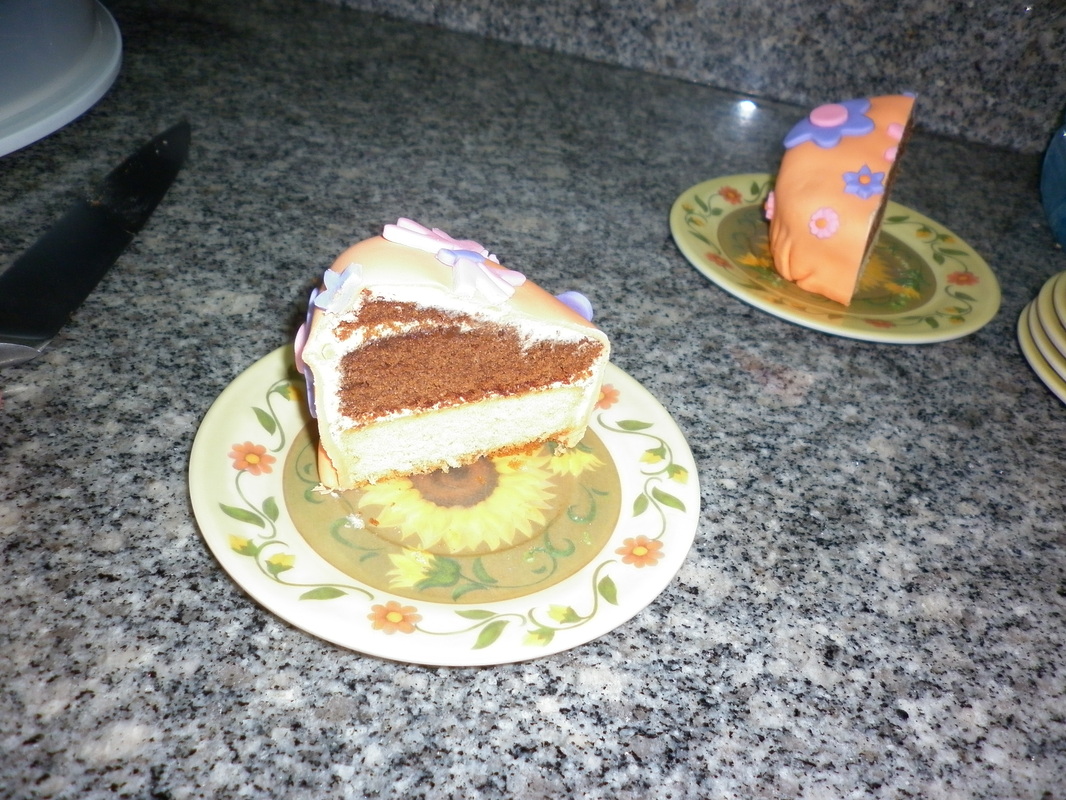 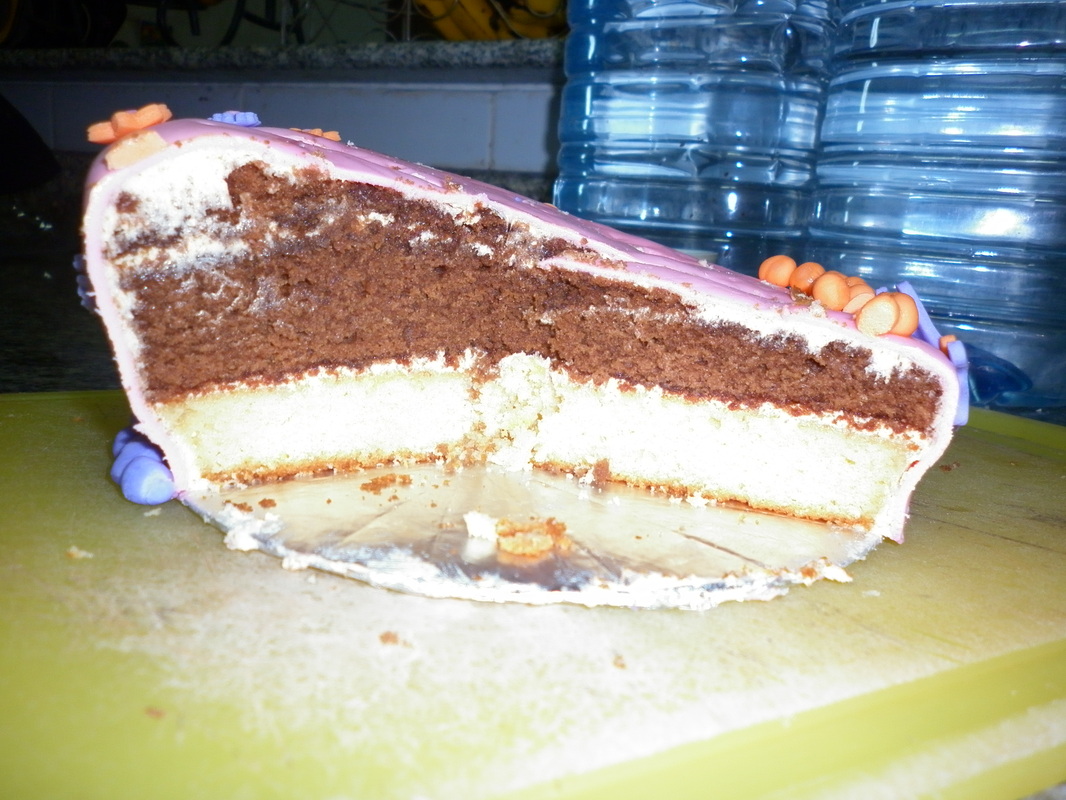 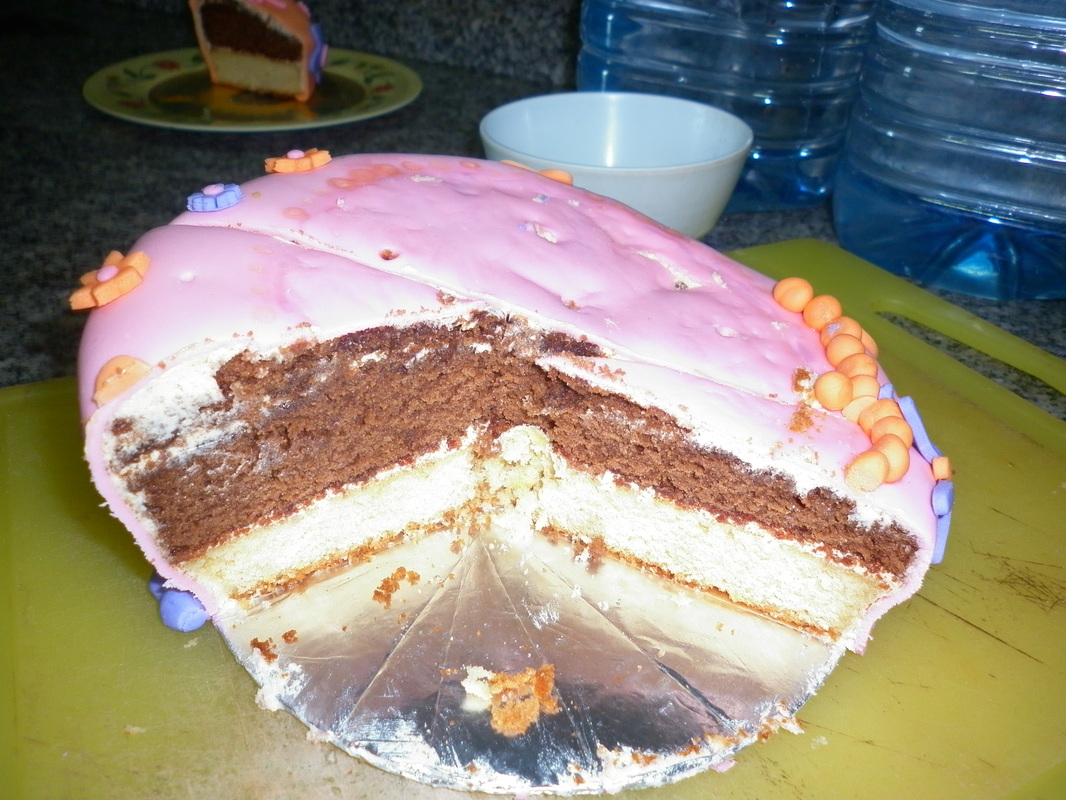  

Hello Visitor and Welcome to Rebeckah's Treasures... I am a Norwegian/Canadian currently studying Midwifery in the UK. I love to crochet! At Rebeckah's Treasures, I share my crochet patterns and treasures. I hope they inspire you to crochet your own little treasures too... 
Comments
|


Hello, my name is Rebeckah.
I hope my crochet inspires you to create your very own treasures! Learn more about me... Categories
All
Archives
October 2021
© 2012-2021 Rebeckah Ferger
All rights reserved. Disclaimer: This website makes use of sponsored and/or affiliate links. Please see this page for more information.
|
- Home
-
-
- Special Offers
- New Releases
- Accessory Crochet Patterns
- Afghan Square Crochet Patterns
- Amigurumi Crochet Patterns
- Applique Crochet Patterns
- Baby Crochet Patterns
- Dolly Crochet Patterns
- Fashion Doll Crochet Patterns
- Free Downloads
- Holiday Crochet Patterns
- Tapestry Crochet Patterns
- Under the Sea Crochet Patterns
- Wedding Crochet Patterns
- Disclaimer and FAQs
-
-
- Free Crochet Patterns
- New Free Releases
- Free Accessory Crochet Patterns
- Free Afghan Square Crochet Patterns
- Free Amigurumi Crochet Patterns
- Free Applique Crochet Patterns
- Free Baby Crochet Patterns
- Free Dolly Crochet Patterns
- Free Fashion Doll Crochet Patterns
- Free Guest Crochet Patterns
- Free Holiday Crochet Patterns
- Free Tapestry Crochet Patterns
- Free Under the Sea Crochet Patterns
- Free Wedding Crochet Patterns
- Free Crochet Patterns Coming Soon
Welcome Visitor! I hope you enjoy my treasures.


 RSS Feed
