|
Disclaimer: This website makes use of sponsored and/or affiliate links. Please see this page for more information.
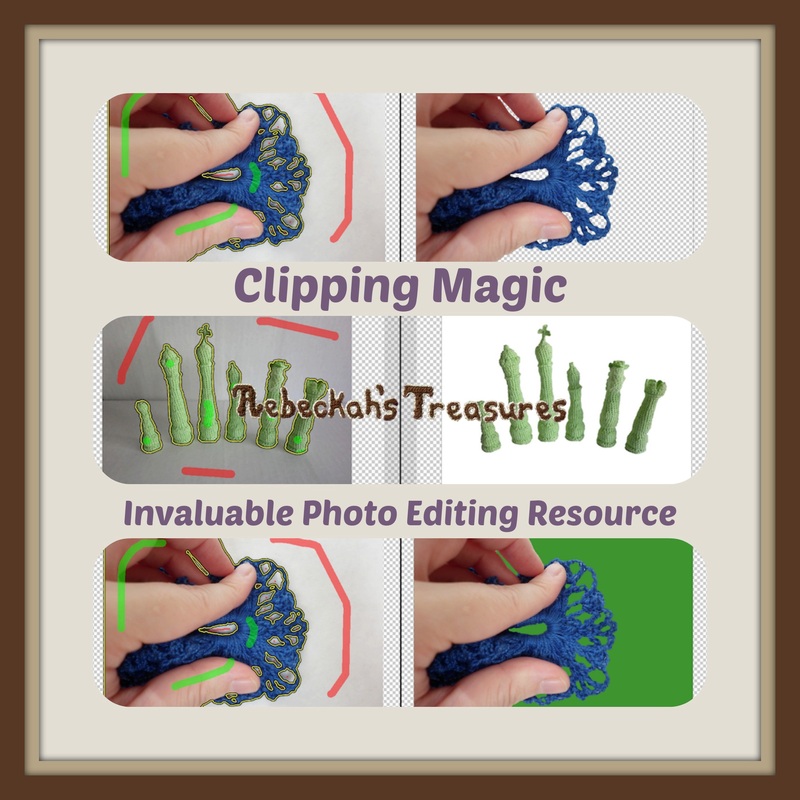
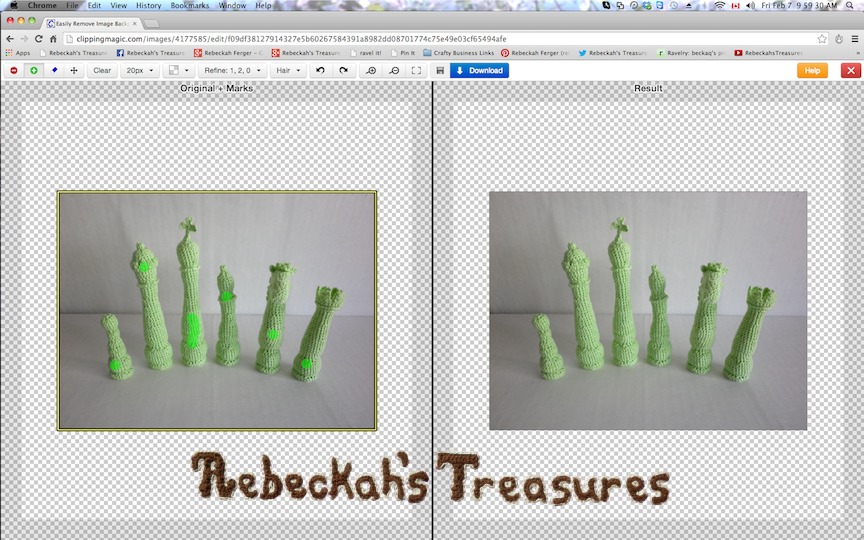
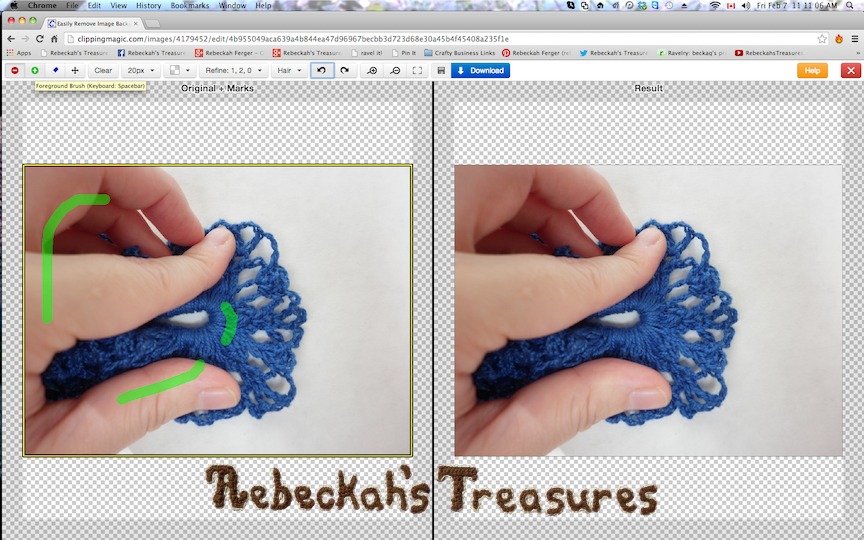
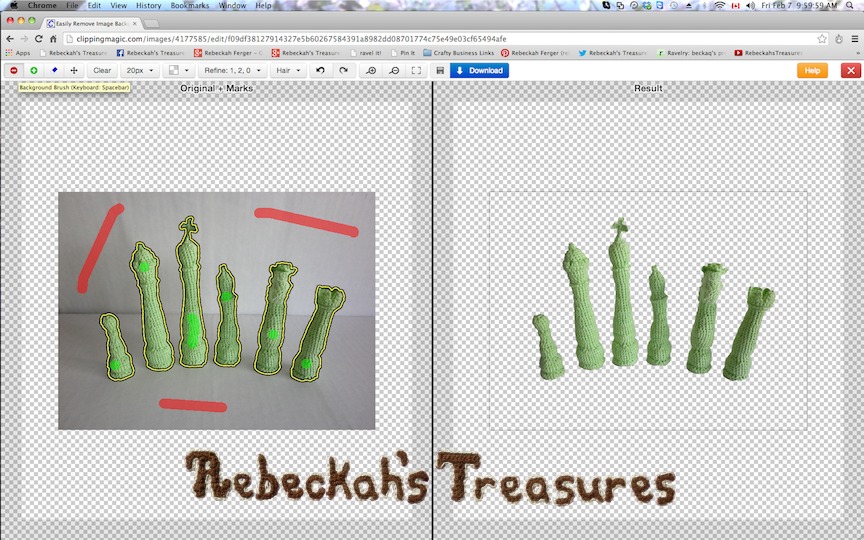
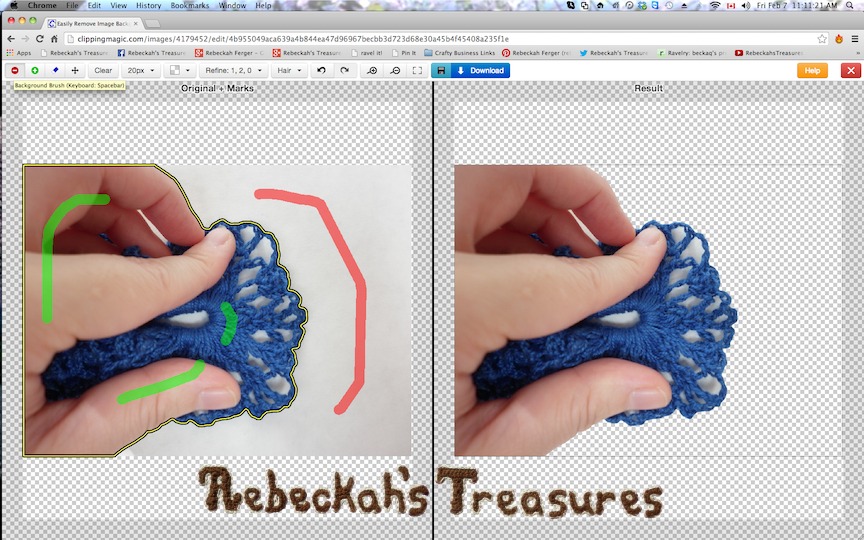
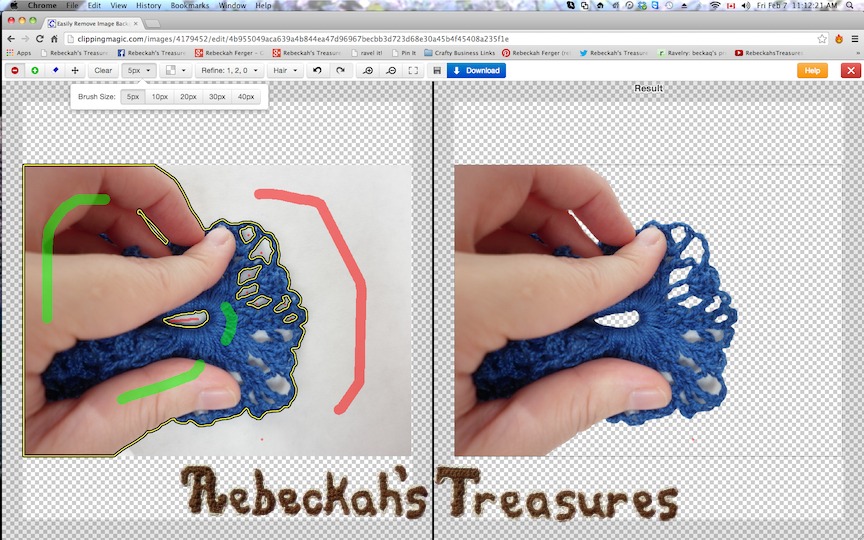
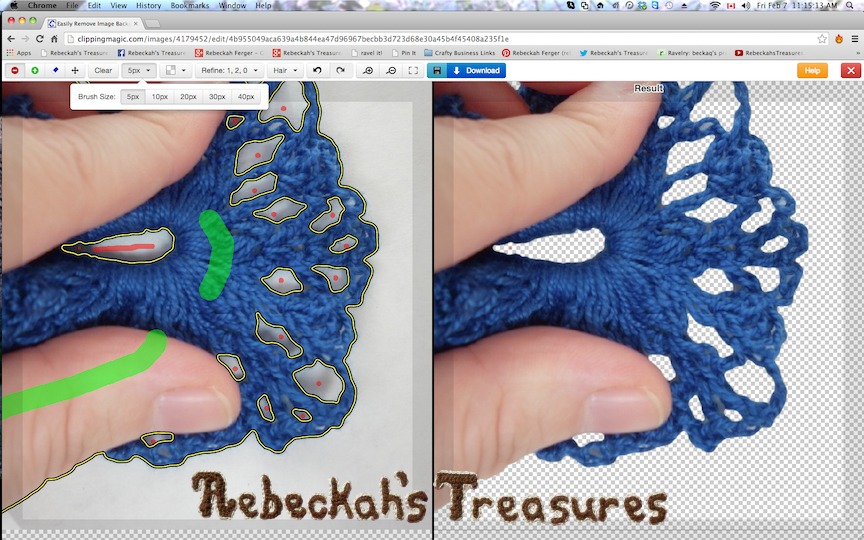
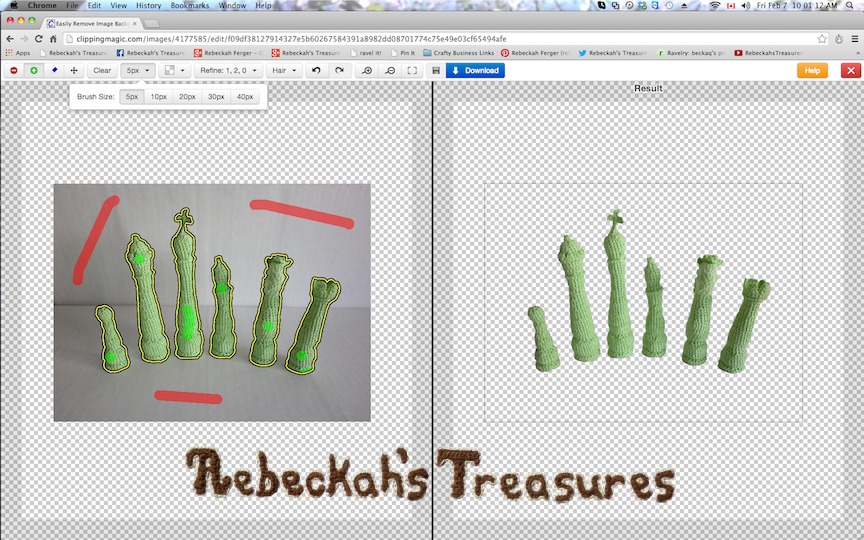
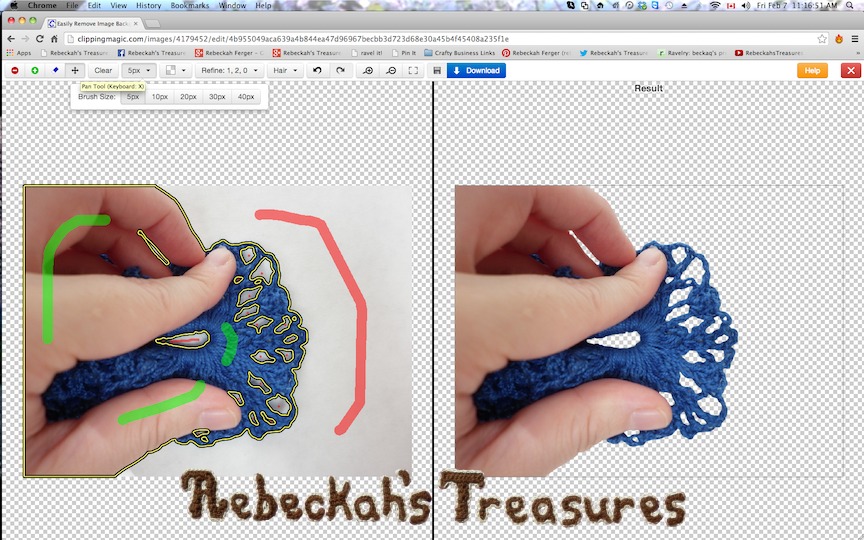
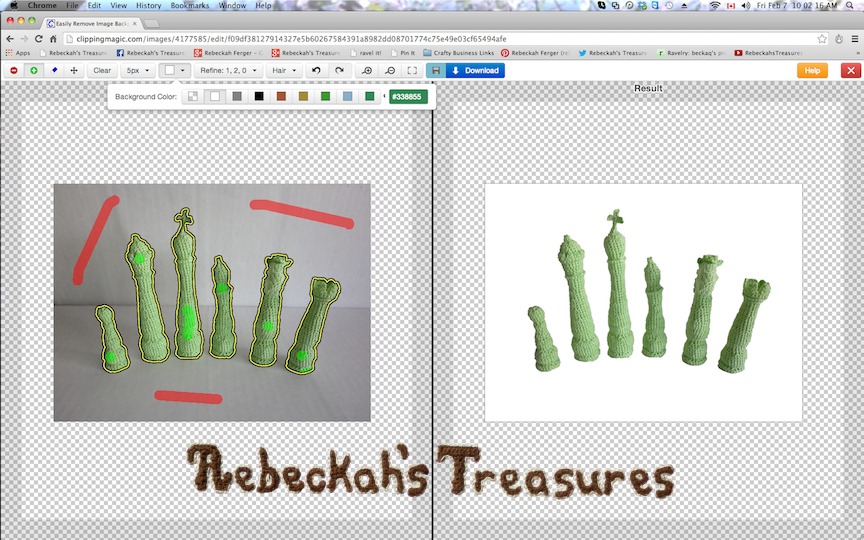
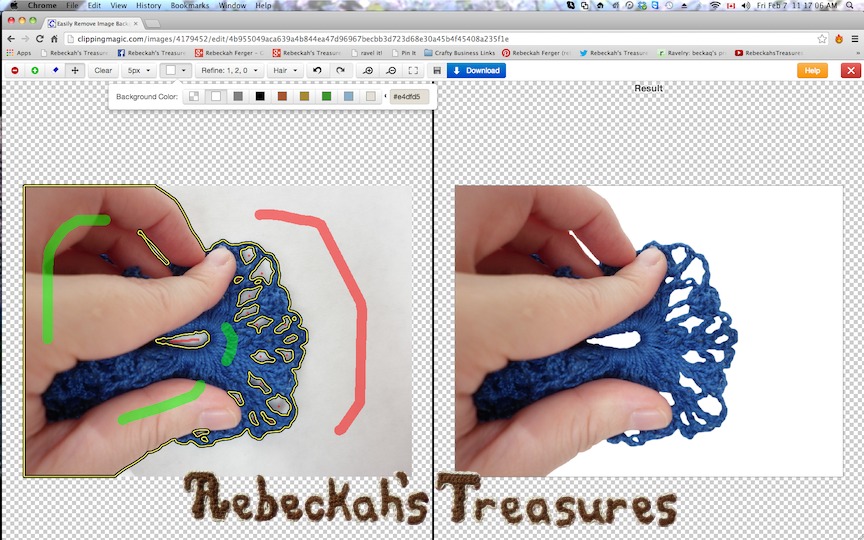
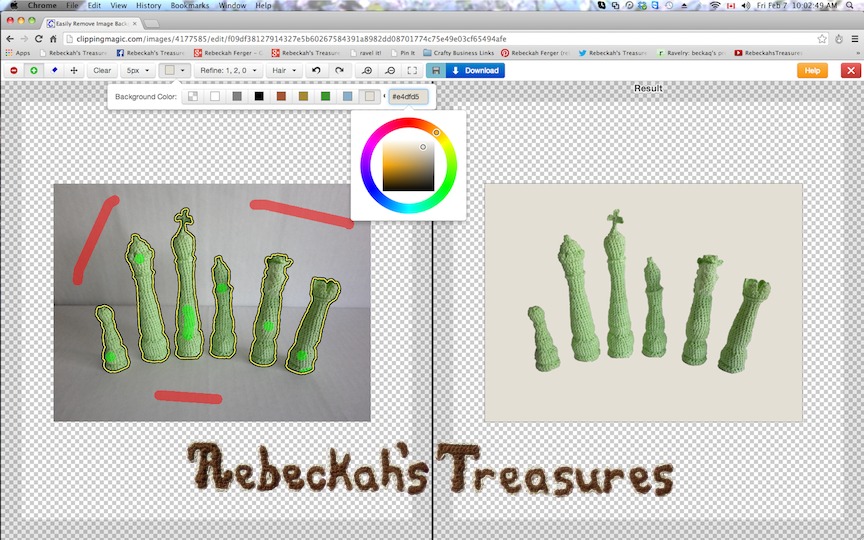
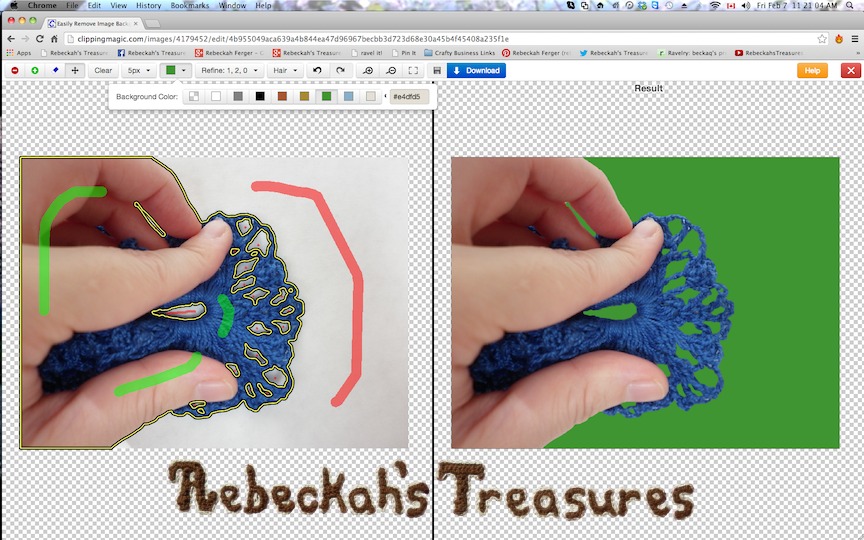
NOTE: As you clip your photo, it will show the original image with markings to the left and the edited version to the right. Step 1 ~ Mark what you want to KeepThe first thing you will do is mark the areas of the image you wish to keep. You just have to make sure you mark at least once per colour. For the first chess photo below, I just place one dot on each piece. For the first scrunchy photo below, I made several marks across the hand and scrunchy. Step 2 ~ Mark what you want to EraseThe second thing you will do is mark the background areas you wish to erase. One to a few strokes ought to do the trick. Depending on your object this may all you have to do to your picture. For the next chess photo, you'll see that is successfully erased everything and then some of the castle. For the next scrunchy photo, it completely erased the outer perimeter nicely with that one stroke. Step 3 ~ Touch UpsIf there are still some areas to clear, or it erased part of the object, you'll need to to a few minor touch ups... For the scrunchy, I had to make a few more red-erasing marks. So, I changed the size of the marker and added an extra dot or 2 into the spaces. I zoomed in to see them more clearly in the one pic. See following two pics... For the chess photo, it erased the bottom corner of the castle, so I fixed this by making an extra mark with the green-keep highlighter. Now your image is ready with a transparent background. If you want to use it for watermarking, or placing onto a new background, you'll download the picture just like is. Otherwise, you'll proceed to Step 4. Step 4 ~ Change the background Colour ~ Optional ~I like to use a white background because it really makes my crochet pieces pop! See following two images... However, sometimes it is fun to pick another colour. For the chess photo below, I input a colour code number, and for the scrunchy, I picked one of the default colours. Whenever you are happy with your image, you just have to press the download button, and volia, you're done! Of course, there are many more things you can do with this clipping magic tool. I still have much to learn about using this tool, but so far, I am loving it! Just the other day, I was able to edit over 100 pictures for my barbie wedding custom order (I will be sharing this with you all soon) in just two days! This normally would have taken me about a week with a paint program I was using. What other fun tools have you found to be useful? Share them with me below...
Hello Visitor and Welcome to Rebeckah's Treasures... I am a Norwegian/Canadian currently studying Midwifery in the UK. I love to crochet! At Rebeckah's Treasures, I share my crochet patterns and treasures. I hope they inspire you to crochet your own little treasures too... 
Comments
|
Hello, my name is Rebeckah.
I hope my crochet inspires you to create your very own treasures! Learn more about me... Categories
All
Archives
October 2021
© 2012-2021 Rebeckah Ferger
All rights reserved. Disclaimer: This website makes use of sponsored and/or affiliate links. Please see this page for more information.
|
- Home
-
-
- Special Offers
- New Releases
- Accessory Crochet Patterns
- Afghan Square Crochet Patterns
- Amigurumi Crochet Patterns
- Applique Crochet Patterns
- Baby Crochet Patterns
- Dolly Crochet Patterns
- Fashion Doll Crochet Patterns
- Free Downloads
- Holiday Crochet Patterns
- Tapestry Crochet Patterns
- Under the Sea Crochet Patterns
- Wedding Crochet Patterns
- Disclaimer and FAQs
-
-
- Free Crochet Patterns
- New Free Releases
- Free Accessory Crochet Patterns
- Free Afghan Square Crochet Patterns
- Free Amigurumi Crochet Patterns
- Free Applique Crochet Patterns
- Free Baby Crochet Patterns
- Free Dolly Crochet Patterns
- Free Fashion Doll Crochet Patterns
- Free Guest Crochet Patterns
- Free Holiday Crochet Patterns
- Free Tapestry Crochet Patterns
- Free Under the Sea Crochet Patterns
- Free Wedding Crochet Patterns
- Free Crochet Patterns Coming Soon
Welcome Visitor! I hope you enjoy my treasures.











 RSS Feed
