|
Disclaimer: This website makes use of sponsored and/or affiliate links. Please see this page for more information.
You're taking the next step in your crochet/knit business and you are looking to create an eBook.
This photo tutorial will show you how to use secondary sources to create a Ravelry eBook with two or more patterns. This way, you can offer special discounts for pattern sets or combine free blog patterns into an eBook, so you charge for PDF pattern sales... 
Step 1:
The first step is to create your pattern listing on Ravelry as you normally would for a free blog crochet or knit pattern.
If you already have your pattern listing on Ravelry, proceed to Step 2. If you are unfamiliar with creating a listing on Ravelry, my friend Rhondda over at Oombawka Designs has a tutorial here: Learn How to Add Your First Pattern to Ravelry. Step 2:
The second step is the key to creating an eBook with two or more patterns. This is done by creating a secondary source. Here's how...
Go to the listing you wish to add a pay PDF version or add to an eBook. Once there, click on the pencil icon at the top of the listing, or below the navigation menu to edit the listing information. 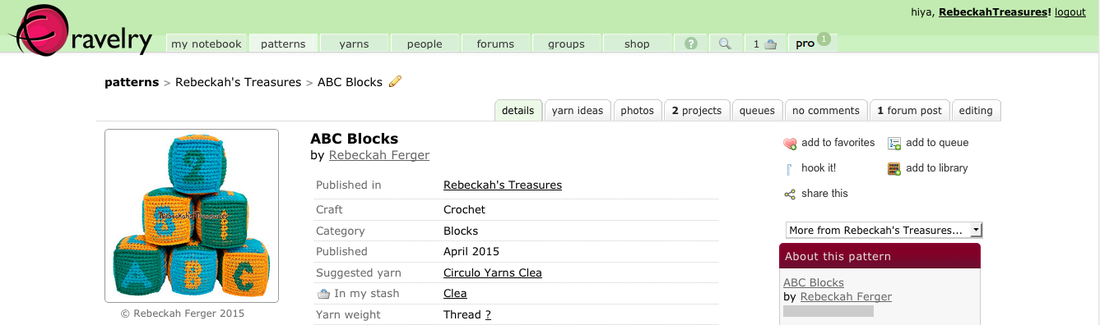
What you want to do now is add a new source. Do this by clicking on the green + circle or the "add source" text next to it under the Source fields.
Call it "Collection Title" or "Collection Title Ebook" or whatever you'd like to call the PDF version of the eBook – it just needs to be unique. Then, make sure the first source (the blog or shop source) is selected as the primary source – this will ensure your listing stays searchable as free if it's free on it's own or make sure that the individual pattern download price is listed. 
NOTE: You can add as many sources as you need for any pattern. It is there for this purpose. This way all the places any particular pattern can be found is listed in the same place.
Once you have added the new source or sources, type a quick note in the bottom field to say "adding a source", click save and continue to Step 3. 
eBook TIP: Repeat the first two steps for all of the patterns you wish to turn into an eBook, making sure the secondary source you add (a.k.a. the eBook Title) is the same for each pattern.
You only need to have ONE pattern listed on Ravelry, to START creating your eBook and add the PDF for it – this is helpful for those patterns you wish to release individually on your blog, but make the complete eBook available right away. IMPORTANT NOTE: You MUST have a minimum of TWO designs in a source because only one counts as a duplicate pattern and this is not permitted on Ravelry. Simply repeat this step as you publish each pattern to Ravelry and it will automatically include that design in the eBook source page. Step 3:
The third step is where you will add your PDF.
When you have your PDF uploaded and all the details set up, proceed to Step 4. If you are unfamiliar with adding PDF downloads to Ravelry, see my tutorial here: How to Add PDF Patterns to Sell on Ravelry. Step 4:
The fourth step is optional, but highly recommended. It can be completed before or after Step 3. The order is not really important.
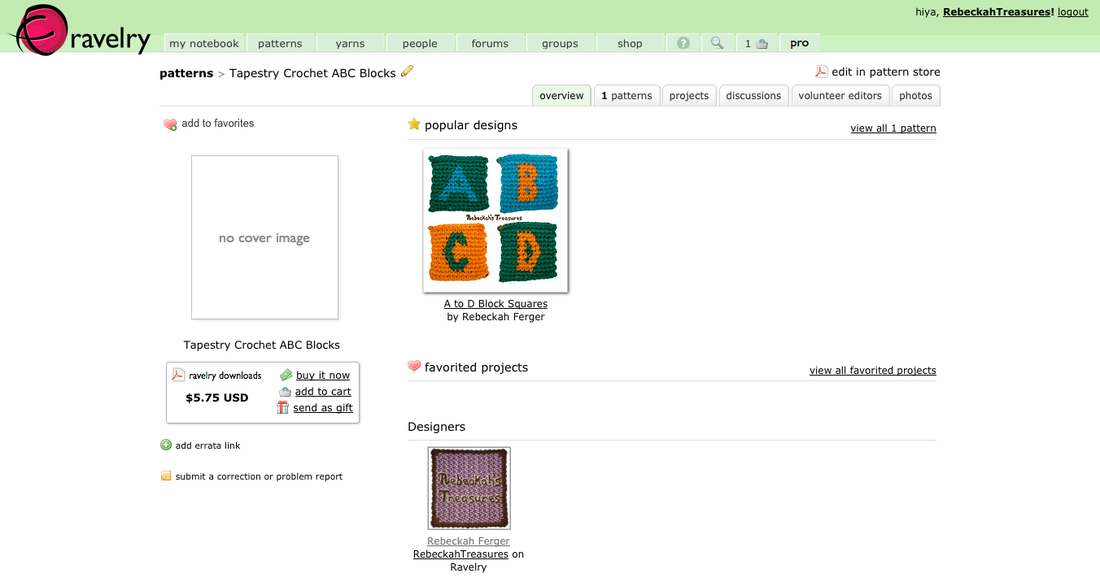
This step will cover editing the secondary source's link – the link you can direct people to see more information about the eBook. To do this, you will first need to go to the eBook link. There are several ways to to get there:
Here are the links to look for...
Once on the Raverly eBook source listing, you can edit the details, much like you do for a normal listing by clicking on the pencil icon at the top of the page.
There you can edit the source name, add in the publishing date, add your notes, etc. You'll want to choose "eBook" from the "Type" drop-down menu, and you may like to add a URL to the listing on your website too.

To the right, you can add the languages available and mark the eBook source as complete when you do not wish to add anymore patterns to the eBook.
Click the "save source" button at the bottom of the page when you are through editing details. 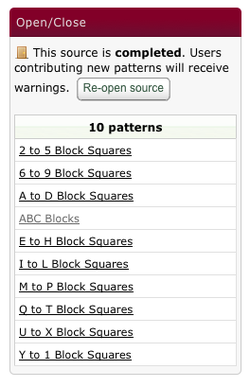
Here's what the box looks like when the source is closed...
Now, all that remains is to add some photos for this listing!
Click on the "Photos" tab of the listing's navigation menu. There you can upload one or more photos that people can browse. The first one uploaded, is the one that will display on the eBook Ravelry listing link. All others will only be visible in the photo's tab or on the individual pattern design pages. 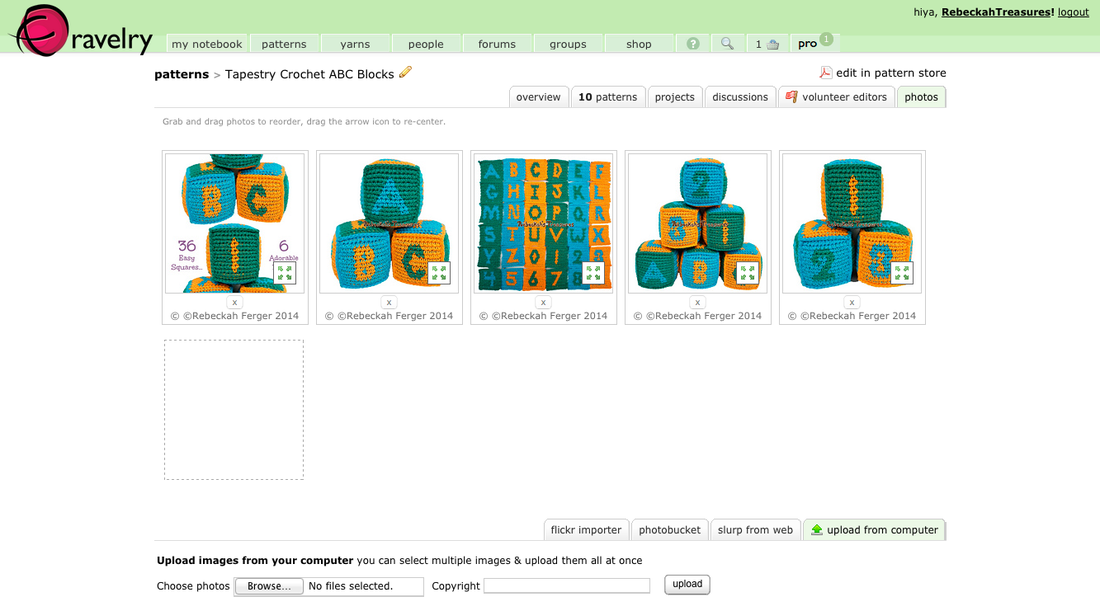
Now let's look at the 10 patterns tab (the number 10 will be whatever number of patterns are included).
See here how there is now a main photo for the source on the left (this will show on the overview, patterns and discussions tabs) and this page will show all the pattern designs included in the eBook... 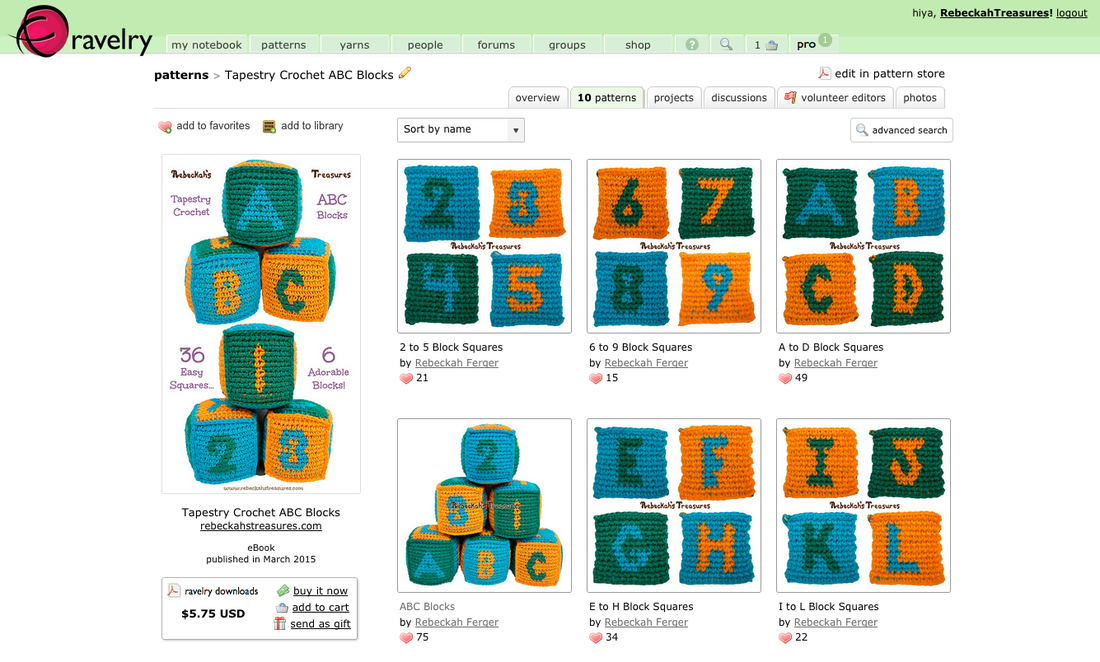
And your done!
Now you know how to use sources to make an eBook to sell on Ravelry! There is just one little note I would like to add... **See the source of the eBook from this tutorial here. Click on the patterns included to see what they look like with additional sources.
Tell us what you thought about this tutorial by giving it a star-rating or commenting below!
If you loved this tutorial, you'll also love my Website Shop 101 Lesson: Ravelry Shop Buttons, where I show you how to use Ravelry's HTML code to sell patterns on your website.
Plus, learn How to List Ravelry Patterns for Free & Sale, so you can charge for PDF sales of free blog patterns and have them searchable as both! Thanks so much for visiting today. Hope to see you again soon!  
Hello Visitor and Welcome to Rebeckah's Treasures... I am a Norwegian/Canadian currently studying Midwifery in the UK. I love to crochet! At Rebeckah's Treasures, I share my crochet patterns and treasures. I hope they inspire you to crochet your own little treasures too... 
Comments
|


Hello, my name is Rebeckah.
I hope my crochet inspires you to create your very own treasures! Learn more about me... Categories
All
Archives
October 2021
© 2012-2021 Rebeckah Ferger
All rights reserved. Disclaimer: This website makes use of sponsored and/or affiliate links. Please see this page for more information.
|
- Home
-
-
- Special Offers
- New Releases
- Accessory Crochet Patterns
- Afghan Square Crochet Patterns
- Amigurumi Crochet Patterns
- Applique Crochet Patterns
- Baby Crochet Patterns
- Dolly Crochet Patterns
- Fashion Doll Crochet Patterns
- Free Downloads
- Holiday Crochet Patterns
- Tapestry Crochet Patterns
- Under the Sea Crochet Patterns
- Wedding Crochet Patterns
- Disclaimer and FAQs
-
-
- Free Crochet Patterns
- New Free Releases
- Free Accessory Crochet Patterns
- Free Afghan Square Crochet Patterns
- Free Amigurumi Crochet Patterns
- Free Applique Crochet Patterns
- Free Baby Crochet Patterns
- Free Dolly Crochet Patterns
- Free Fashion Doll Crochet Patterns
- Free Guest Crochet Patterns
- Free Holiday Crochet Patterns
- Free Tapestry Crochet Patterns
- Free Under the Sea Crochet Patterns
- Free Wedding Crochet Patterns
- Free Crochet Patterns Coming Soon
Welcome Visitor! I hope you enjoy my treasures.


 RSS Feed
