|
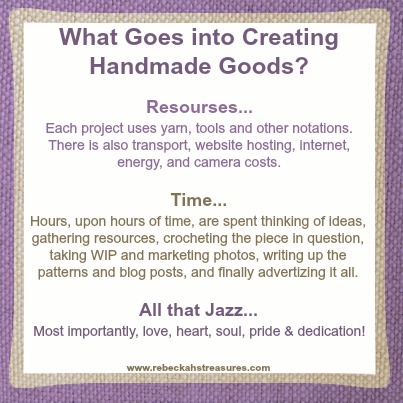
Disclaimer: This website makes use of sponsored and/or affiliate links. Please see this page for more information. Have you ever wondered what goes into creating a crochet pattern, or even just creating something handmade? Continue reading and you will discover just that... Inspiration...First comes the idea for a crochet pattern. Most ideas are inspired from things I see; some ideas come out of the blue, and others are inspired by people like you. Lots of inspiration can come from other projects I am working on too. I am so easily inspired that sometimes it is difficult to turn it off! Plan of Execution...Once an idea for a new design has occurred, I begin to brainstorm how I am going to go about crocheting this new design, so that I may turn it into a crochet pattern. I think about what all will be included or needed, and what colours/notations I will use. Sometimes I know exactly what I will need to do right away, other times, it not always evident. A considerable amount of time is spent on this step as it is much easier to proceed when I have a better idea on how I wish to crochet. This is not something that I stop thinking about after one time. I will be continuously thinking about this throughout the entire process of creation. Gathering Resources...It is now time to gather resources and materials I will need. First, I check my stock to see if I have what I need on hand. Sometimes I do, and I will get started right away. However, if I don't, and most cases this is so as I usually buy with projects in mind, I will need to go out to the craft store. Here the craft stores are really small and not that grand. They do not always have what I think I will need in one store. So when I go, I cross my fingers that they will have everything I need in the first store I enter. I have now spent money on gas and materials. Apart from time, this is my first expense for the project. The Crocheting Bit...Now that I have a general idea in mind, and I have all I think I will need to execute it, I need to turn the idea into something tangible. Depending on what I am creating, this can take anywhere from hours to days to weeks. I will usually spend a full work day and more everyday crocheting while I am working on it. As I crochet, I am writing and taking pattern notes. I do this so that I do not forget what I was doing, or did, and of course, so that latter, I can share the pattern with everyone who wants it. This makes the process of creation take much more time than it would if I was just crocheting, but it is worth it in the end as it leaves me with not only a beautifully finished piece, it also gives me a lovely pattern, so that you can create it too! If I am lucky, everything will flow smoothly. However, that is not always the case. More often than not, I will have to frog (undo or pull out) what I have already crocheted. There are many reasons for this to occur; the design is not going the way I want it to go, or I have made a mistake and only noticed several rows past it. Sometimes, ideas will change, and/or the method I think will work, doesn't. All about the Photos...Depending on the pattern, sometimes I need to take instructional photos. This means that I will have to stop every so often to take a picture. Sometimes, I have already thought far enough in advance where the design is going to take me, so I know I will need to take a picture. Other times, I will have to make the piece again, or undo what I have done before I can take any pictures. I am not an expert photographer yet. I rely on natural light and my digital camera. The sun and sometimes the camera do not always cooperate with me. Sometimes, I have had to delay crocheting until the morning so that I can take better pictures. I am planning to take some classes, or workshops as soon as I can, and perhaps even invest into a real camera, but for now I do the best I can with what I have and know how to do. I have now finished crocheting and adding final touches to the project. Now it is time to take marketing pictures, and pictures for my portfolio and personal records. As I have stated earlier, I am still learning about my camera. However, I have learned that I can get some really nice pictures when I take them in the morning on a nice day. So, I wait until the first opportunity I have to take pictures. This is not always the following morning. Once I have the opportune moment to take pictures, I set up my photo station, and position my piece(s) for their photo shoot. I take more pictures than I think I'll need as it is much more efficient to delete unnecessary photos, than it is to set up to take more pictures. After I have gotten as many photos as I will need, I upload them to my computer to edit them for use in the patterns, and to make collages of them to share on various places. I like to use PicMonkey to make my collages and add written text to my photos, and I like to use pixlr to do some minor editing to the photos if it is needed, or to change the background colours. Another great one that I sometimes use for collages is piZap. Sometimes, I will make the collages after I have already started to digitalize my pattern, other times, I will do it beforehand. However, more often than not, I will make the marketing photos first, and wait to make the photos for the pattern until I have most of the pattern digitalized. Digitalizing my Pattern...Now it is time to digitalize my handwritten pattern. I work on a Mac, so I use Pages, the Word equivalent for Mac. I have Word too, but I prefer Pages! I type out my pattern to include all of the instructions necessary. I use table charts to keep the abbreviations and pattern perfectly organized and in line. For the abbreviations, I create two, or four columns (to double it up in one row), one for the abbreviation and one for the stitch written out. For the actual pattern, I create three columns; the first one to state the row/round, one for the stitch count at the end, and a larger middle one for the instructions. The pattern will also include what materials, tools and notations will be need for the project. Plus, I also include a written description of the pattern and other pattern notes. Once I have got that done, I start to add pictures to the appropriate places in the document. Some of the pictures flow inline with the document. Others float, and are locked into place. Then, I go over the document several times to be sure that everything is in order. When I am happy with how it looks, I save it as a pdf. Now it is ready for sharing or selling. Blogging about my Design...For free patterns, I write up a blog post with the whole pattern in a similar fashion to the pdf version, which takes much more time to do because I no longer have my table charts. At the bottom of my post, I add a downloadable version of the pattern. Then, I link it to my Free PDF Crochet Patterns page. For sales patterns is slightly different. I still write up a blog post for them, however, instead of writing up the pattern like I do for free patterns, I talk a little bit more about the pattern's story, and I showcase the finished project. Afterwards, I will link where the pattern can be purchased. Getting it out There...After the blog post is written up, I will first list it in Rebeckah's Treasures' Store. Then, I will list it in Rebeckah's Treasures' Store on Craftsy, and finally I will list it in Ravelry to link back here. Each time, in each store front, I have to write up all/most of the details for the pattern with full descriptions etc. Now it is ready to share on Social Media. First thing I will do is pin images from my blog post and from my store. This kills two social media fronts with one stone as my Pinterest is linked to Twitter and automatically tweets a link there. Then, I will post pictures and links onto my Facebook Page and Google+ Page. Then, I wait for wonderful people like you to take an interest in them. Rounding it all up...Basically, think of pattern designing like developing a theory for a scientific experiment. You come up with theories and hypothesis based on information you already know. You set up an experiment to test your hypothesis. You then experiment to see what works, what doesn't, and why. Then, you write down your findings and publish them. It is all rather a simple process! It just takes time, some small or great costs in material, some more time, some energy costs, and even more time. Though what does that all matter, or compare to the wonderful feeling I get once a project/pattern has come to conclusion? Absolutely nothing! Thanks so much for taking the time to read this! If you like what you have read, tell me your thoughts below...
Hello Visitor and Welcome to Rebeckah's Treasures... I am a Norwegian/Canadian currently studying Midwifery in the UK. I love to crochet! At Rebeckah's Treasures, I share my crochet patterns and treasures. I hope they inspire you to crochet your own little treasures too... 
Comments
|
Hello, my name is Rebeckah.
I hope my crochet inspires you to create your very own treasures! Learn more about me... Categories
All
Archives
October 2021
© 2012-2021 Rebeckah Ferger
All rights reserved. Disclaimer: This website makes use of sponsored and/or affiliate links. Please see this page for more information.
|
- Home
-
-
- Special Offers
- New Releases
- Accessory Crochet Patterns
- Afghan Square Crochet Patterns
- Amigurumi Crochet Patterns
- Applique Crochet Patterns
- Baby Crochet Patterns
- Dolly Crochet Patterns
- Fashion Doll Crochet Patterns
- Free Downloads
- Holiday Crochet Patterns
- Tapestry Crochet Patterns
- Under the Sea Crochet Patterns
- Wedding Crochet Patterns
- Disclaimer and FAQs
-
-
- Free Crochet Patterns
- New Free Releases
- Free Accessory Crochet Patterns
- Free Afghan Square Crochet Patterns
- Free Amigurumi Crochet Patterns
- Free Applique Crochet Patterns
- Free Baby Crochet Patterns
- Free Dolly Crochet Patterns
- Free Fashion Doll Crochet Patterns
- Free Guest Crochet Patterns
- Free Holiday Crochet Patterns
- Free Tapestry Crochet Patterns
- Free Under the Sea Crochet Patterns
- Free Wedding Crochet Patterns
- Free Crochet Patterns Coming Soon
Welcome Visitor! I hope you enjoy my treasures.











 RSS Feed
