|
Disclaimer: This website makes use of sponsored and/or affiliate links. Please see this page for more information.
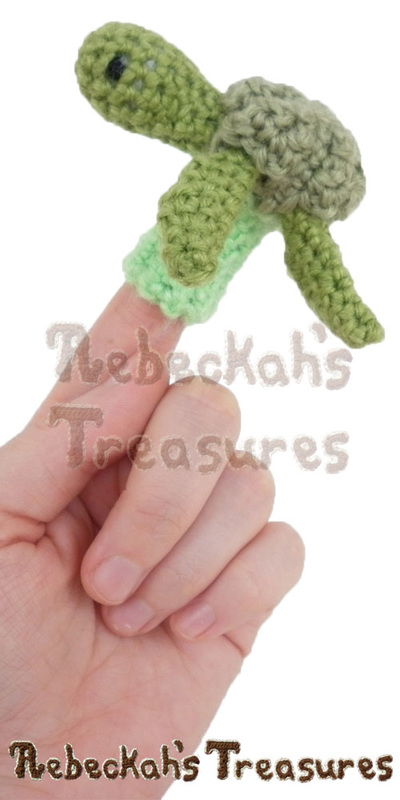
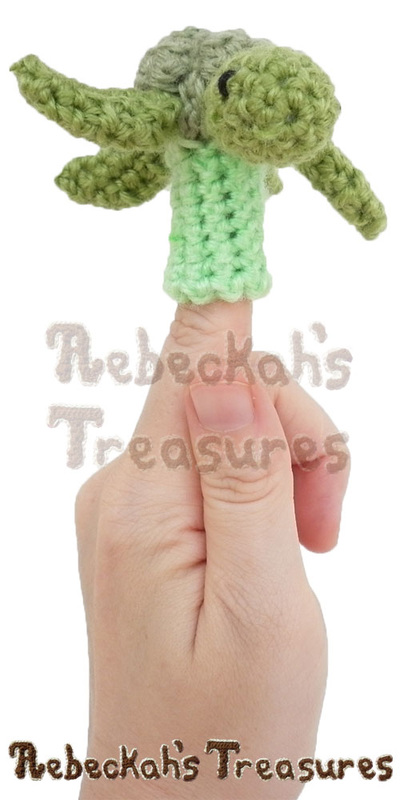
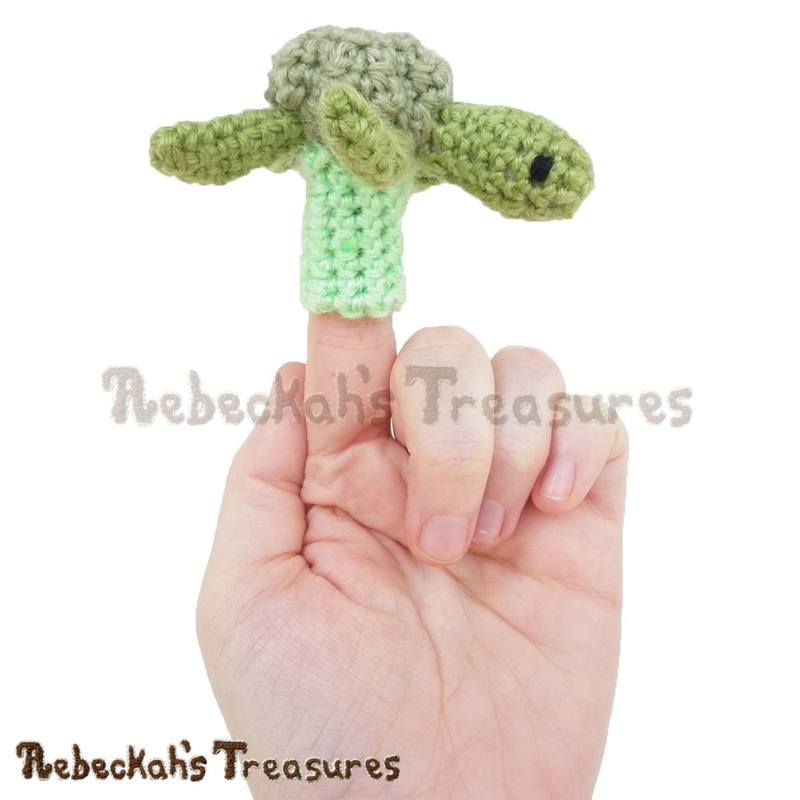
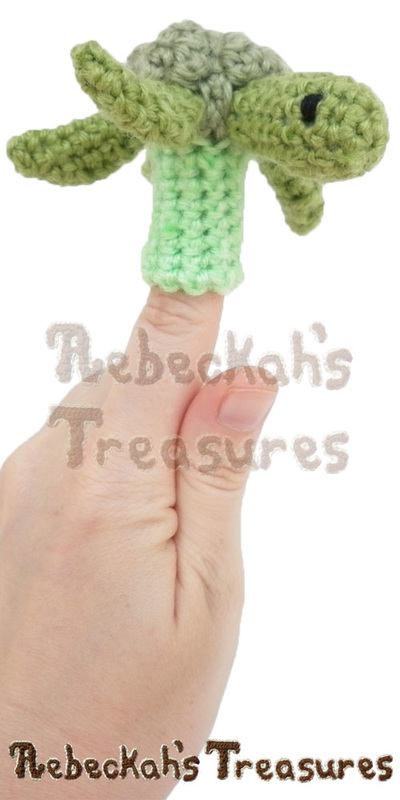
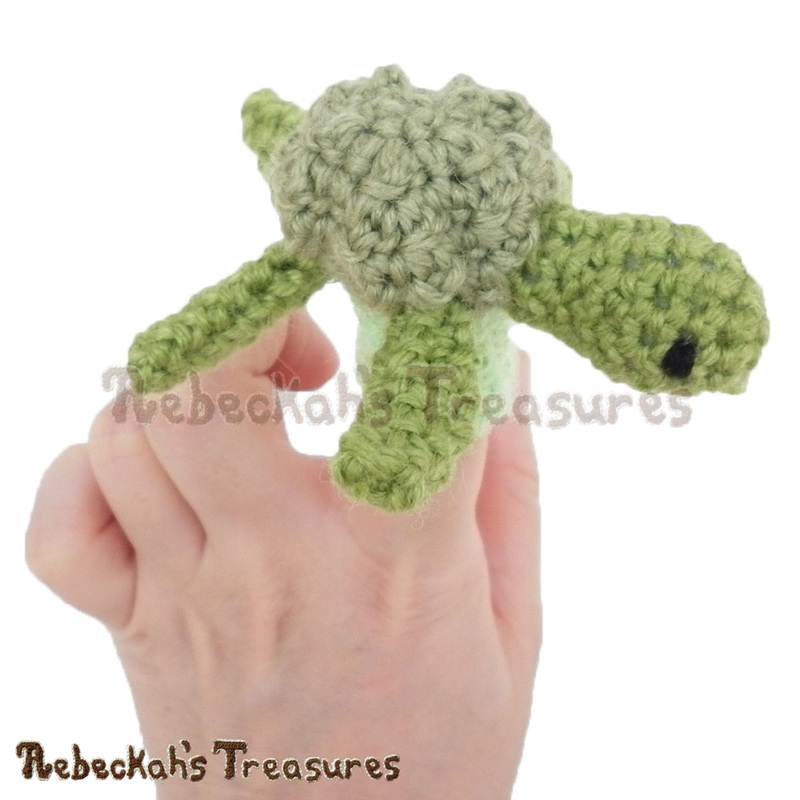
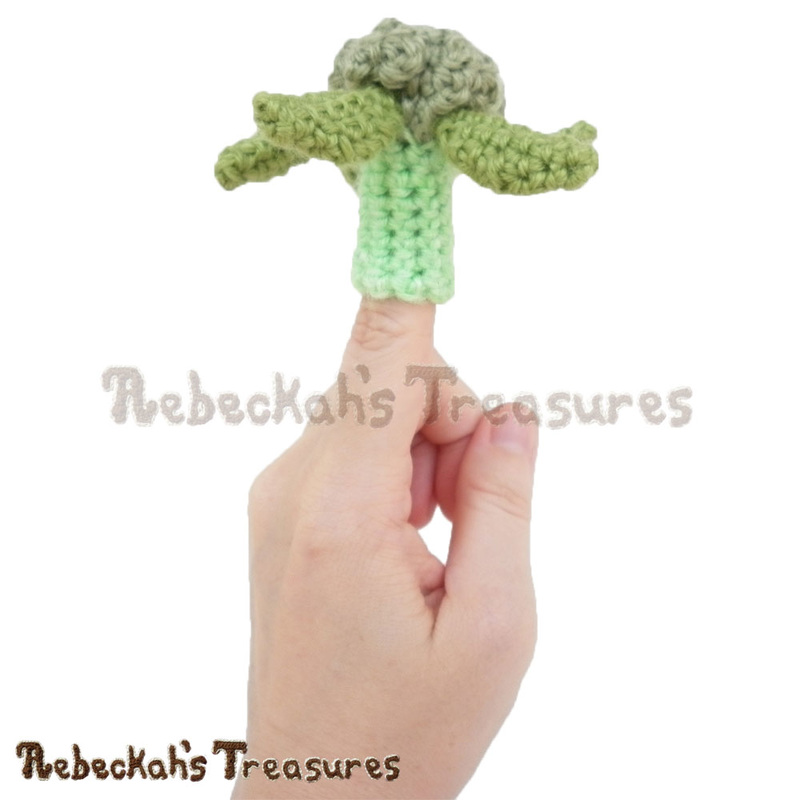
Looking for a new friend for your puppet theatre? Try this Finger Puppet Turtle Friend pattern!
Get ready for smiles, laughter and endless theatre productions starring this Turtle and Friends... 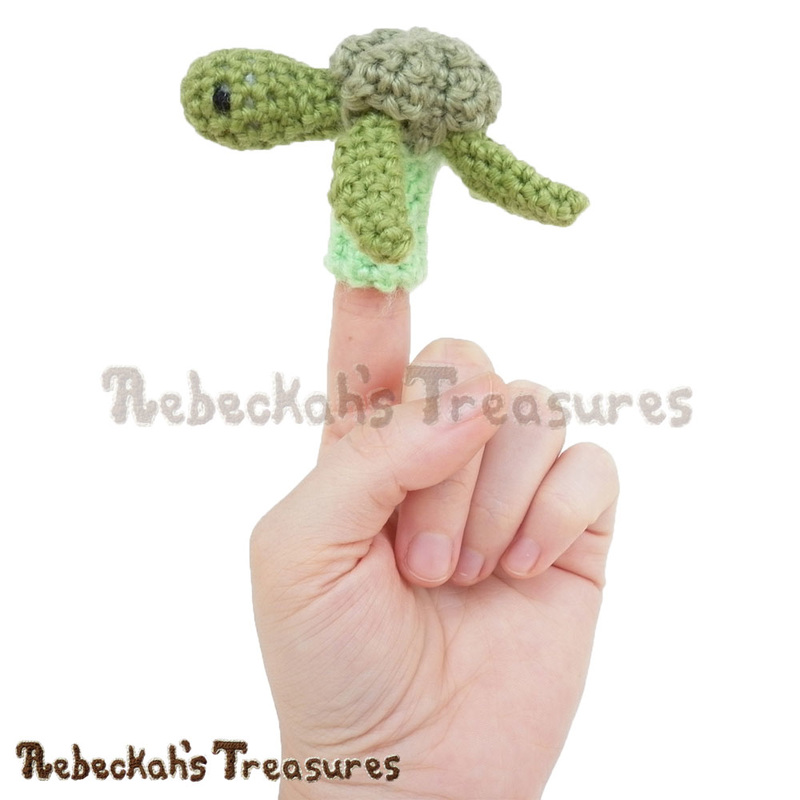
This minutes-to-make pattern includes written instructions and photo tutorials for crocheting this turtle puppet for slender, female adult fingers. Tips are included to adjust it to fit fingers of all sizes.
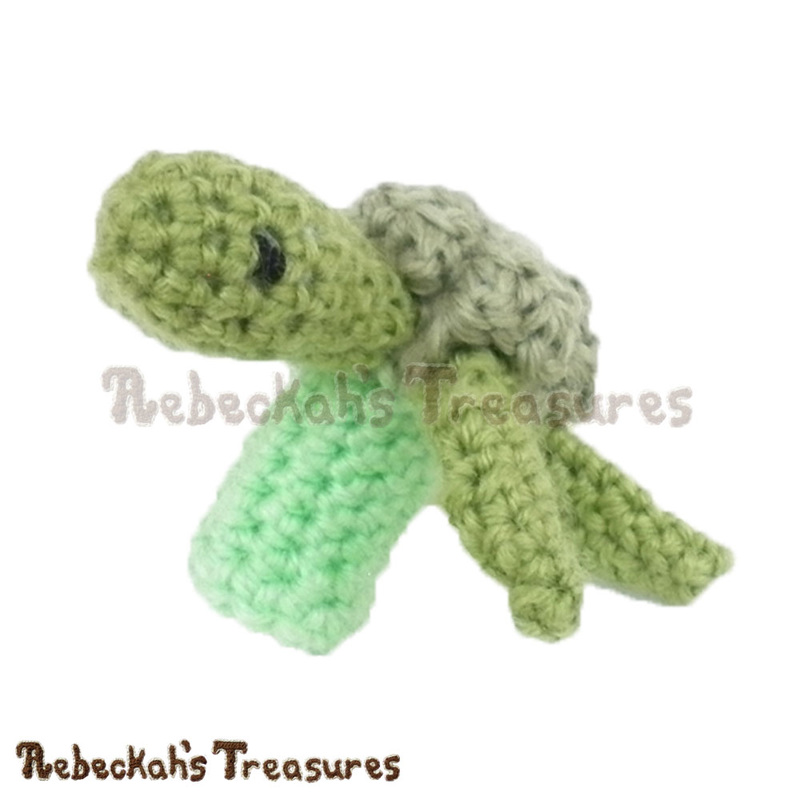
This project was inspired from my Pencil Topper Turtle Friend and my Mini Amigurumi Turtle Friend, which are also FREE crochet patterns. Gifting ideas include stocking stuffers for Christmas, trick-or-treats for Halloween and Birthday party favours. These would be especially great for teachers and caretakers of young children! Come Mid-November 2016, this crochet pattern will also be available as a printer friendly, 8-page eBook / PDF download, which includes all three variations of the mini turtle friends - the Amigurumi Toy, Pencil Topper & Finger Puppet. Stay Tuned! Or learn more about the Mini Turtle Friends...
This pattern is copyrighted to Rebeckah Ferger of www.rebeckahstreasures.com. It is for personal use only. No part of this pattern may be copied or distributed in any way. If you sell what you make from this pattern, please credit me as the designer. All rights reserved, 2016.

You'll Need:
- less than 10m (2 grams / scraps) - turtle shell → a variegated or self-striping green is recommended! - less than 10m (2 grams / scraps) - turtle base → a mint or spring green is recommended!
Sizing:
Designed to fit a slender, female adult finger. The puppet base, which slips onto the finger, is approximately 1” (2.5 cm) in height. The turtle is 3.5” (9 cm) long; 4” (10 cm) wide.
Sizing can be adjusted by changing the yarn weight and hook size. Gauge:
10 single crochet stitches x 12 rows = 2” (5 cm), or 10 single crochet stitches fit around the finger snuggly but not too tight.
TIP: Yarn weight and hook size are flexible. Most thicker yarn weights such as, Fingering, Sport, DK or WW work great for turning it into a finger puppet. All you have to ensure before you begin, is 10 single crochet stitches wrap snuggly, but comfortably around the finger in question!
Turtle Finger Puppet Instructions:
IMPORTANT – Work all turtle pieces in order as they appear here!
Turtle's Head Instructions:
Make 1 The turtle’s head is worked continuously in rnds from front to back. Do NOT turn at the end of rnds unless directed otherwise to do so. *Side facing you = WS.
*Using Safety Eyes? Attach to stitches #3 and #9 of either rnd 3 or 4!
rnd 6: sc 2, sc2tog in BL, sc 4, sc2tog in BL, sc 2 (10 sts). rnd 7: [sc 2, sc2tog in BL] x 2, sc 2 (8 sts). rnd 8-9: sc 8 – 2 rnds, sl st join & f/o at the end of the last rnd (8 sts). Stuff head... Set aside for now.
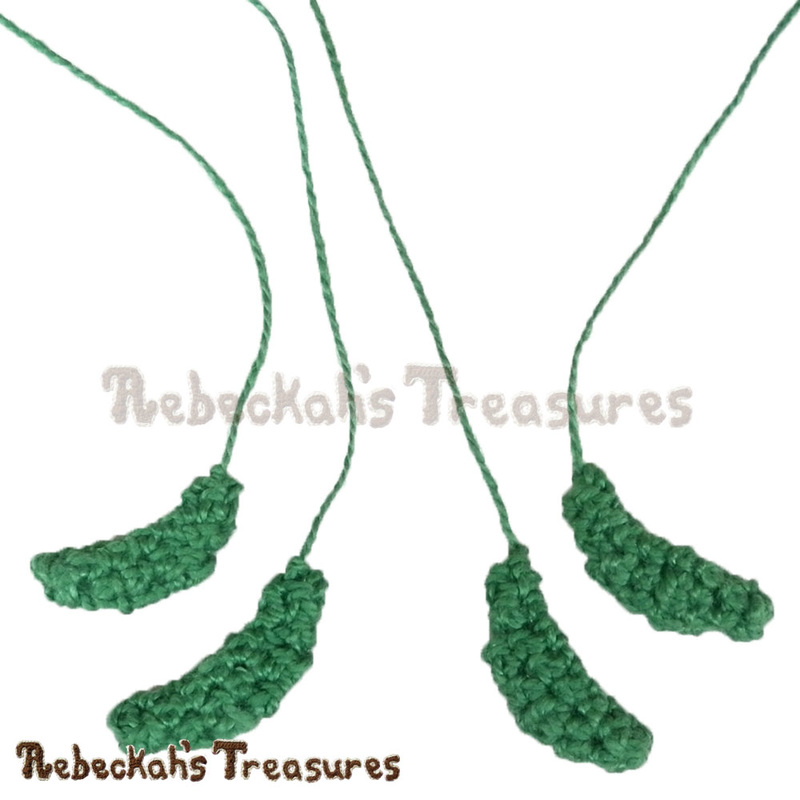
Turtle's Legs Instructions:
Make 4 The turtle’s legs are worked continuously in rnds from the toe-tip. Do NOT turn at the end of rnds unless directed otherwise to do so. *Side facing you = WS. Starting with turtle body colour... rnd 1: sc 3 into a magic circle (3 sts). rnd 2: sc 1, sc 2 into the next st, sc 1 (4 sts). rnd 3: sc 1, sc 2 into each of the next 2 sts, sc 1 (6 sts).
Turtle's Body Instructions:
Make 1 The turtle’s body is worked in two parts. The first part is worked in rows to create the turtle’s belly – where the first row is created directly onto the front legs and head, and the final row joins the back legs. For this part, ODD rows = Bottom or Turtle's Belly. The second part switches the last row of the first part into a rnd and works the top or the turtle’s back – where the first rnd is worked directly into the top-surface of the body’s belly. For this part, side facing you = WS.
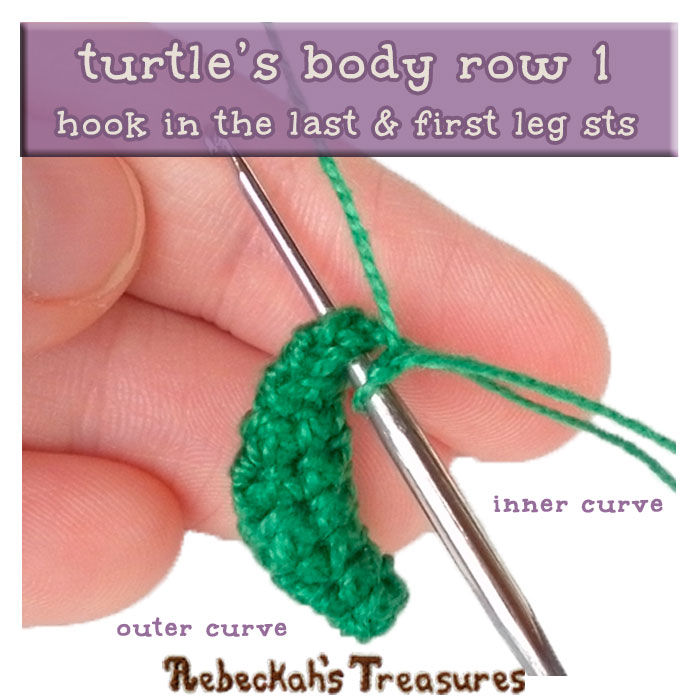
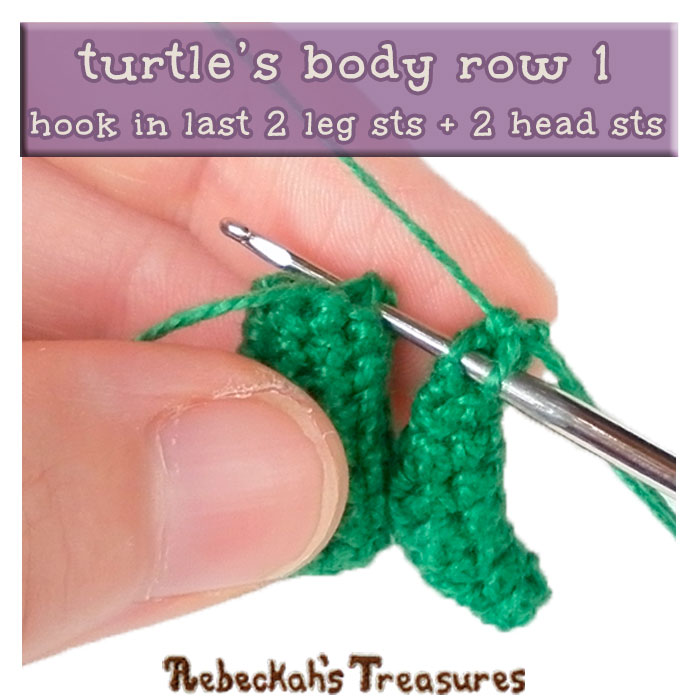
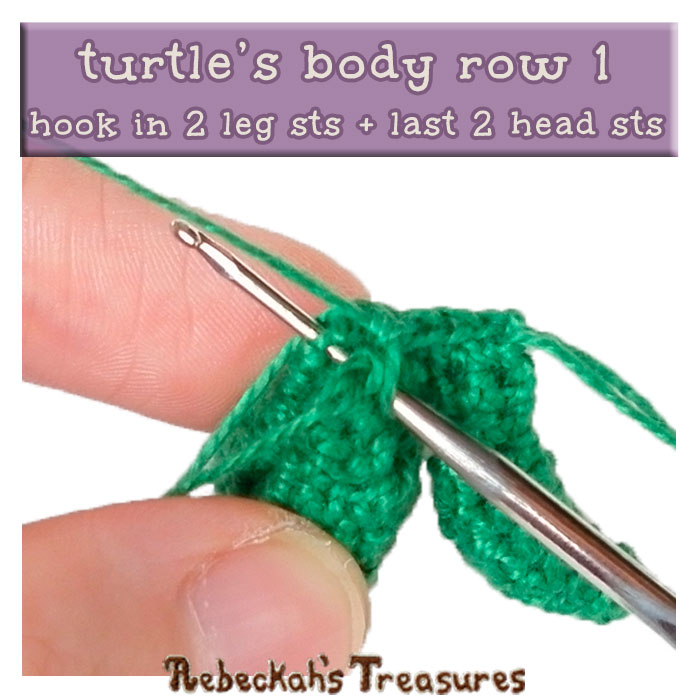
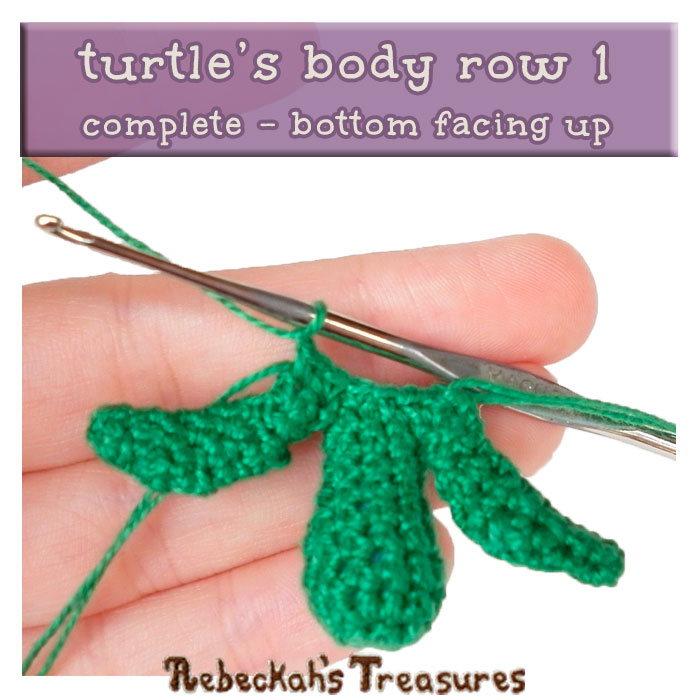
row 1: make a slip knot in turtle body colour... press opening of the first (right-front) leg flat → sc attach to the last + first sts so the inner curve of the leg is to your right and so you work thru 2 sts at the same time; insert hook into the rem 2 leg sts AND into the 2nd + 3rd head sts too (4 sts on hook) → work a sc here – first leg closed & joined; pressing the rem head sts tog in the same fashion → sc 2 as you join the next 2 sets of head sts tog (work thru 2 sts at the same time); press opening of the second (left-front) leg flat → insert hook into the 2nd + 3rd leg sts so the outer curve is to your right, now insert the hook into the rem 2 head sts too (4 sts on hook) → work a sc here – head closed & joined; sc 1 as you join the rem 2 leg sts tog (work thru 2 sts at the same time) – second leg closed & joined, ch 1, turn (6 sts).
*Tutorial pictures are worked in thread. Your turtle will be much bigger. Click images to enlarge them...
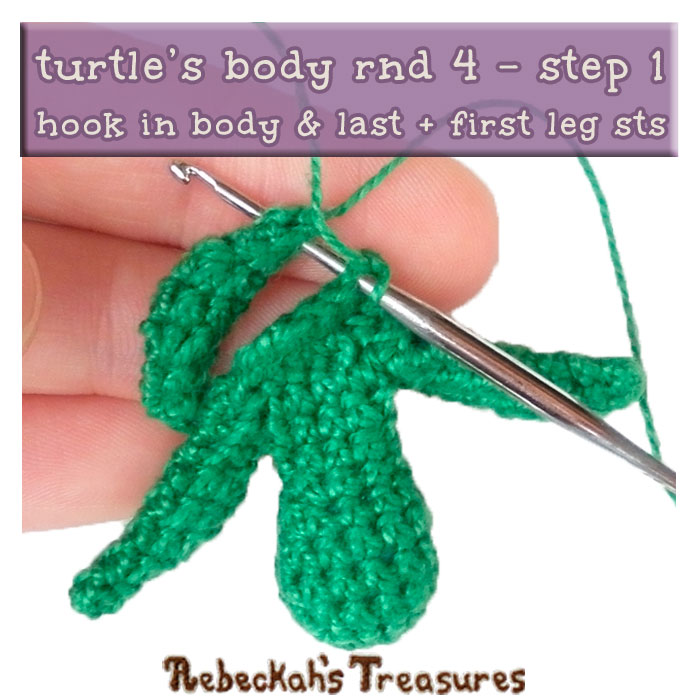
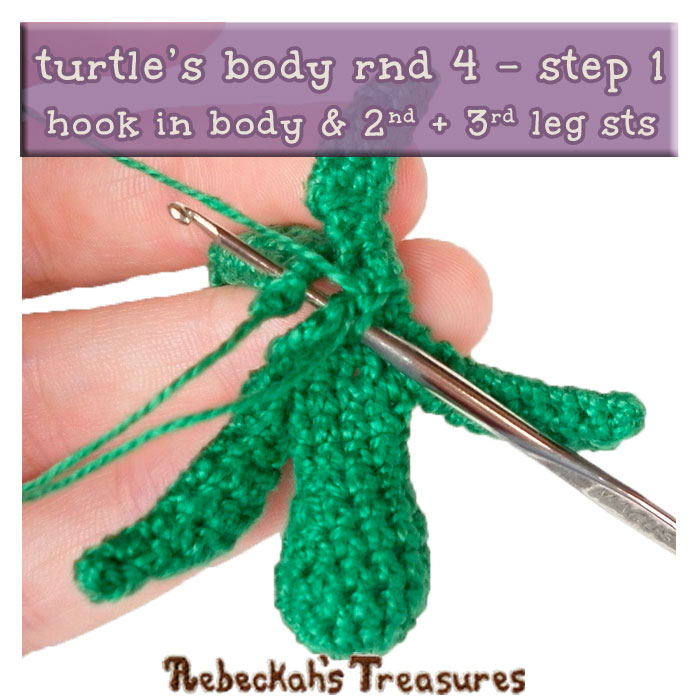
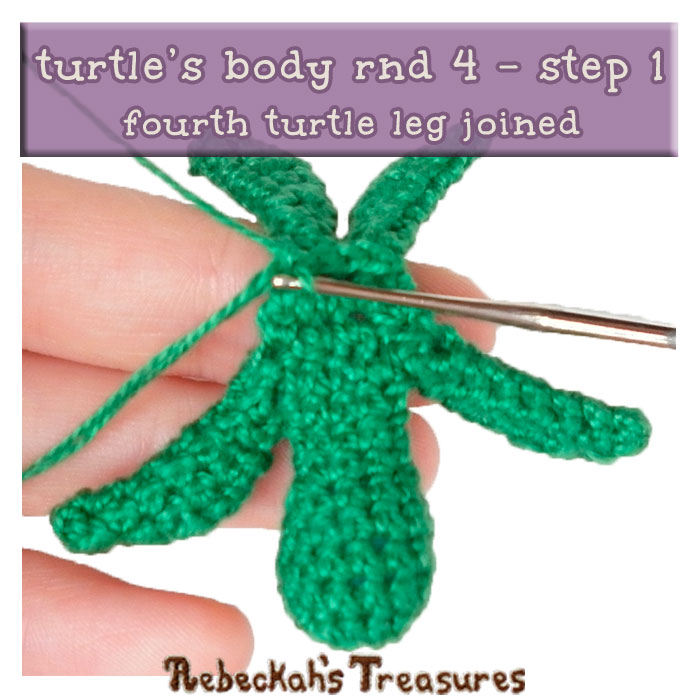
rnd 4 - Step 1: press opening of the third (left-back) leg flat, hold to the back of work so the inner curve is to your right and the outer curve is in the center → insert hook into the first body st AND into the last + first leg sts (3 sts on hook) → work a sc here; insert hook into the next body st AND into the rem 2 leg sts (3 sts on hook) → work a sc here – third leg closed & joined; press opening of the fourth (right-back) leg flat, hold to the back of work so the outer curve is to your right → insert hook into the next body st AND into the 2nd + 3rd leg sts (3 sts on hook) → work a sc here; insert hook into the last body st AND into the rem 2 leg sts (3 sts on hook) → work a sc here – fourth leg closed & joined (4 sts up to here);
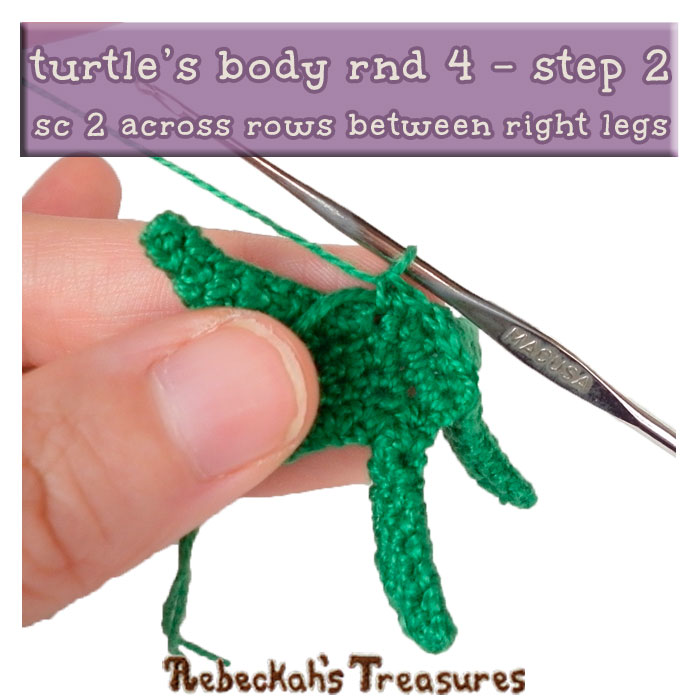
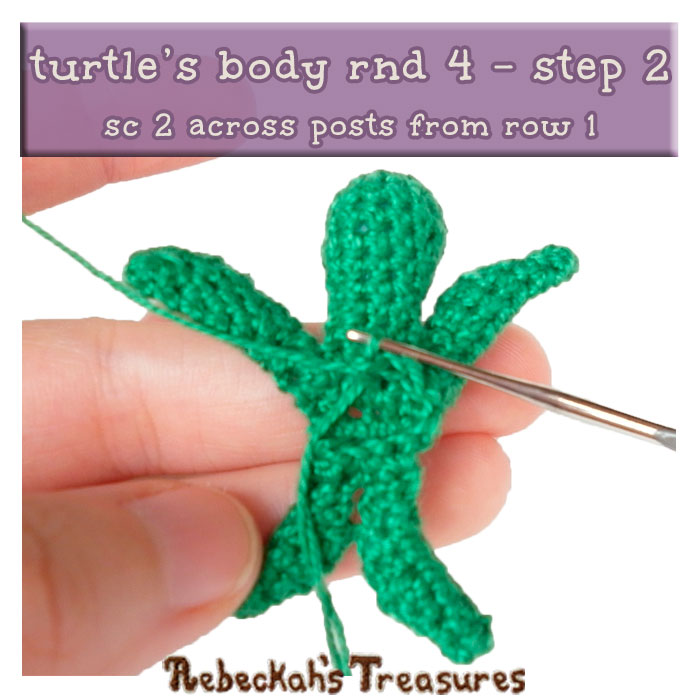
Continuing rnd 4 as you switch from rows to rnds... From here, work in continuous rnds and do NOT turn at the end of rnds unless directed otherwise to do so. *Side facing you = WS.
rnd 4 - Step 2: working in a counterclockwise direction → sc 2 across the body rows between the right legs, sc 1 into the body post between the right-front leg and the head, sc 2 across the body posts from row 1, sc 1 into the body post between the head and the left-front leg, sc 2 across the body rows between the left legs (12 sts).
rnd 5-6: sc 12 – 2 rnds (12 sts).
Stuff body... rnd 7: sc2tog in BL x 6, sl st join to first st of rnd, f/o with a small tail to close opening (6 sts). Use the small ending tail to close the opening of the turtle body. Weave in all ends or tuck them into the turtle’s body. Set aside for now. 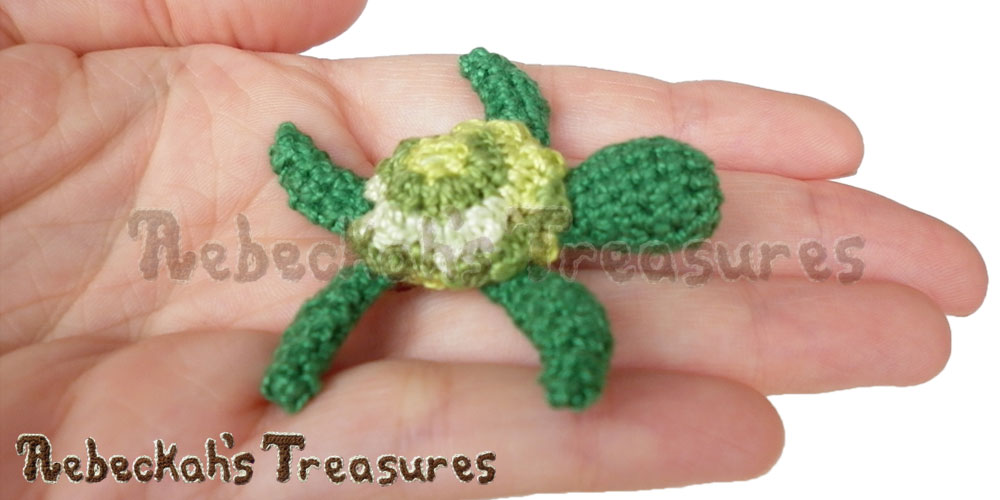
Turtle's Shell Instructions:
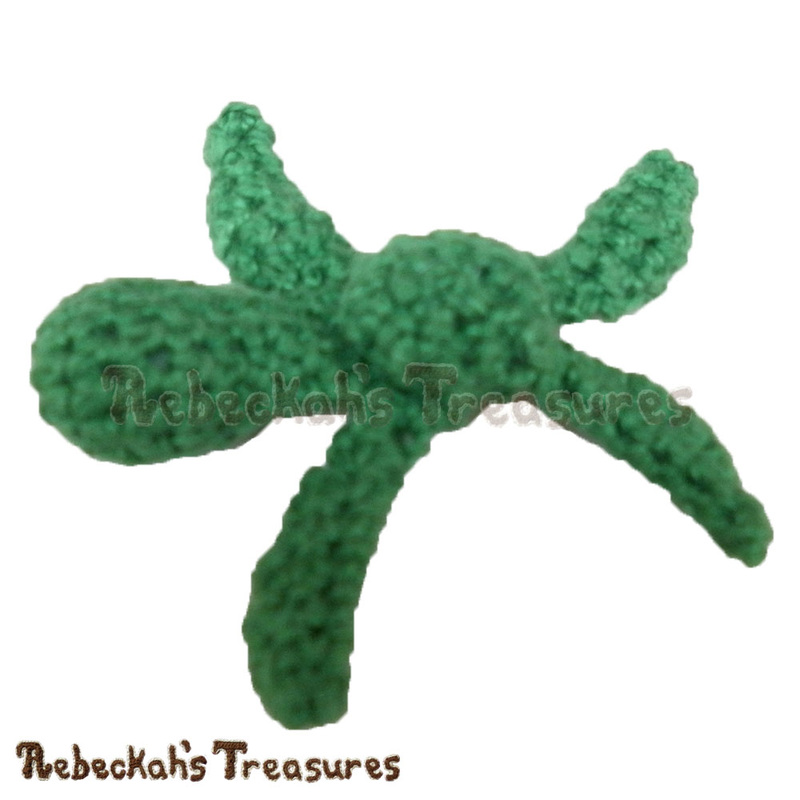
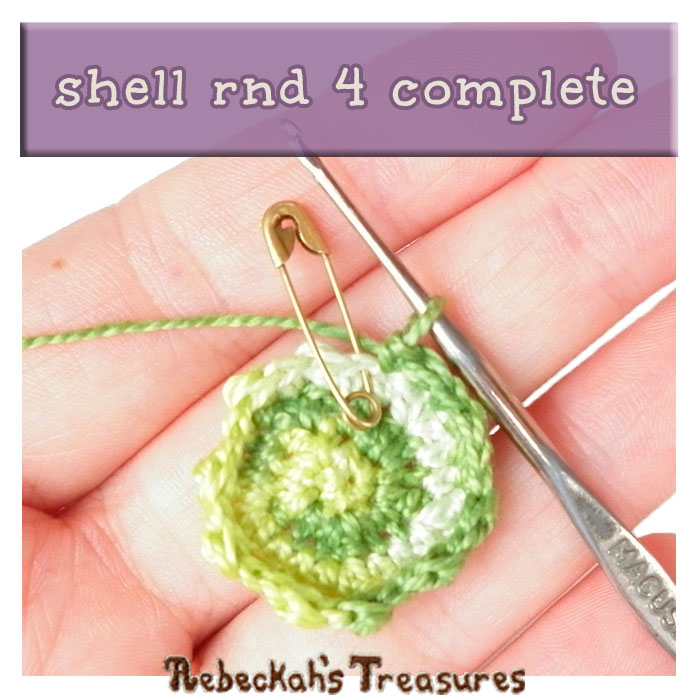
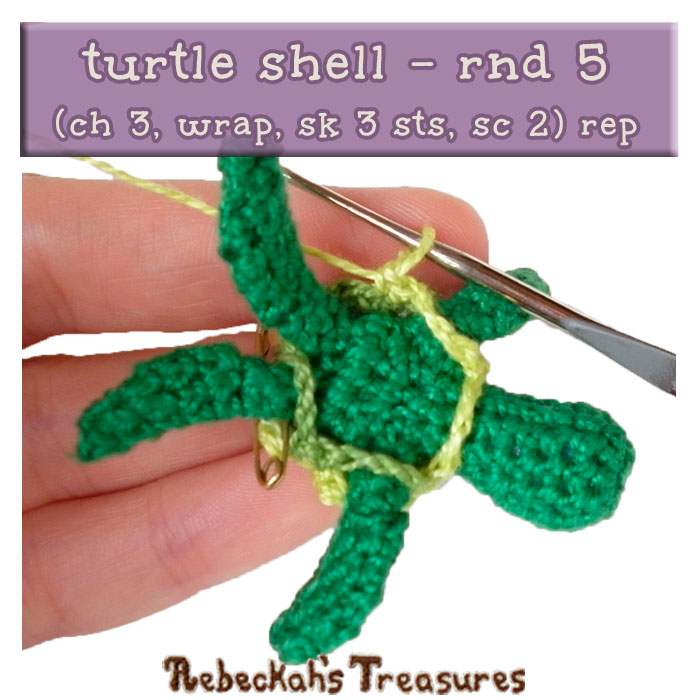
Make 1 The turtle’s shell is worked in continuous rnds from the center-outwards, where the final rnd wraps the shell onto the turtle’s body. Do NOT turn at the end of rnds unless directed otherwise to do so. *Side facing you = WS. Starting with turtle top shell colour... rnd 1: sc 5 into a magic circle (5 sts). rnd 2: (sc 1, dc 1, sc 1) into each st around (15 sts). rnd 3: sc 1, [*(dc 1, sc 1, dc 1) into the next st,** sc 2] x 4, rep from * to **, sc 1 (25 sts). rnd 4: [sc 1, dc 1] x 2, [sc 2, dc 1, sc 1, dc 1] x 4, sc 1 (25 sts). This final rnd will wrap outer-shell around turtle’s body and create a base for the final part of the toy... rnd 5: sc 1, ch 3, place shell on top of body so the first st is in between the back legs and the turtle’s belly faces you → wrap the ch-3 over belly & across back-left leg, sk 3 sts of the shell, sc 2; ch 3, wrap the ch-3 over belly & across front-left leg, sk 3 sts of the shell, sc 2; ch 3, wrap the ch-3 over belly & across head, sk 3 sts of the shell, sc 2; ch 3, wrap the ch-3 over belly & across front-right leg, sk 3 sts of the shell, sc 2; ch 3, wrap the ch-3 over belly & across back-right leg, sk 3 sts of the shell, sc 1, sl st join to the first st of rnd, f/o (5 ch-sps).
Weave in all ends or tuck them into the turtle’s body.
Turtle's Eyes Instructions:
Make 2 Take a strand of black embroidery thread (or yarn) and thread it onto a tapestry yarn needle. Do not knot the ends tog. Instead leave a short tail on one side of the needle’s eye and a longer one on the other side. Insert needle into one stitch and up the next stitch on the first side of the turtle’s head, where you’d like the first eye to go. Wrap around stitches a few times until the eye looks just right. On the last wrap around for the first eye, cross over to the same position on the other side of the turtle’s head. Rep the same wrapping around of stitches. On the last wrap around for the second eye, cross back over to the stitch with the starting tail. Knot the ends tog, trim and tuck the ends into the turtle’s head. Alternatively, attach miniature googly eyes to each side of the head instead. Or use your preferred mini eyes.
Turtle's Puppet Base Instructions:
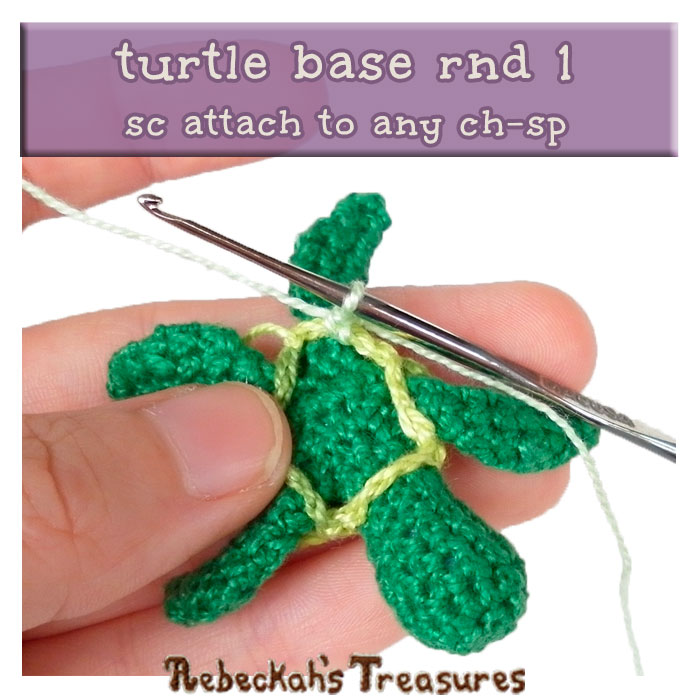
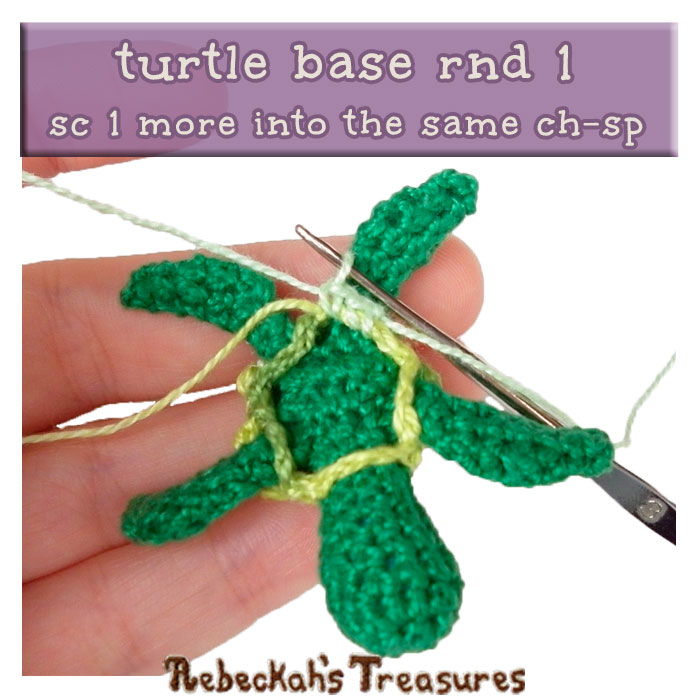
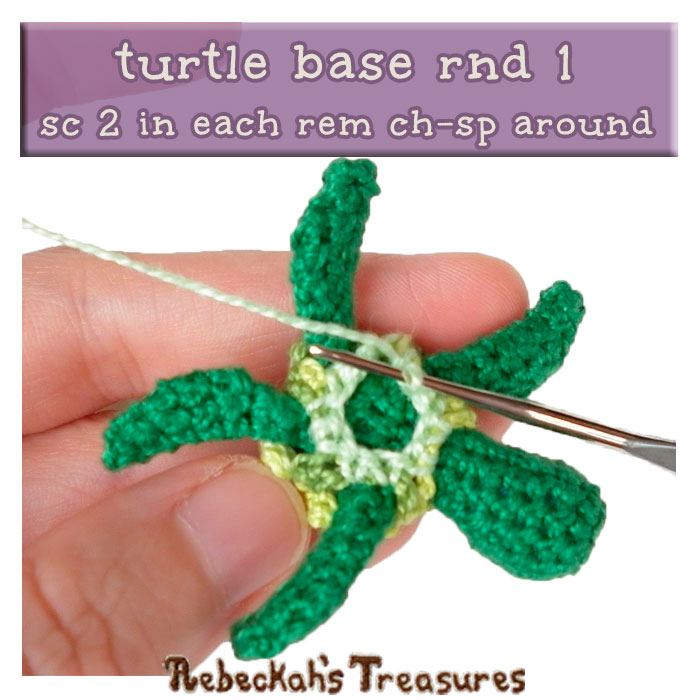
Make 1 The turtle’s puppet base is worked in continuous rnds from the top-down, starting from the ch-sps of the shell. Do NOT turn at the end of rnds unless directed otherwise to do so. *Side facing you = WS. rnd 1: make a slip knot in chosen shell belly colour & with the belly facing up → sc attach to any ch-3-sp from rnd 5 of the shell, sc again into the same sp, sc 2 in each rem ch-3-sp around (10 sts).
rnd 2+: sc 10 – 6 rnds for finger puppets OR until desired height is reached, sl st join & f/o at the end of the last rnd (10 sts). *The number of rep rnds may vary according to your preference.
Weave in all ends. Attach to your favourite stationery staple or finger!
Thanks so much for visiting today!
If you have any questions, or need pattern help, comment below OR visit my one of my groups / communities on Facebook, Google+ or Ravelry. Have a tremendous day!
 

Hello Visitor and Welcome to Rebeckah's Treasures... I am a Norwegian/Canadian currently studying Midwifery in the UK. I love to crochet! At Rebeckah's Treasures, I share my crochet patterns and treasures. I hope they inspire you to crochet your own little treasures too... 
Comments
|


Hello, my name is Rebeckah.
I hope my crochet inspires you to create your very own treasures! Learn more about me... Categories
All
Archives
October 2021
© 2012-2021 Rebeckah Ferger
All rights reserved. Disclaimer: This website makes use of sponsored and/or affiliate links. Please see this page for more information.
|
- Home
-
-
- Special Offers
- New Releases
- Accessory Crochet Patterns
- Afghan Square Crochet Patterns
- Amigurumi Crochet Patterns
- Applique Crochet Patterns
- Baby Crochet Patterns
- Dolly Crochet Patterns
- Fashion Doll Crochet Patterns
- Free Downloads
- Holiday Crochet Patterns
- Tapestry Crochet Patterns
- Under the Sea Crochet Patterns
- Wedding Crochet Patterns
- Disclaimer and FAQs
-
-
- Free Crochet Patterns
- New Free Releases
- Free Accessory Crochet Patterns
- Free Afghan Square Crochet Patterns
- Free Amigurumi Crochet Patterns
- Free Applique Crochet Patterns
- Free Baby Crochet Patterns
- Free Dolly Crochet Patterns
- Free Fashion Doll Crochet Patterns
- Free Guest Crochet Patterns
- Free Holiday Crochet Patterns
- Free Tapestry Crochet Patterns
- Free Under the Sea Crochet Patterns
- Free Wedding Crochet Patterns
- Free Crochet Patterns Coming Soon
Welcome Visitor! I hope you enjoy my treasures.


 RSS Feed
