|
Disclaimer: This website makes use of sponsored and/or affiliate links. Please see this page for more information.
Looking for quick and easy last minute gifts to crochet?
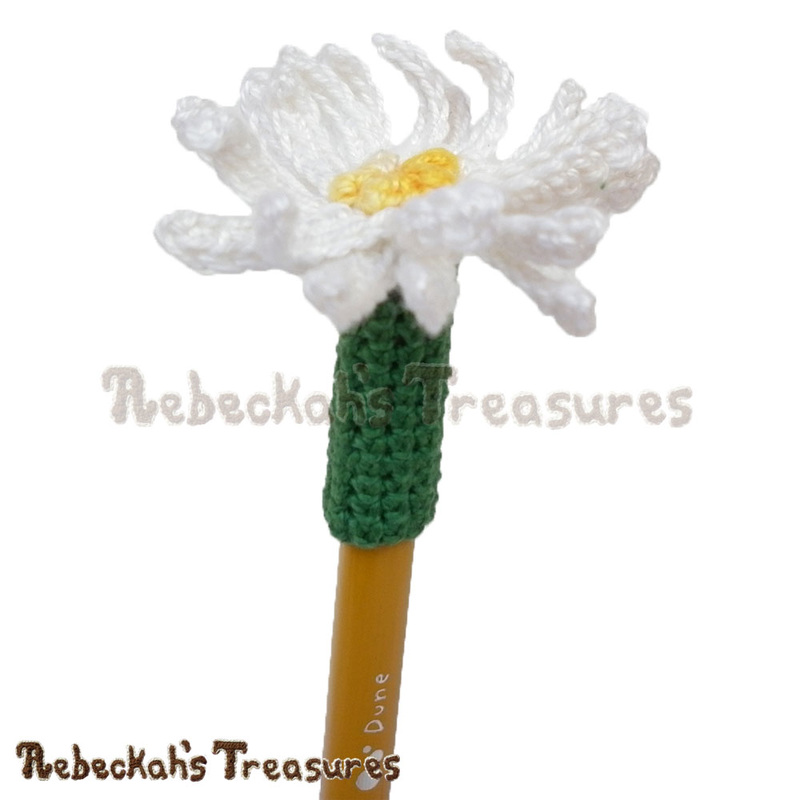
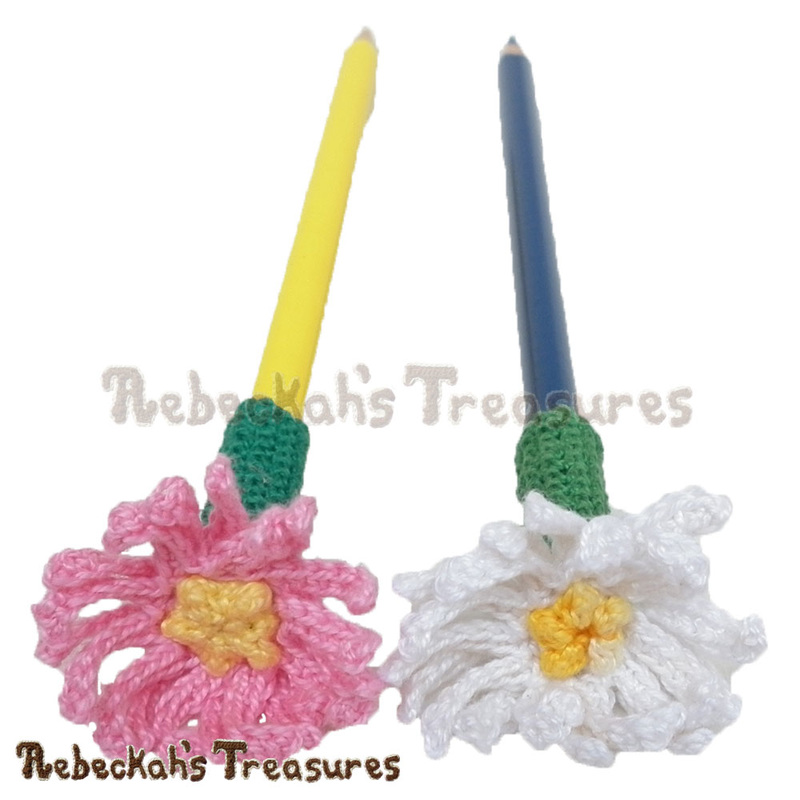
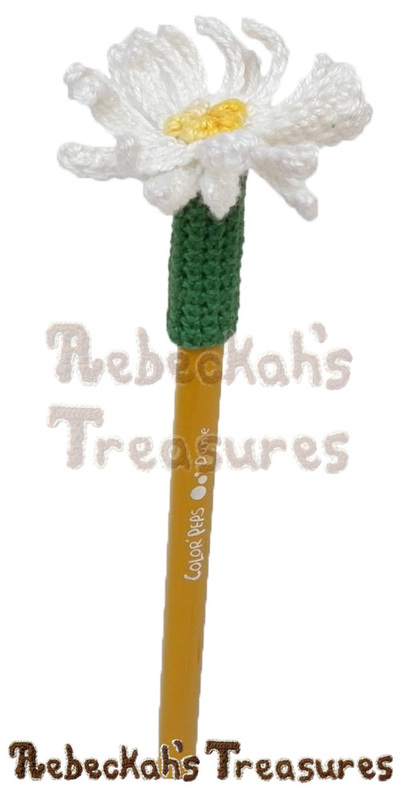
Try this delicate Dainty Daisy Pencil Topper pattern. It's perfect for all ages and works great for last-minute or bulk gifting events!
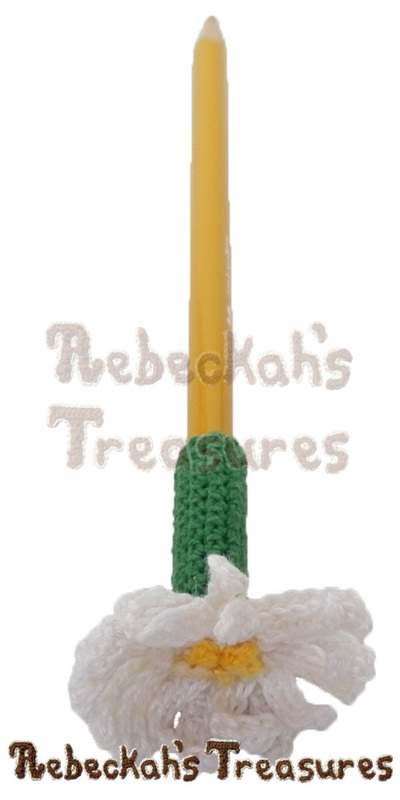
This minutes-to-make pattern includes written instructions and photo tutorials for crocheting this floral pencil topper for standard issue pencils and pens. Plus, tips are included for turning this topper into a finger pencil instead!
This project was inspired from an idea I had while dreaming. See Dreaming of Pencil Toppers for the full story and to see more pencil topper designs. Gifting ideas include stocking stuffers for Christmas, trick-or-treats for Halloween, party favours and back-to-school accessories. My favourite idea is to make several for a Teacher's appreciation bouquet with various stationery staples in a coffee mug! This crochet pattern is also available as a printer friendly, 5-page PDF download. GRAB IT HERE for only $1.75, OR SIGN UP for Rebeckah's Newsletter and grab this one or another pattern of your choosing (from the loyalty program list) for FREE in the next edition!
This pattern is copyrighted to Rebeckah Ferger of www.rebeckahstreasures.com. It is for personal use only. No part of this pattern may be copied or distributed in any way. If you sell what you make from this pattern, please credit me as the designer. All rights reserved, 2016.
You'll Need:
Sizing:
Designed to fit a standard pencil or pen when using lace weight yarn. The base of this pencil topper, the part that slips onto the pencil, is approximately 1” (2.5 cm) in height.
Sizing can be adjusted by changing the yarn weight and hook size. Gauge:
20 single crochet stitches x 24 rows = 2” (5 cm), or 10 single crochet stitches fit around the pencil snuggly but not too tight.
TIP: Thread/Yarn weight and hook size are flexible. Most lace or fine weight yarns will work well for creating a pencil topper. Whereas, thicker yarn weights such as DK or WW work great for turning it into a finger puppet. All you have to ensure before you begin, is 10 single crochet stitches wrap snuggly, but comfortably around the pencil, pen, chalk, finger or whatever staple you wish to accessorize! Pattern Notes:
You should be familiar with basic crochet stitches (chs, sl sts, sc, tr), working in rows, rounds, and how to do increases and decreases.
Additional notes are included below... Dainty Daisy Pencil Topper Instructions:
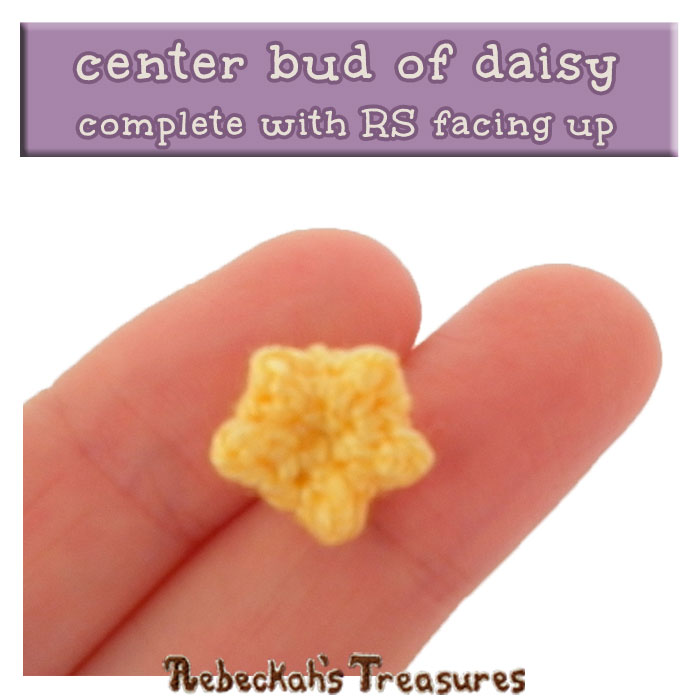
This daisy pencil topper is worked in three parts. The first part creates the petals, the second part creates the flower center bud and the final part creates the stem base.
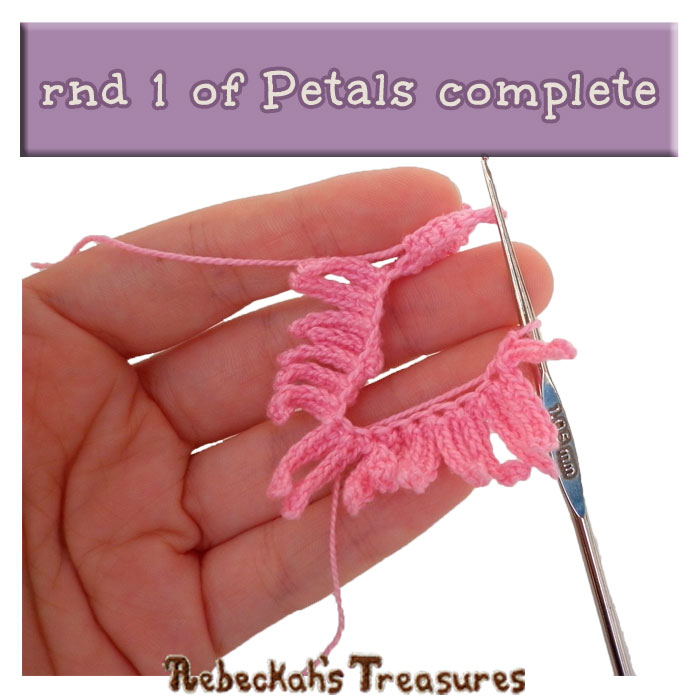
Coil the string of petals, so that the last 10 created petals rest evenly on top of the first 10 petals...
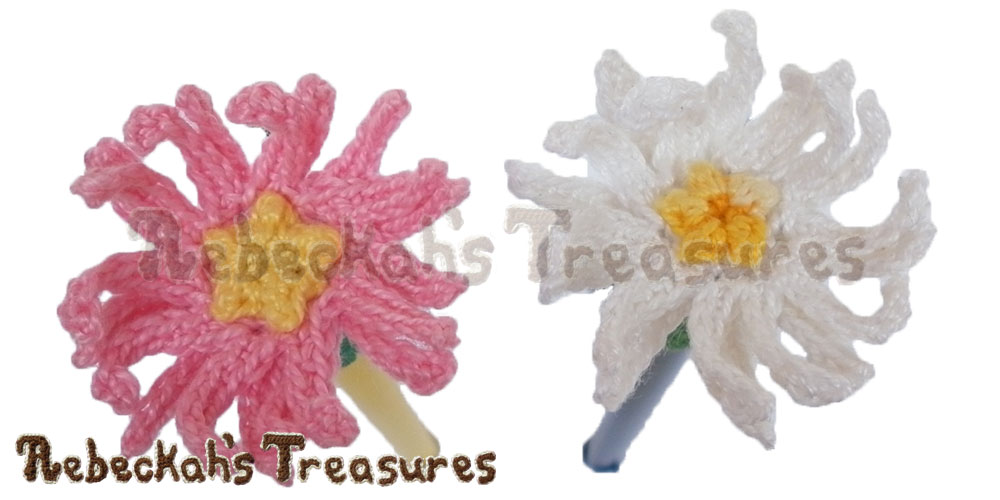
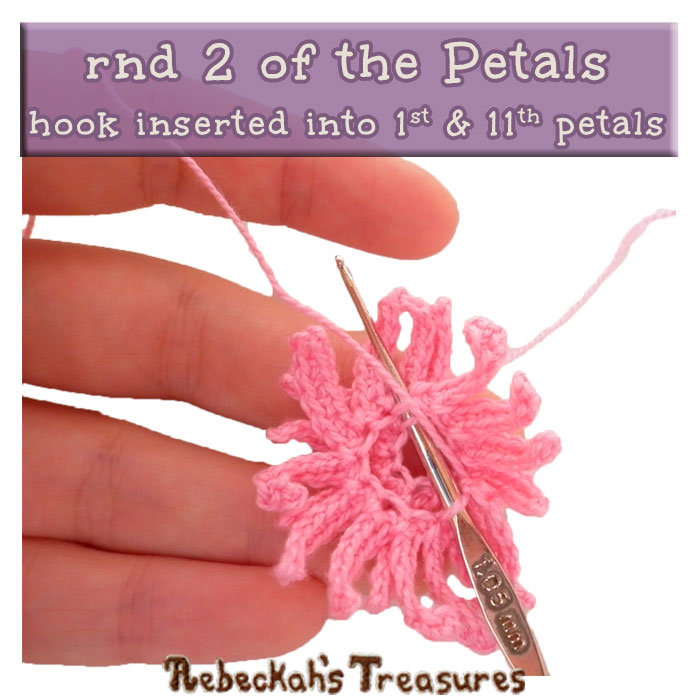
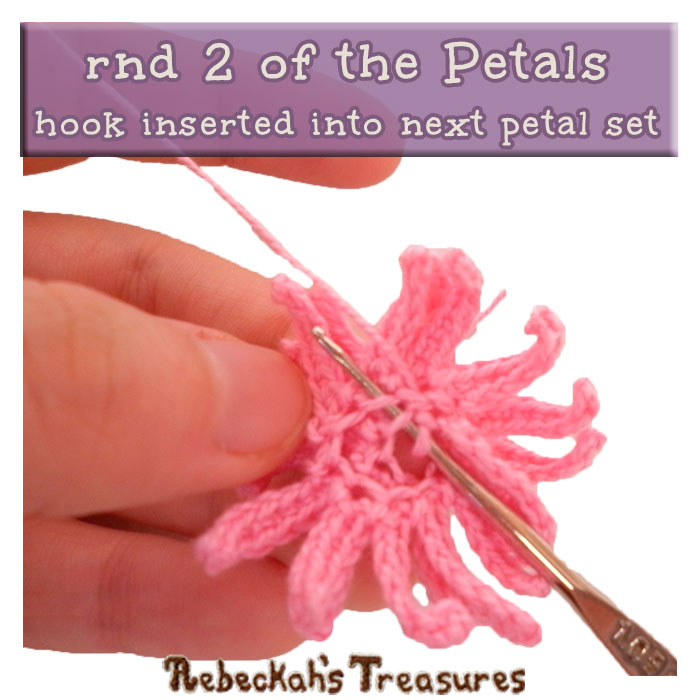
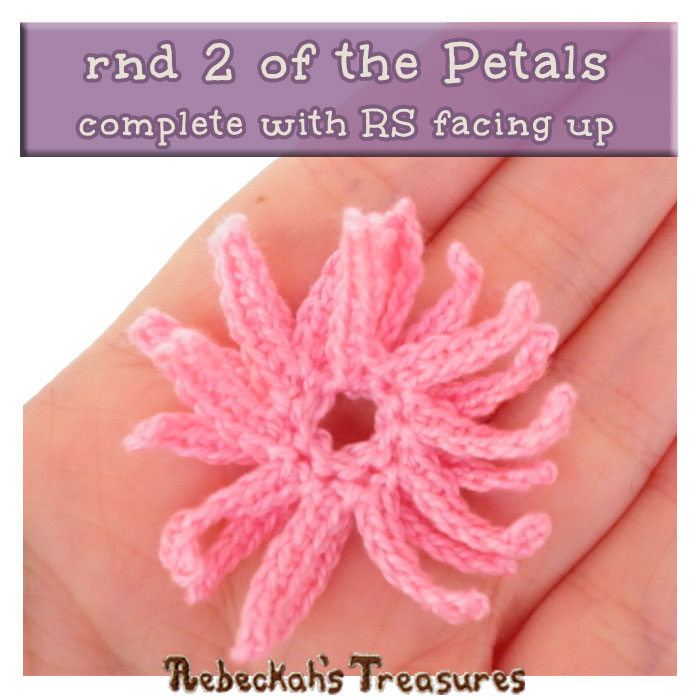
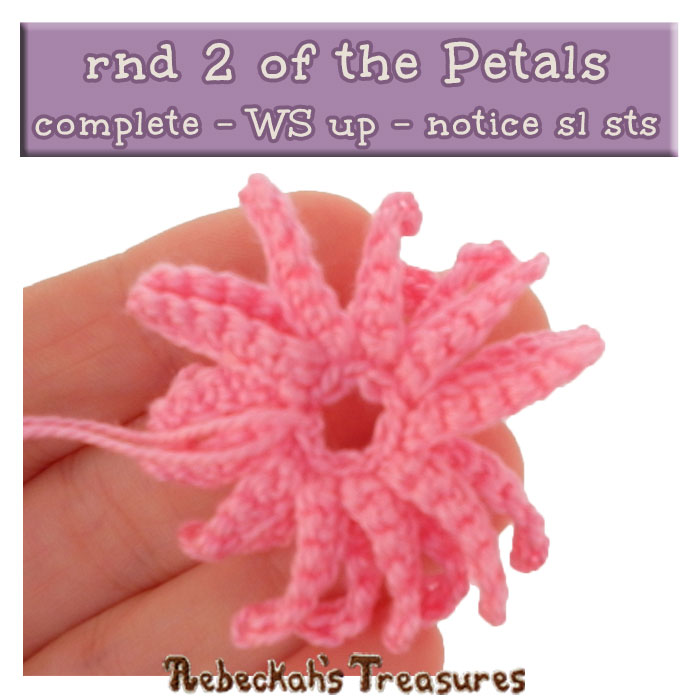
rnd 2: sl st join tog the bottom of the 1st petal created to the bottom of the 10th petal from hook - a.k.a. the 11th petal created (hook goes into the 1st st first and the 10th st second - both from WS/bottom to RS/top), now working in a counterclockwise direction → (sl st join tog the next petals on the bottom & top) rep around so that the 2nd created is paired with the 9th from hook, the 3rd with the 8th and so on, ch 1, f/o (10 sts). *See tutorial pics below for this rnd. Below the tutorial pictures, see an alternative method for crocheting rnd 2 if this is too challenging for you. *PLEASE NOTE: Petal tutorial pictures are worked in pink so you can see the stitches better.
Alternatively, if you are having troubles with rnd 2, fold the petals in half – WS pressed tog, and sl st the bottom of the petals tog this way instead. Make sure to join the ends tog to form a circle with the petals as you finish.
Base Stem Instructions:
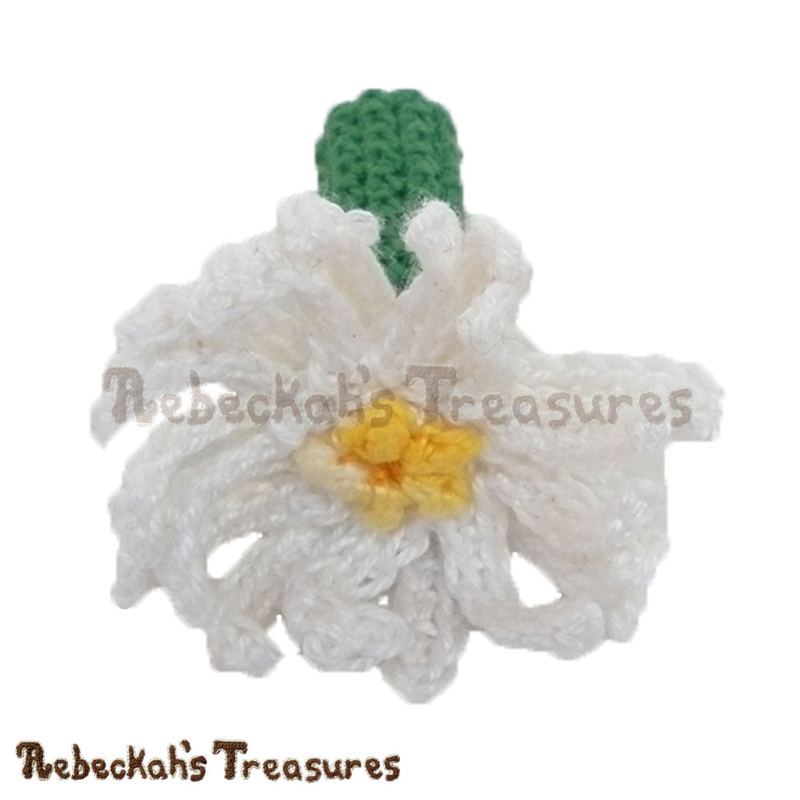
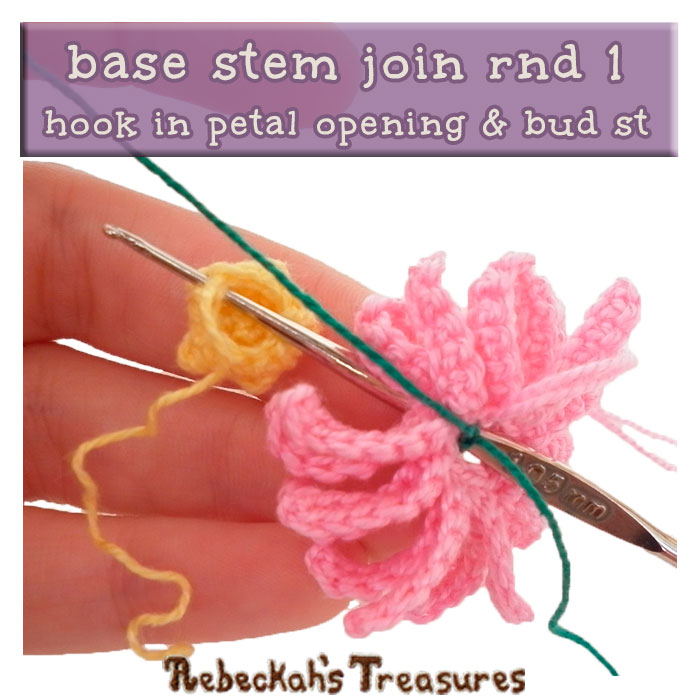
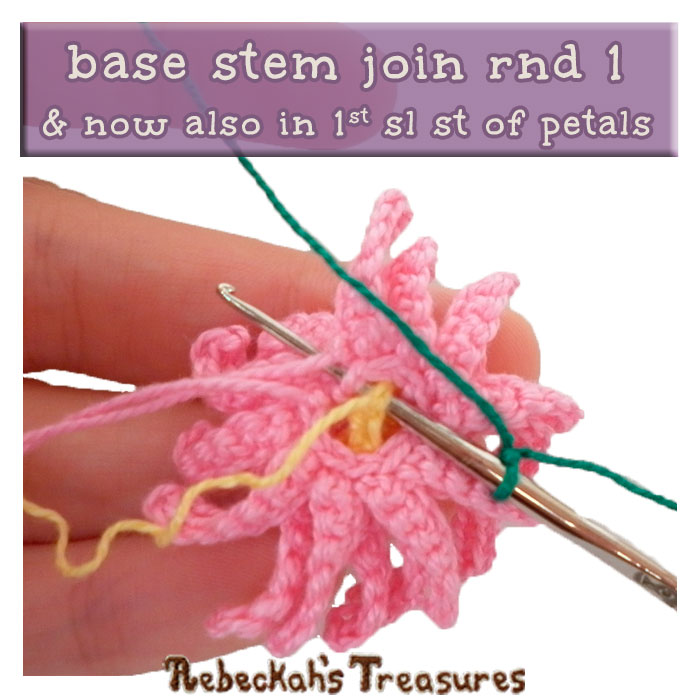
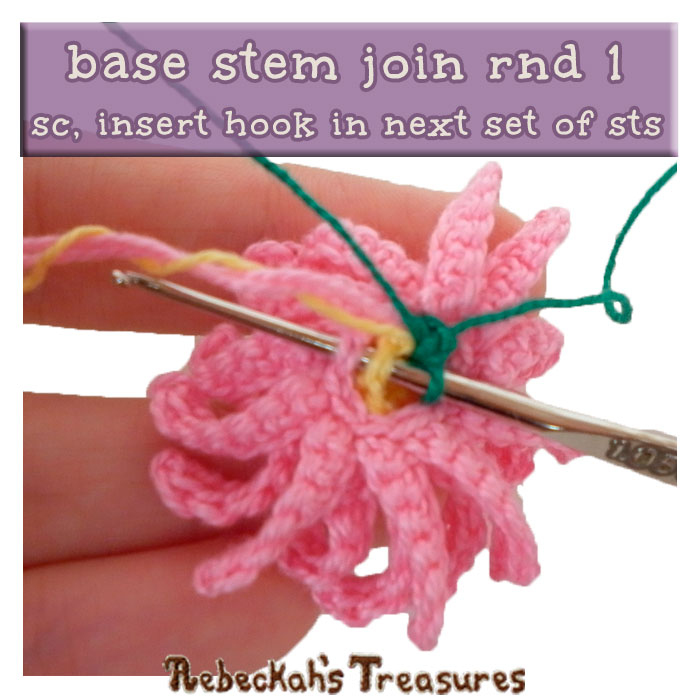
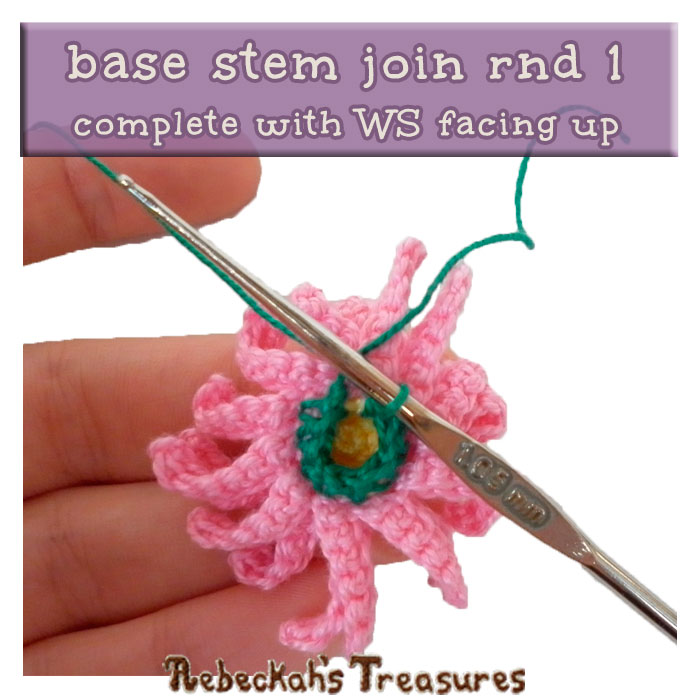
Make 1 The base of this daisy pencil topper is worked in continuous rnds from top to bottom and joins all the pieces tog. Work continuously and do NOT turn at the end of rnds. *Side facing you = WS. The first rnd joins the first two pieces tog and is the first rnd of the stem. Before you begin, place the daisy center on top of the petal opening, so both pieces have their RS facing the same direction. rnd 1: make a slip knot in chosen stem thread colour & with the bottom of both the daisy petals & center bud facing up → sc join tog ONE st of the daisy center bud to ONE st of the daisy petals, [sc join tog the next st of the daisy center bud to the next st of the daisy petals] x 9 (10 sts). *Work in a counterclockwise direction and ALWAYS insert hook through the opening of the petals into center bud piece first & petal piece second. NOTE: It can be bit tricky to manipulate all the pieces as you work rnd 1. To help you out, here it is broken down further: Step 1: Insert your hook through the opening of the petal piece from the bottom to the top (a.k.a. WS to RS). Step 2: Insert your hook through a st from the last rnd of the center bud piece from WS to RS. Step 3: Insert your hook through a st from the last rnd of the petal piece from RS to WS. Now there are two sts on your hook. Step 4: Work a sc into both sts at the same time. Step 5: Rep steps 1-4 for all sts around.
rnd 2-14: sc 10 – 13 rnds or until desired height is reached, sl st & f/o at the end of the last rnd (10 sts). *The number of rnds you work here may vary according to your project and preference.
Weave in all ends. Attach to your favourite stationery staple!
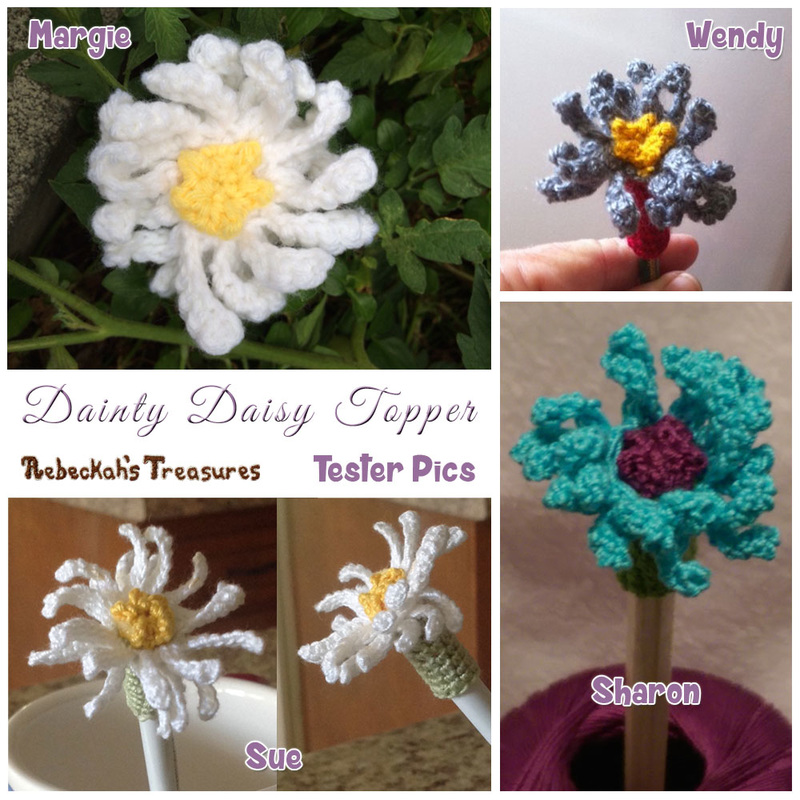
Thanks Margie E., Sharon E., Sue B. and Wendy B. for testing the Dainty Daisy Pencil Topper/Finger Puppet crochet pattern for me, and thanks to Theresa P. for your help tech editing this pattern too!

Hello Visitor and Welcome to Rebeckah's Treasures... I am a Norwegian/Canadian currently studying Midwifery in the UK. I love to crochet! At Rebeckah's Treasures, I share my crochet patterns and treasures. I hope they inspire you to crochet your own little treasures too... 
Comments
|
Hello, my name is Rebeckah.
I hope my crochet inspires you to create your very own treasures! Learn more about me... Categories
All
Archives
October 2021
© 2012-2021 Rebeckah Ferger
All rights reserved. Disclaimer: This website makes use of sponsored and/or affiliate links. Please see this page for more information.
|
- Home
-
-
- Special Offers
- New Releases
- Accessory Crochet Patterns
- Afghan Square Crochet Patterns
- Amigurumi Crochet Patterns
- Applique Crochet Patterns
- Baby Crochet Patterns
- Dolly Crochet Patterns
- Fashion Doll Crochet Patterns
- Free Downloads
- Holiday Crochet Patterns
- Tapestry Crochet Patterns
- Under the Sea Crochet Patterns
- Wedding Crochet Patterns
- Disclaimer and FAQs
-
-
- Free Crochet Patterns
- New Free Releases
- Free Accessory Crochet Patterns
- Free Afghan Square Crochet Patterns
- Free Amigurumi Crochet Patterns
- Free Applique Crochet Patterns
- Free Baby Crochet Patterns
- Free Dolly Crochet Patterns
- Free Fashion Doll Crochet Patterns
- Free Guest Crochet Patterns
- Free Holiday Crochet Patterns
- Free Tapestry Crochet Patterns
- Free Under the Sea Crochet Patterns
- Free Wedding Crochet Patterns
- Free Crochet Patterns Coming Soon
Welcome Visitor! I hope you enjoy my treasures.














 RSS Feed
