|
Disclaimer: This website makes use of sponsored and/or affiliate links. Please see this page for more information.
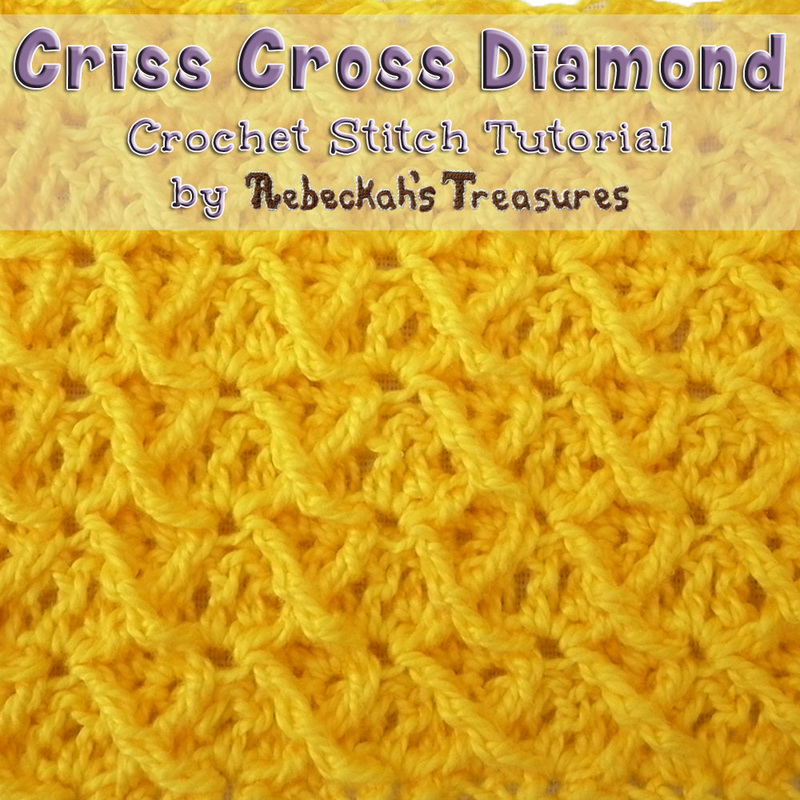
Back in the fall of 2013, I shared how to crochet the Criss Cross Diamond Stitch I designed when I was working on the "Criss Cross Diamond Romper Layette" I made for my auntie's first grand-baby.
It is my pleasure to announce that I have revised this stitch tutorial with clearer written instructions and now it also features both a photo tutorial and a video tutorial to boot!
This has to be one of my most favourite crochet stitches in the world! Though, I should point out that I am pretty biased about this one as it is the first crochet stitch I ever designed. I love the complexity, the versatility and the textured look of this stitch, and I hope you will too.
This stitch came to be when I was experimenting with a way to make smaller diamonds, so that the romper I made for my auntie could really pop and have a more textured look. As you will know if you have seen this stitch previously, it is similar to and inspired by the Diamond Stitch (links to video tutorial). However, this one differs in that it creates rows of "X's" that form the illusion of overlapping diamonds where the points come together. Hence why I decided to call it the criss cross diamond stitch. This stitch is much easier to work up than it appears... It is essentially a foundation row of single crochet, followed by two repeat rows. One row of double crochet first. Then, a row of single crochet and double treble crochet into posts of the previous single crochet / odd row. Easy, right? For this stitch, you should be familiar with basic crochet stitches (such as ch, sc & dc), tall crochet stitches (such as dtr) and surface crochet by means of working dropped post stitches. Also, if you would like to add shaping to your project, you should also be familiar with increases (working more than one stitch into the same space) and decreases (by means of the cluster version of the dc3tog). This section of the tutorial can be found in a separate post here. If you're new to any of these techniques, rest assured that either the photo or video tutorial below or both will help you master them. Let's get started! You'll Need:
Abbreviations: ~US terms are used~
Quick Notes About the Criss Cross Diamond Stitch:
The criss cross diamond stitch is created by working surface crochet into specific front post stitches from ODD rows of the project. It is always worked on an odd row. *This means odd rows = RS.
The very first row that you work this stitch is in row 3. Here you will alternate between working double treble crochet stitches into the single crochet posts from row 1 and single crochet stitches into row 2. The base row of the criss cross diamond stitch (a.k.a. row 3) is the only time where it is necessary to count stitches to figure out were the surface stitches should be made. All other criss cross diamond rows will be worked in a similar fashion into the top slants of the previous set of criss cross diamond stitches. Criss Cross Diamond Stitch Instructions:
You have two options to start your project with this stitch. The first option uses foundation single crochet (this is the preferred option, see Moogly's tutorial here), which helps you avoid having to crochet into chains, plus it gives the project a better stretch. The second option uses the foundation chains and a row of single crochet across them. Either option will work well.
Option 1 – Recommended Starting Method: If starting with foundation single crochet (FSC), you'll need to FSC (a multiple of 4 + 2 sts) in chosen colour until you reach your desired length. This gives you a multiple of 4 stitches with an extra anchor stitch on either side of your project and counts as row 1 for your project. Turn and proceed to row 2... *Note: If following the photo/video tutorials, you'll want to FSC 26. This equals 4 times 6 plus 2. Option 2 – Alternate Starting Method: If starting with foundation chains, you'll need to ch (a multiple of 4 + 3 chs) in chosen colour until you reach your desired length. Then for row 1, you'll sc in the 2nd ch from the hook and in each ch across. This gives you a multiple of 4 stitches with an extra anchor stitch on either side of your project. Turn and proceed to row 2... *Note: If following the photo/video tutorials, you'll want to ch 27. This equals 4 times 6 plus 3. Then for row 1 you'll sc 26. This equals 4 times 6 plus 2. row 2: dc across the row, ch 1, turn (same number of sts as row 1). *First dc can either be a ch 3 or a chainless starting double crochet (see moogly's tutorial here). For the purpose of this tutorial, an additional anchor single crochet stitch was added to either side of the work because the normal criss cross diamond stitch row starts and ends with a post stitch. If we didn't have an anchor stitch on each side, the sides of the project would be too loose. Most patterns I create with this stitch will only have one anchor stitch on either side. However, some projects will have more than one. Be sure to follow the pattern directions. Keeping this in mind... Break up the stitches in each row where you will being working the criss cross diamond into groups of 4 stitches and number them from 1-4 – do NOT count the anchor stitch(es) on either side of the project. This way, the stitches always line up and the following instructions make sense. Special Stitch Abbreviations:
Before we continue to row 3 of the project, where we'll work the criss cross diamond stitch, here are some special abbreviations for this stitch...
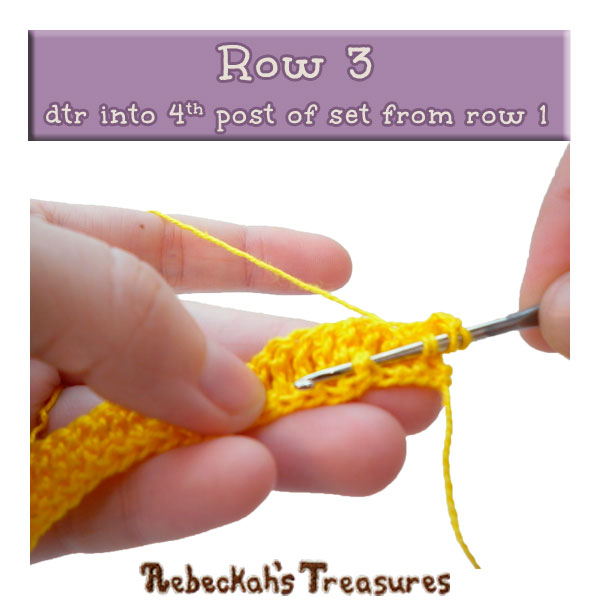
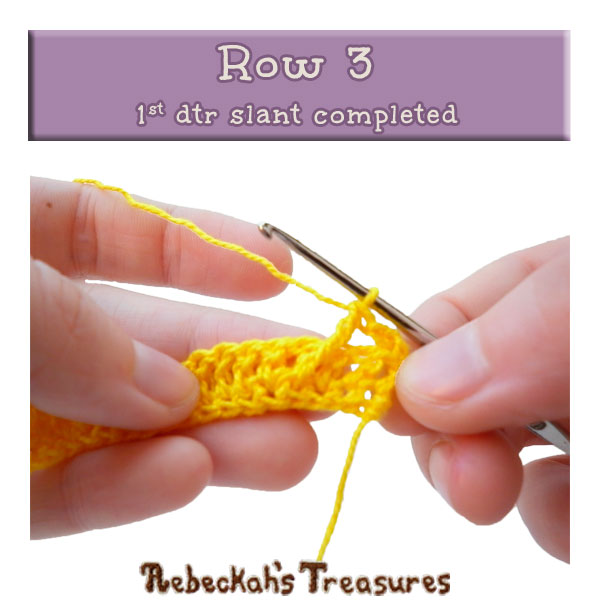
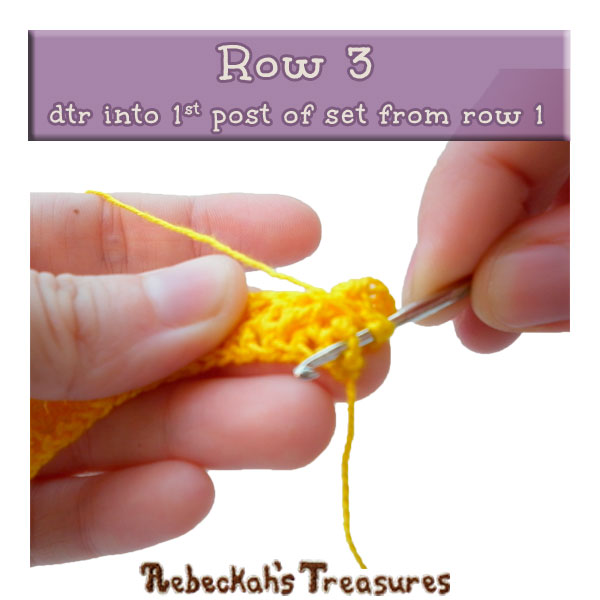
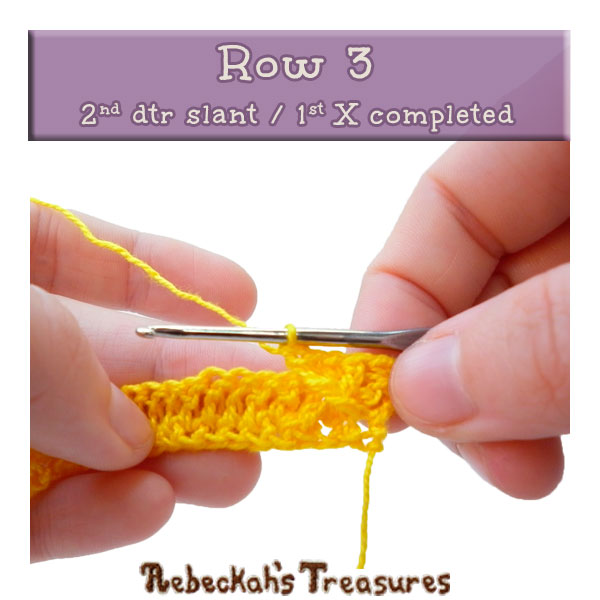
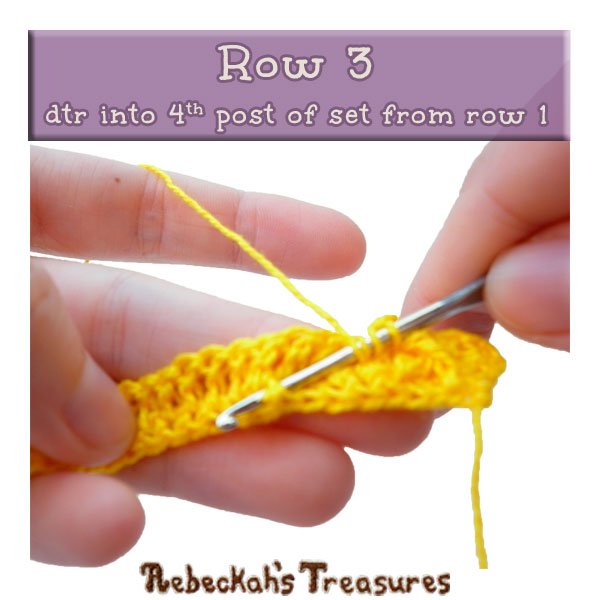
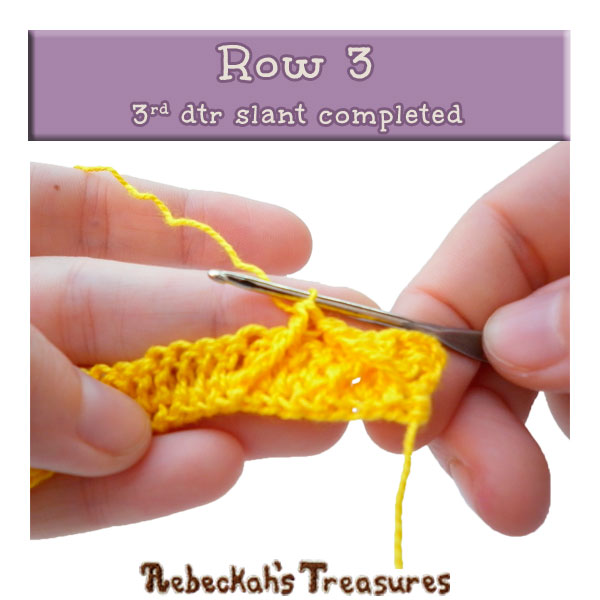
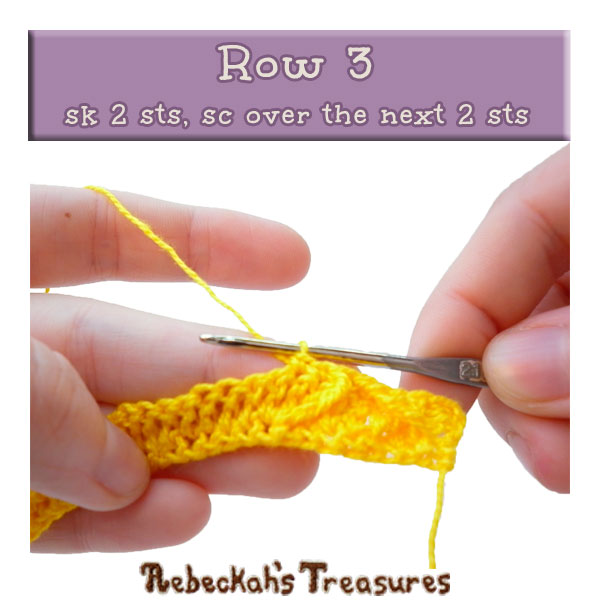
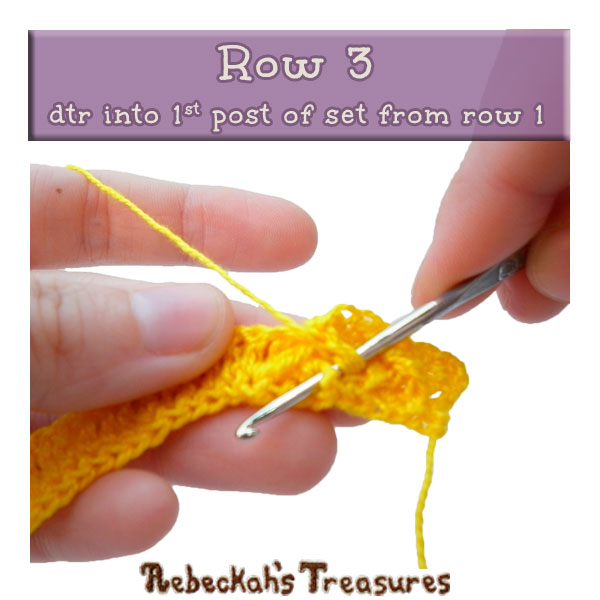
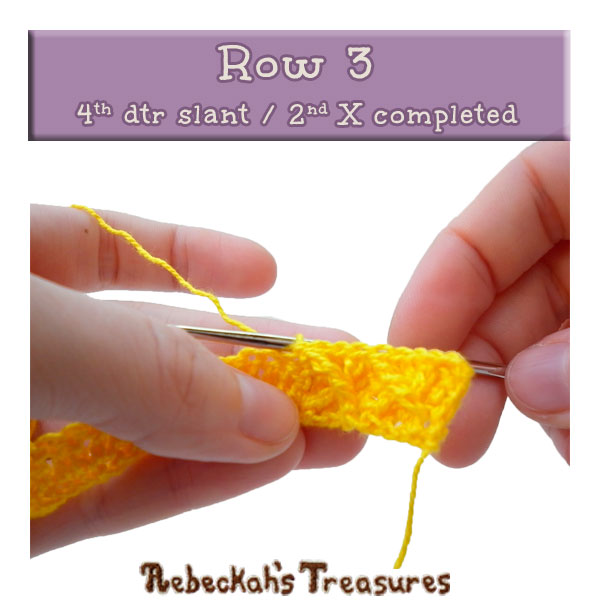
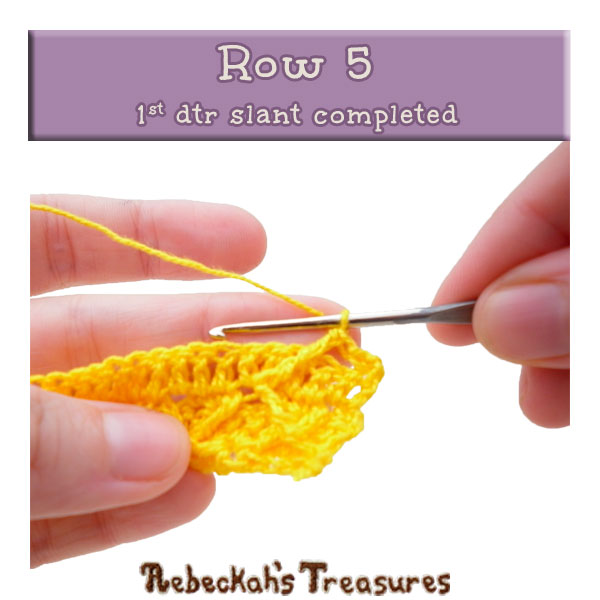
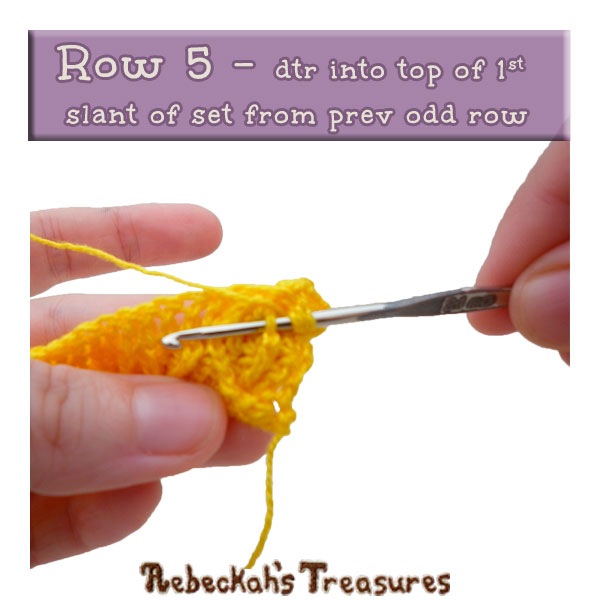
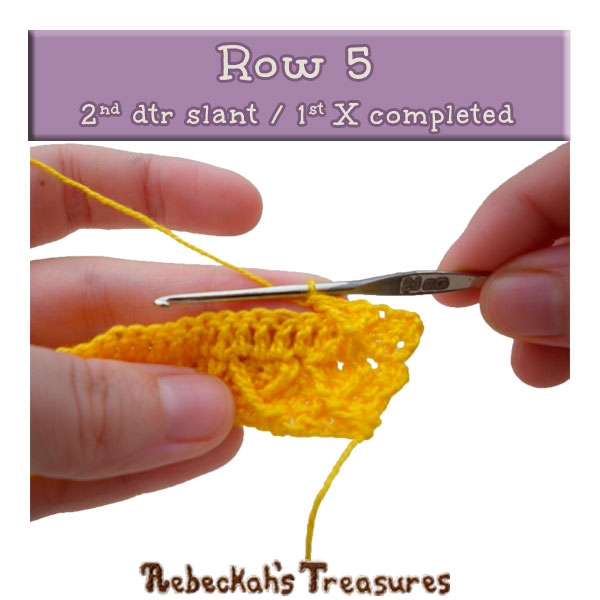
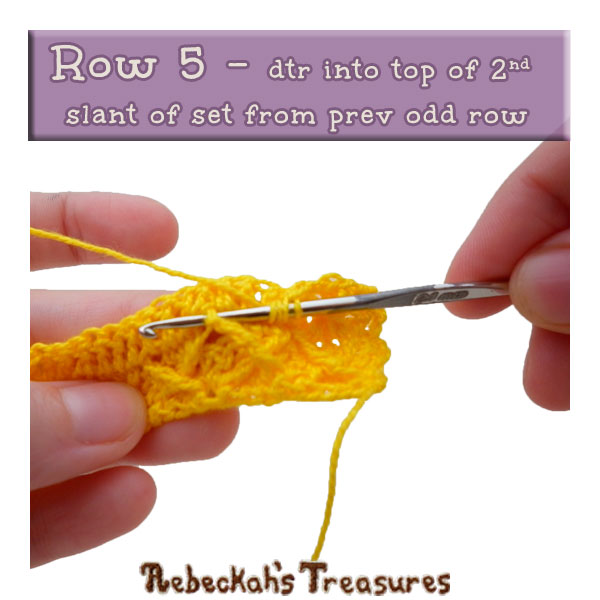
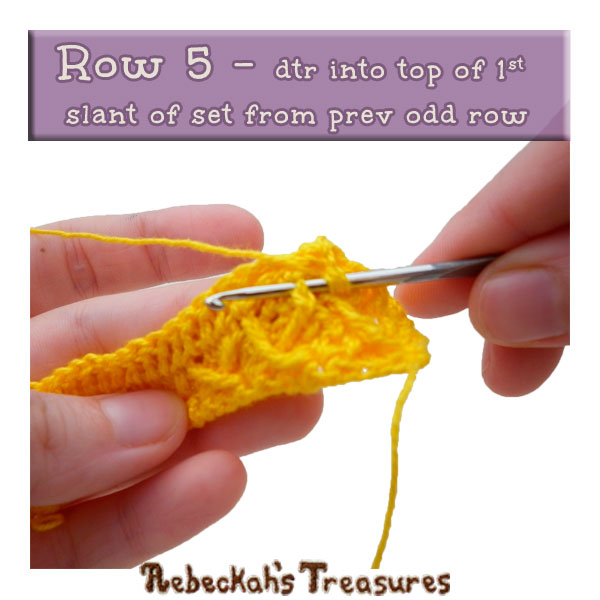
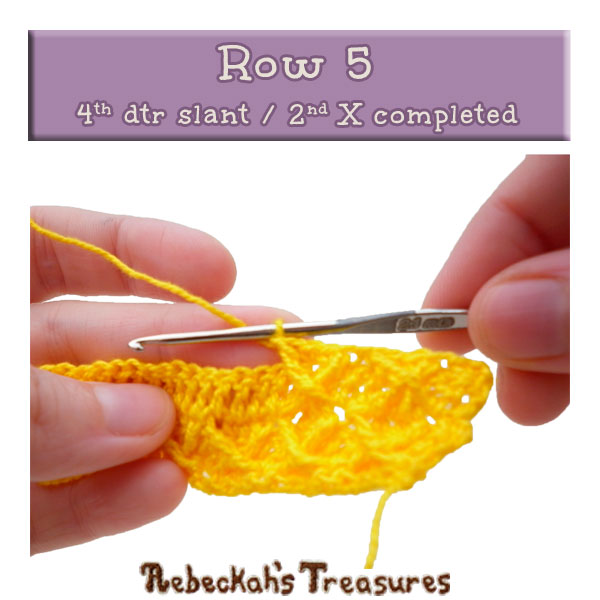
criss-left = work a dtr into the FP of the 4th st of the group from prev odd row OR (for future rows) into the top of the 2nd dtr slant - a.k.a. top of the cross-right slant – of the group from prev odd row. cross-right = work a dtr into the FP of the first st of the group from prev odd row, hereby crossing over the last dtr made and creating a “X” OR (for future rows) into the top of the 1st dtr slant - a.k.a. top of the criss-left slant – of the group from prev odd row, crossing over the last dtr made. criss cross diamond = criss-left, sk 1 st of current row, sc 2, [cross-right, criss-left, sk 2 sts of current row, sc 2] rep across until only one more st of the section rems, cross-right, sk 1 st of current row.
Additional Notes:
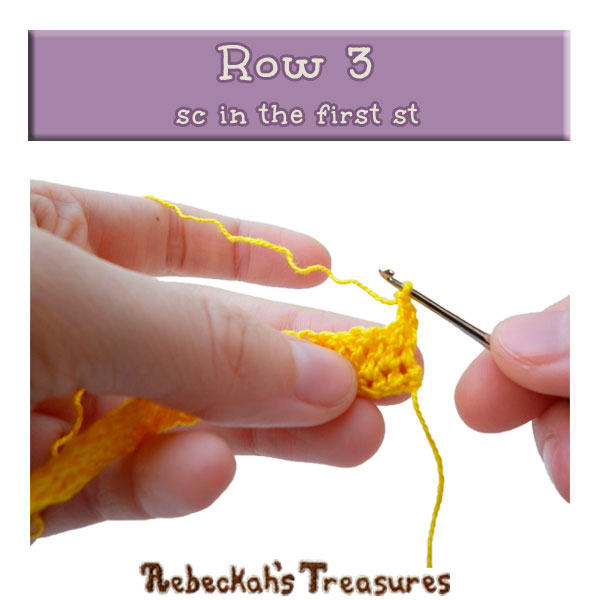
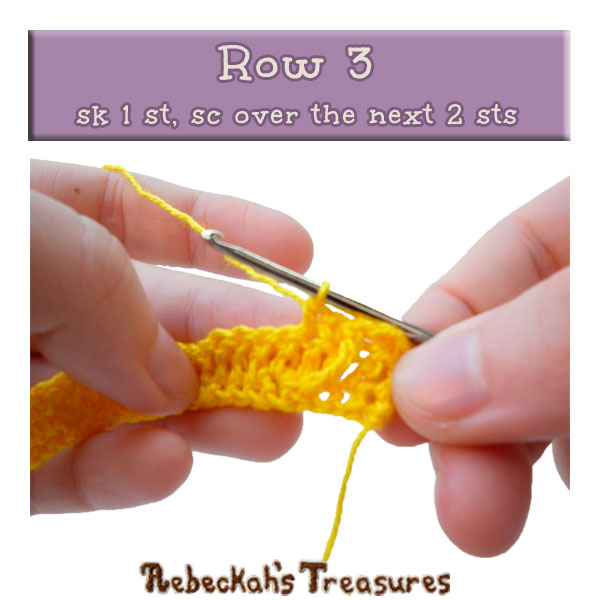
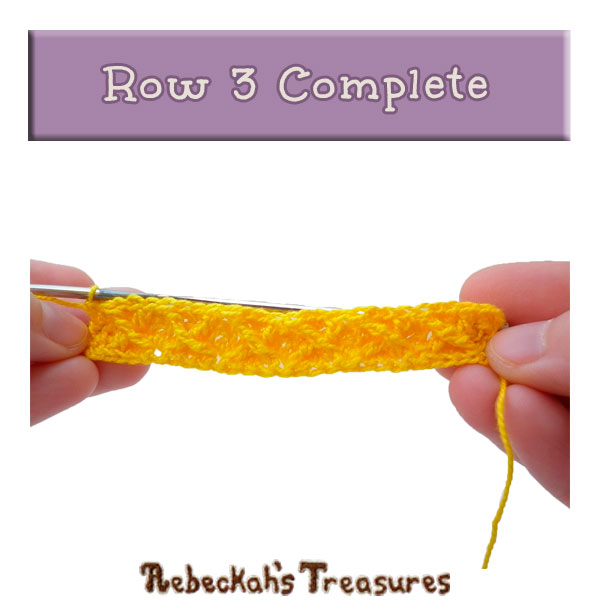
Starting the BASE row of the Criss Cross Diamond: row 3 – simple instructions: sc, criss cross diamond however many multiples of 4 you started your project with or however many times called for in the pattern you are following, sc, turn (same number of sts as row 1). row 3 – expanded instructions: sc, work a dtr into the FP of the 4th st (of first group) from row 1, sk 1 st of current row, sc 2, [work a dtr into the FP of the 1st st (of group) on row 1 (so you are crossing over the last dtr FP st made and creating a “X”), work a dtr into the FP of the 4th st (of new group) on row 1, sk 2 sts of current row, sc 2] rep across the row however many multiples of 4 you started your project with or however many times called for in the pattern you are following minus one, work a dtr into the FP of the 1st st (of group) on row 1 (to complete the last “X” of the section), sk 1 st of current row, sc, turn (same number of sts as row 1). Reminder: The first and last single crochet in row 3 is the anchor stitch. If you are following another pattern, the number of single crochets before and after the criss cross section may be different. *Click on pictures to get a closer look.
row 4: dc across the row, ch 1, turn (same number of sts as row 1).
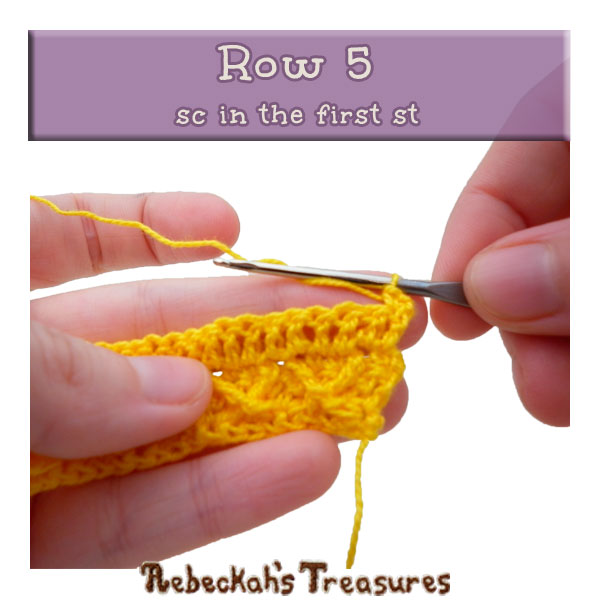
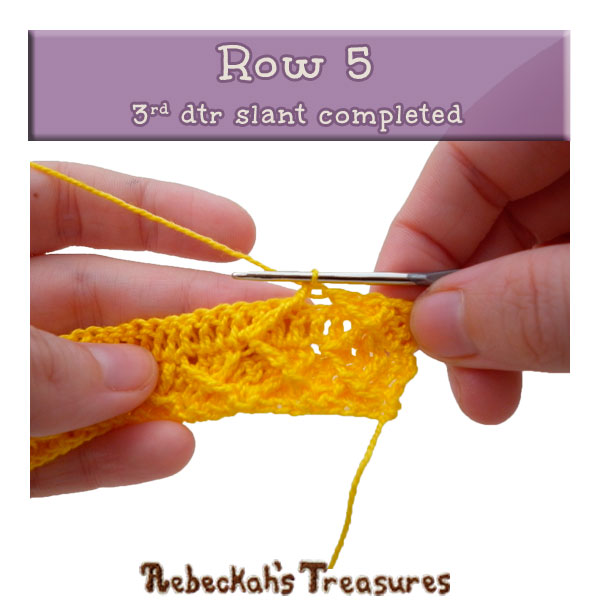
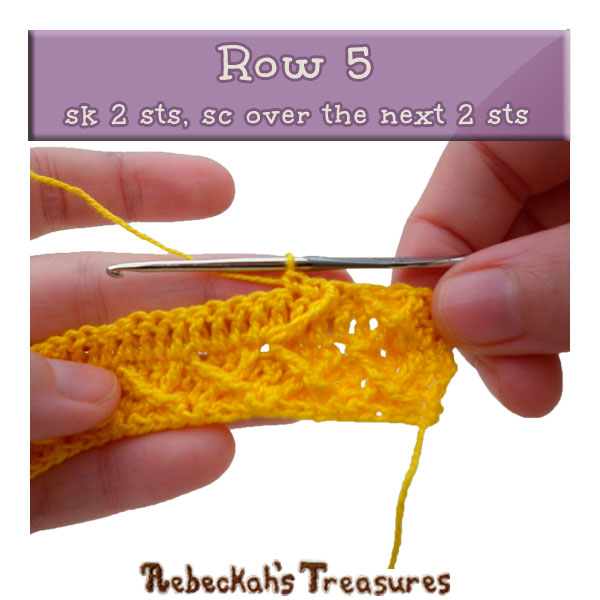
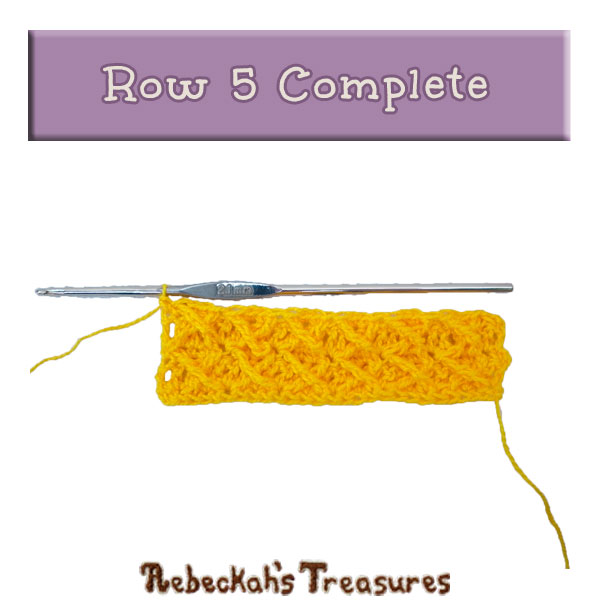
Working the next Criss Cross Diamond row: row 5 – simple instructions: sc, criss cross diamond however many multiples of 4 you started your project with or however many times called for in the pattern you are following, sc, turn (same number of sts as row 1). row 5 – expanded instructions: sc, work a dtr into the top of the 2nd dtr FP st (of first group) from the prev odd row, sk 1 st of current row, sc 2, [work a dtr into the top of the 1st dtr FP st (of group) from the prev odd row (so you are crossing over the last dtr FP st made and creating a “X”), work a dtr into the top of the 2nd dtr FP st (of new group) from the prev odd row, sk 2 sts of current row, sc 2] rep across the row however many multiples of 4 you started your project with or however many times called for in the pattern you are following minus one, work a dtr into the top of the 1st dtr FP (of group) from the prev odd row (to complete the last “X” of the section), sk 1 st of current row, sc, turn (same number of sts as row 1). Reminder: Again as for row 3, the first and last single crochet in row 5 is the anchor stitch. If you are following another pattern, the number of single crochets before and after the criss cross section may differ.
Now all you need to do is repeat rows 4 & 5 alternately until you reach your desired height, or for as many rows called for in the pattern you are following.
Coming up next, I share the tutorial for working increase and decreases in this stitch! See it here... You can see the full instructions for this tutorial including the increases and decreases right away in the video tutorial below...
Jump to a specific section in this video tutorial!
*Note: Clicking on the links below will open this video in YouTube at the respective time. If you would rather stay on this page, just use the time bar to scroll to the linked time for the section you wish to view... Table of Contents 0:00 – Intro 0:20 – Supplies & Techniques 0:45 – Foundation Row Intro 1:04 – Foundation Row | Option 1: Starting with the traditional foundation chains and a row of single crochet. 1:33 – Foundation Row | Option 2: Starting with the recommended foundation single crochet. 1:53 – Row 2 | Working a row of double crochet. 3:14 – Row 3 Intro 5:00 – Row 3 | Working the first row of X's. 12:56 – Row 4 | Working a row of double crochet. 13:17 – Row 5 | Working the next row of X's (a.k.a. normal row 5). 19:30 – Row 6+ | Repeating rows 4 & 5. *Optional for the tutorial. Increases (19:56): 20:06 – Row 14 | Working the FIRST set of increases. 21:53 – Row 15 | Working the next row of X's (a.k.a. alternate row 5). 28:43 – Row 16+ | Repeating rows 4 & 15. *Optional - not repeated in the tutorial. 28:53 – Row 16 | Working the SECOND set of increases. 30:14 – Row 17 | Working the next row of X's (a.k.a. returning to a normal row 5). 36:59 – Row 18+ | Repeating rows 4 & 5. *Optional - not repeated in the tutorial. Decreases (37:09): 37:19 – Row 18 | Working the FIRST set of increases. 39:17 – Row 19 | Working the next row of X's (a.k.a. alternate row 5). 44:40 – Row 20+ | Repeating rows 4 & 15. *Optional - not repeated in the tutorial. 44:50 – Row 20 | Working the SECOND set of increases. 46:26 – Row 21 | Working the next row of X's (a.k.a. returning to a normal row 5). 50:57 – Row 22+ | Repeating rows 4 & 5. *Optional - not repeated in the tutorial.
I hope you've enjoyed learning this new stitch. If you have, please share your rating of this stitch with us here, or favourite this stitch pattern on Ravelry here...
Try this stitch in a crochet project! See Criss Cross Fashion Doll Bedding. Plus, a brand new pattern with this crochet stitch is coming soon! See a preview later this week.
If you have any questions or concerns, leave me a comment below and I'll get back to you as quickly as I can... Thanks so much for visiting. I hope you have a wonderful day! Please share this tutorial with your friends or anyone you know who loves textured crochet... 
Hello Visitor and Welcome to Rebeckah's Treasures... I am a Norwegian/Canadian currently studying Midwifery in the UK. I love to crochet! At Rebeckah's Treasures, I share my crochet patterns and treasures. I hope they inspire you to crochet your own little treasures too... 
Comments
|
Hello, my name is Rebeckah.
I hope my crochet inspires you to create your very own treasures! Learn more about me... Categories
All
Archives
October 2021
© 2012-2021 Rebeckah Ferger
All rights reserved. Disclaimer: This website makes use of sponsored and/or affiliate links. Please see this page for more information.
|
- Home
-
-
- Special Offers
- New Releases
- Accessory Crochet Patterns
- Afghan Square Crochet Patterns
- Amigurumi Crochet Patterns
- Applique Crochet Patterns
- Baby Crochet Patterns
- Dolly Crochet Patterns
- Fashion Doll Crochet Patterns
- Free Downloads
- Holiday Crochet Patterns
- Tapestry Crochet Patterns
- Under the Sea Crochet Patterns
- Wedding Crochet Patterns
- Disclaimer and FAQs
-
-
- Free Crochet Patterns
- New Free Releases
- Free Accessory Crochet Patterns
- Free Afghan Square Crochet Patterns
- Free Amigurumi Crochet Patterns
- Free Applique Crochet Patterns
- Free Baby Crochet Patterns
- Free Dolly Crochet Patterns
- Free Fashion Doll Crochet Patterns
- Free Guest Crochet Patterns
- Free Holiday Crochet Patterns
- Free Tapestry Crochet Patterns
- Free Under the Sea Crochet Patterns
- Free Wedding Crochet Patterns
- Free Crochet Patterns Coming Soon
Welcome Visitor! I hope you enjoy my treasures.









 RSS Feed
