|
Disclaimer: This website makes use of sponsored and/or affiliate links. Please see this page for more information.
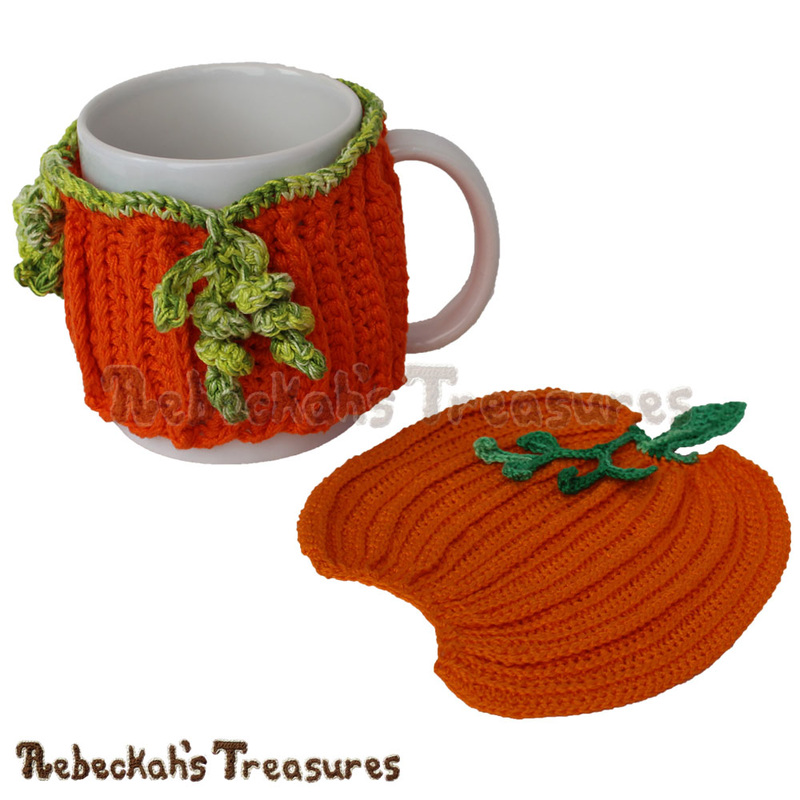
Do you love decorating your home with all things autumn and pumpkins?
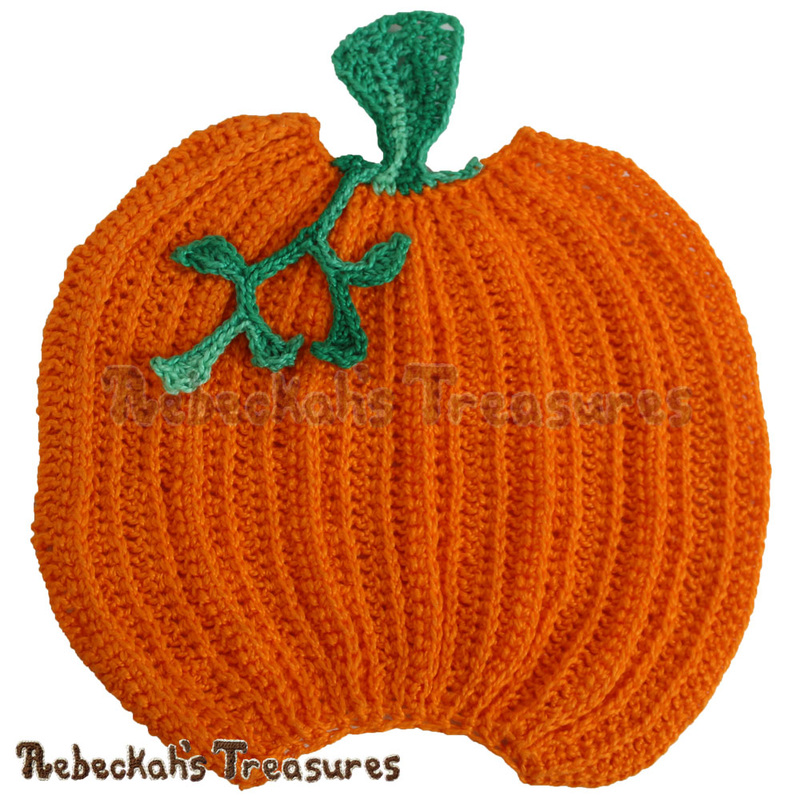
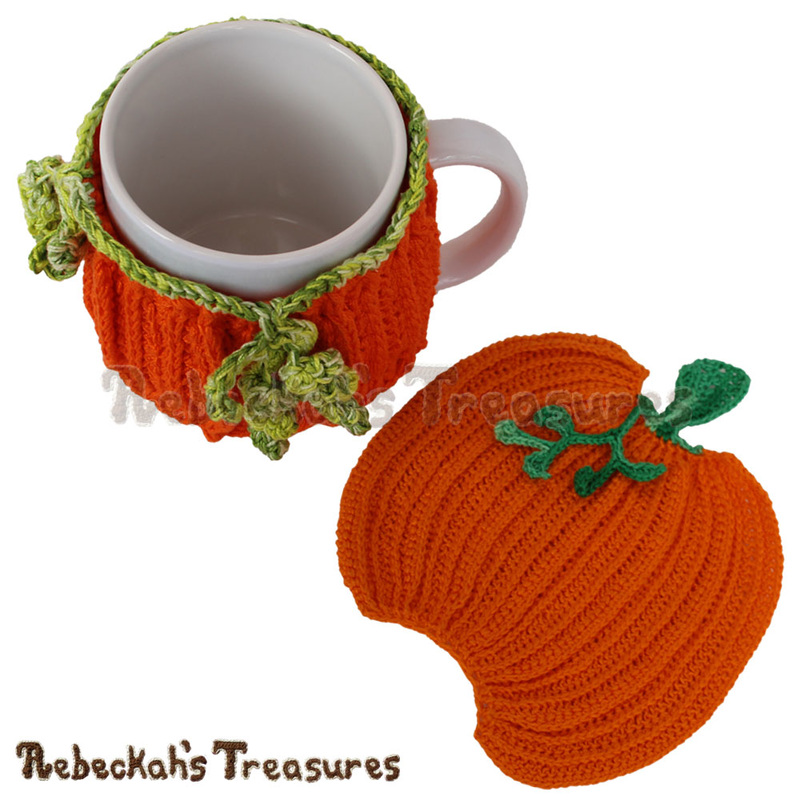
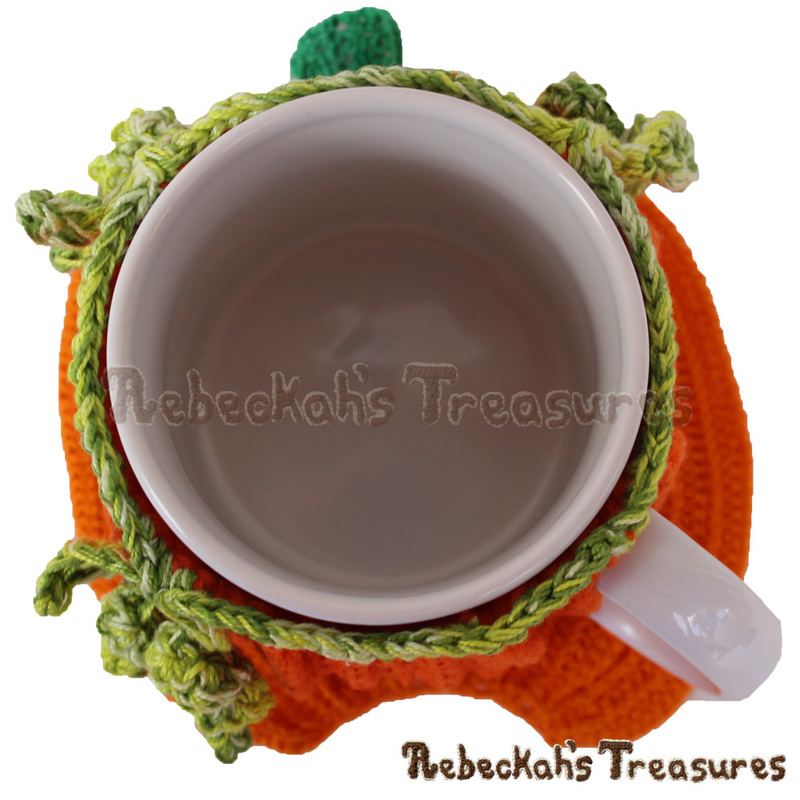
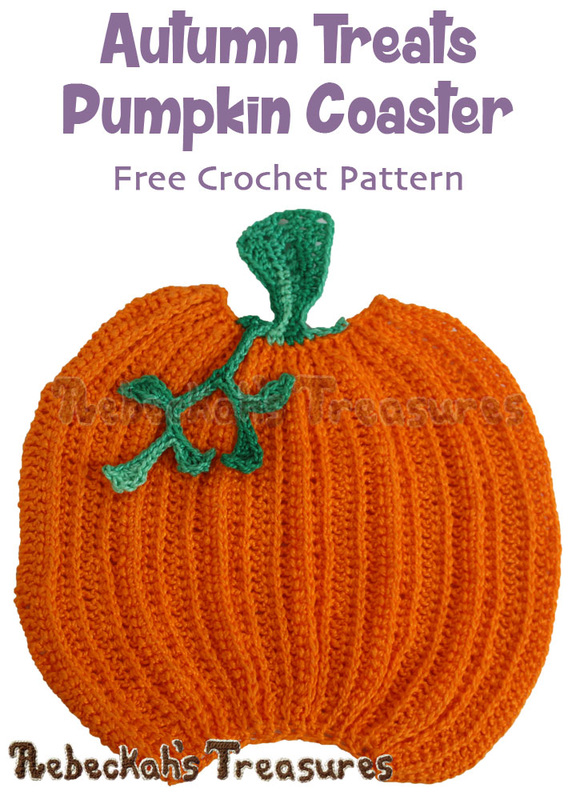
Then, you'll adore the intricate textures of this Autumn Delights Pumpkin Coaster pattern!
This home accessory pattern includes written instructions, a 30 photo tutorial and 4 video tutorial clips for crocheting a delightful coaster in thread or lace weight yarns, or a placemat / wall hanging in alternate yarn weights.
Make several pumpkin coasters and placemats for a fabulous set, or crochet a beautiful statement piece to wow your holiday guests! This project is part of my contribution to the Designer's Potpourri CAL for October 2016, and is one of four free pumpkin patterns I will be sharing this month. You can learn more about my pumpkin madness here and when you can expect each of the pumpkin patterns. This crochet pattern is also available as a printer friendly, 10-page PDF download. GRAB IT HERE for only $3.75 to show your support for Rebeckah's Treasures. Thank you! Queue it, LOVE it, and Add your Autumn Delight Pumpkin projects to Ravelry here!
This pattern is copyrighted to Rebeckah Ferger of www.rebeckahstreasures.com. It is for personal use only. No part of this pattern may be copied or distributed in any way. If you sell what you make from this pattern, please credit me as the designer. All rights reserved, 2016
Supplies:
For a coaster, use the following materials…
– less than 10m (11yd) in green
Or for a placemat / wall hanging, use the following materials, OR use an alternate yarn weight and hook of choosing…
– less than 20m (22yd) in green
Additional useful tools…
Sizing:
Cotton Thread #10 + a 1.05mm hook makes a – 5.5” (14cm) wide by 5.75” (14.5cm) tall coaster.
Worsted (4 : Medium / 10 ply UK) yarn + a 3.75mm hook makes approximately a – 12” (30cm) wide/tall placemat or wall hanging. *NOTE: These sizes are approximates. Your sizing may differ depending on your chosen yarn, hook size and tension. Adjust these factors to get desired size. Gauge:
Gauge is not important for this pattern. Simply use one of the smaller hook sizes recommended for your chosen yarn weight.
If you would like to make your coaster the same size, then follow this gauge: 20 single crochet stitches x 24 rows = 2” (5cm). TIP: Thread/Yarn weight and hook size are flexible. Most lace or fine weight yarns will work well for creating a coaster. Whereas, thicker yarn weights, such as Sport, DK or WW, work great for making a larger centerpiece, a placemat or a wall hanging! Pattern Notes:
You should be familiar with basic crochet stitches (chs, sl sts, sc, hdc, dc), working in rows, rounds, front posts (see special abbreviations for special FP notes), and how to do increases and decreases.
A special stitch you should be familiar with is the cluster stitch, since variations are used in this crochet pattern. A special technique you should know is how to sc attach onto crochet pieces to start a new section. When the number comes after the stitch, crochet across the stitches. However, when the number comes first, this is indicative of an increase, so work them into the same stitch or space as directed. Photo tutorial included here was created with a swatch, which is meant to guide you with stitch positioning for select rows. The exact stitch count is not shown in the photos, so be sure to follow the pattern correctly. The same is true for the video tutorial clips as well. Additional notes are included as you come to them below… Autumn Delights Pumpkin Coaster Instructions:
This autumn treats pumpkin coaster is worked in four parts. The first part creates the base of the coaster. The second & third parts add some shaping to the top & bottom of the coaster, respectively. The final part creates a stem with or without leaf-vines – that’s up to you!
Part 1 – Pumpkin Coaster Base Instructions:
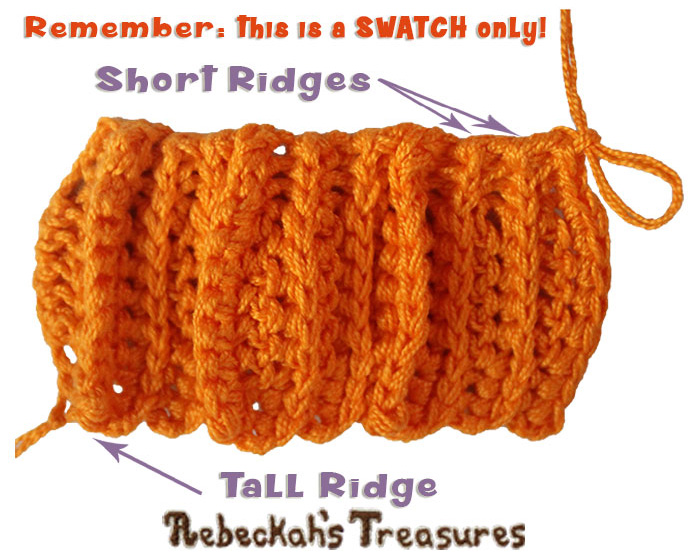
Make 1. The base of this pumpkin coaster is worked in rows from side to side, where *EVEN rows = RS. The beg of even rows & end of odd rows = TOP of coaster. The end of even rows & beg of odd rows = BOTTOM of coaster. This coaster base is worked in such a way as to create an intricately textured design, where there are two-different height ridges. These ridges follow a pattern of 1-TALL, 2-SHORT. If you keep this in mind, the following instructions will be much easier to follow.
VERY IMPORTANT NOTES before you begin:
Special Abbreviation Instructions for the Coaster Base:
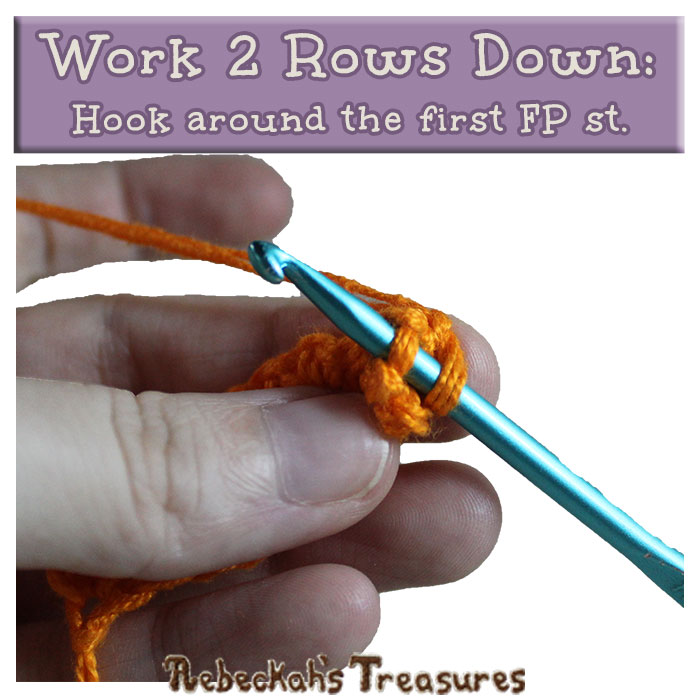
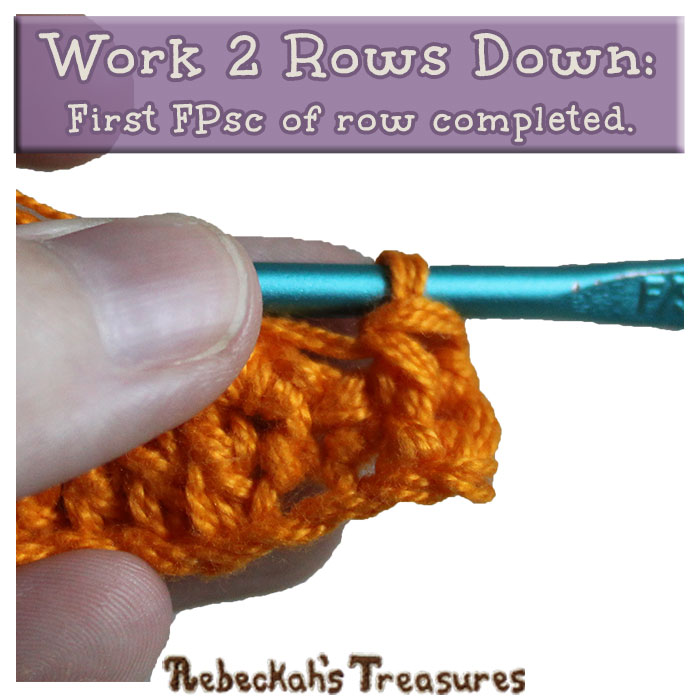
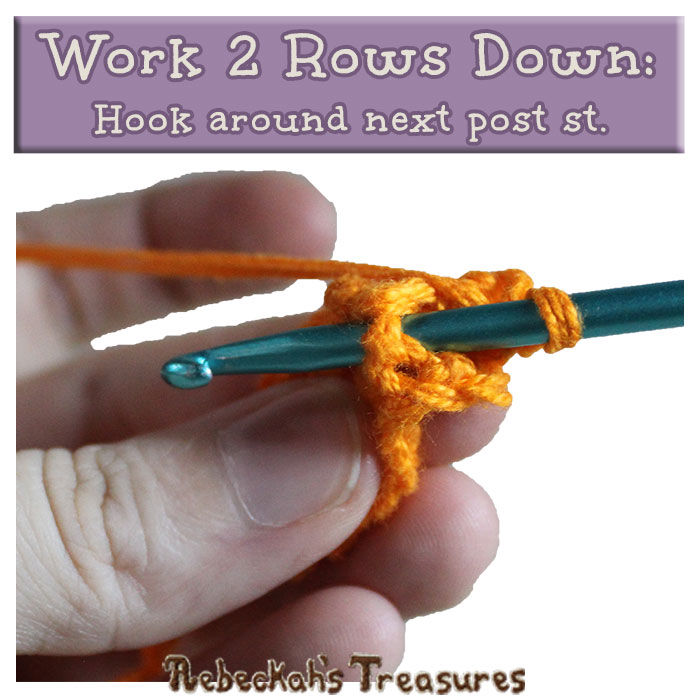
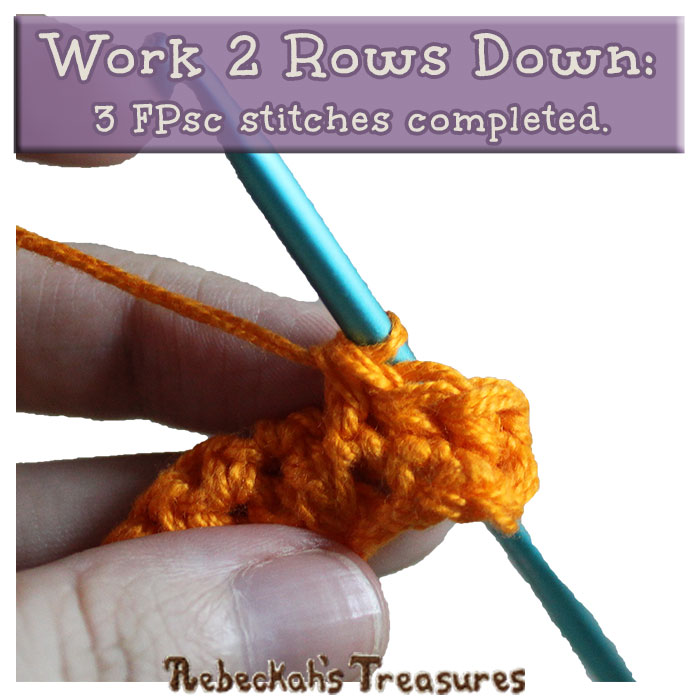
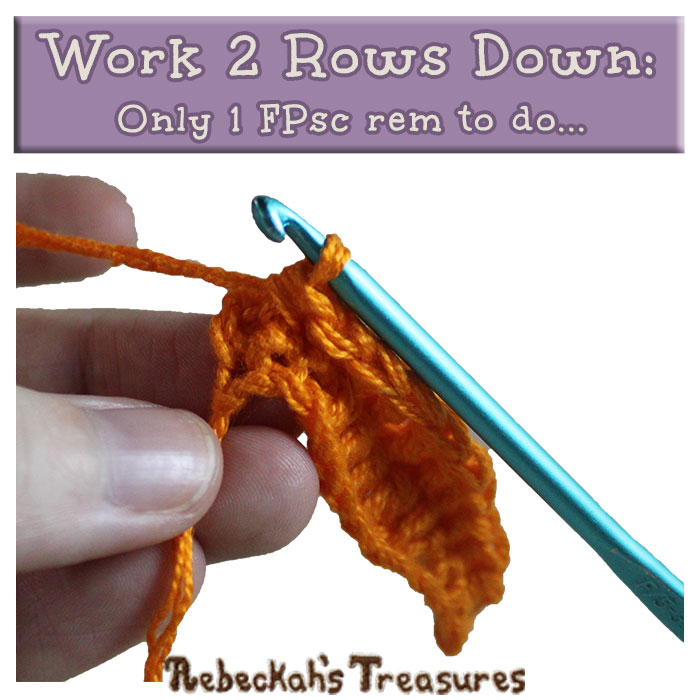
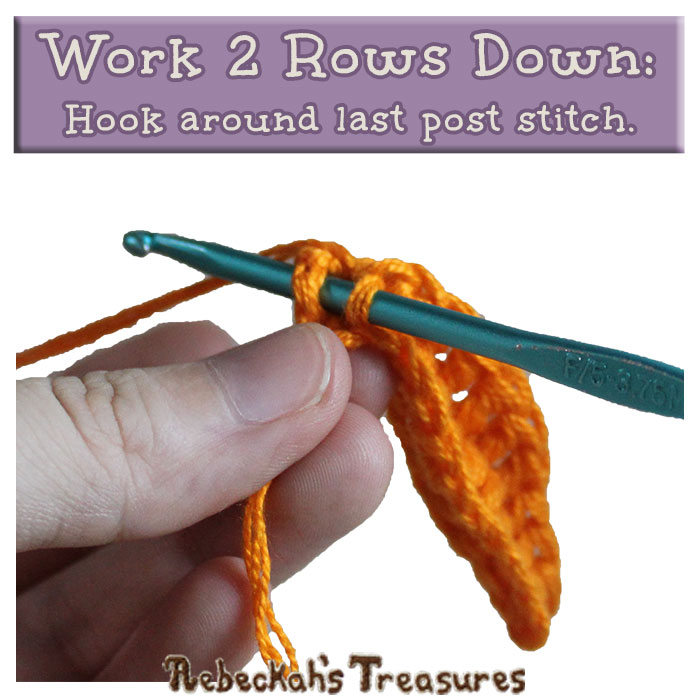
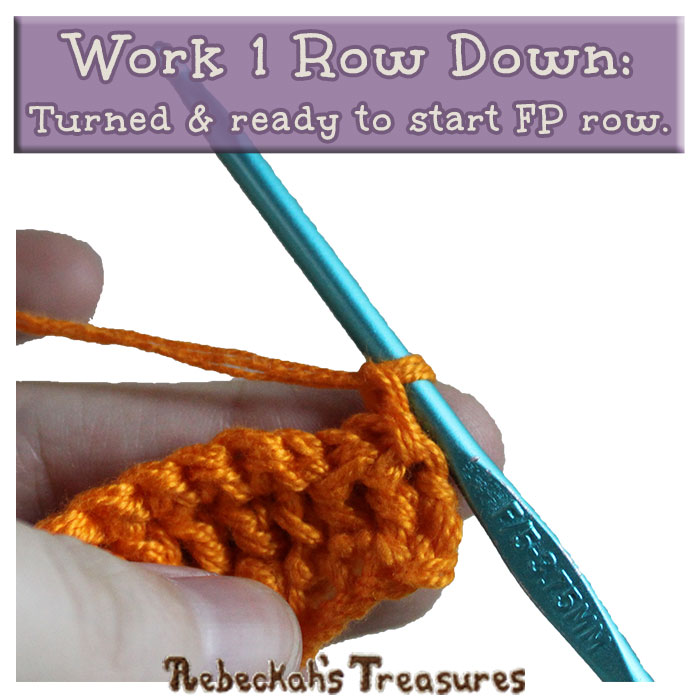
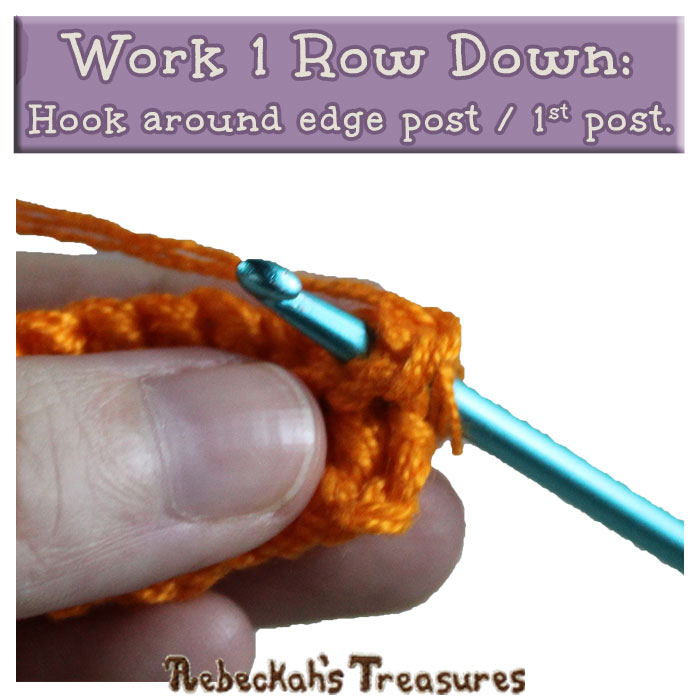
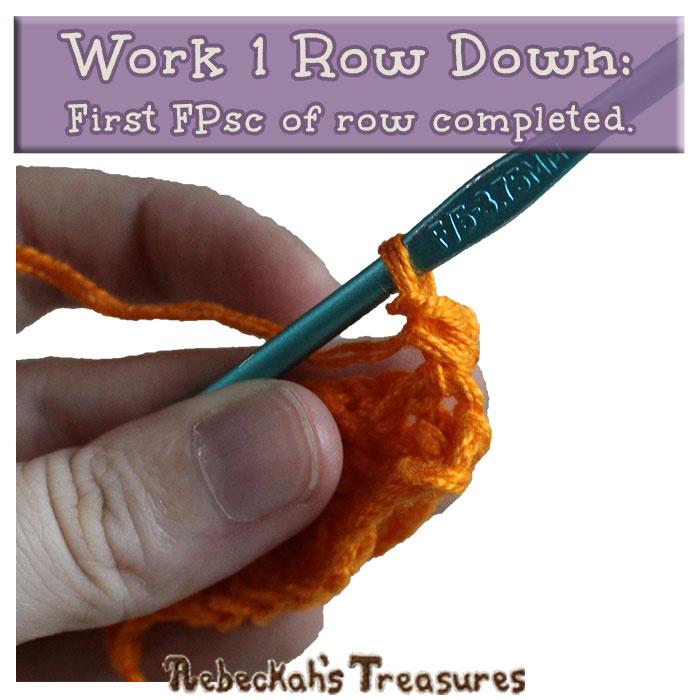
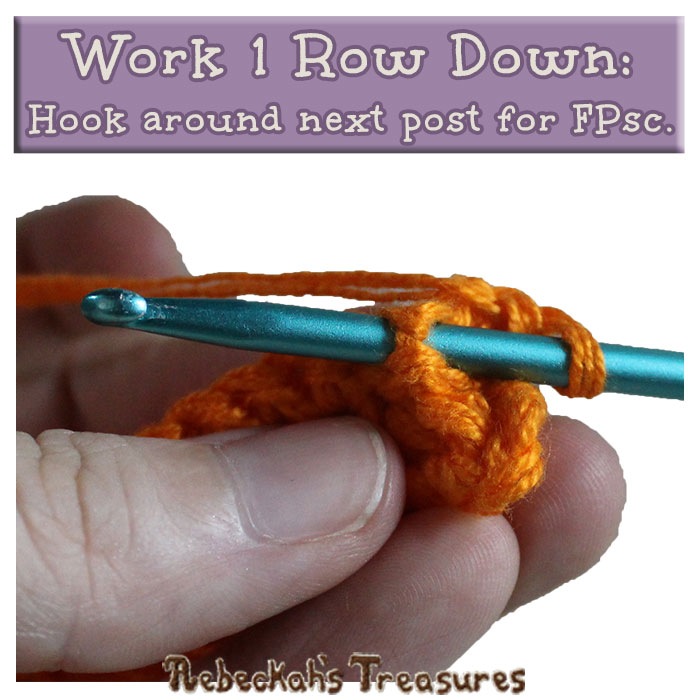
*FPsc = When working the FPsc stitches on odd rows → insert your hook into the next st from front to back, then come back thru to the front by inserting your hook into the subsequent st from back to front – the hook is now wrapped around the post of the next st → work a normal sc here.
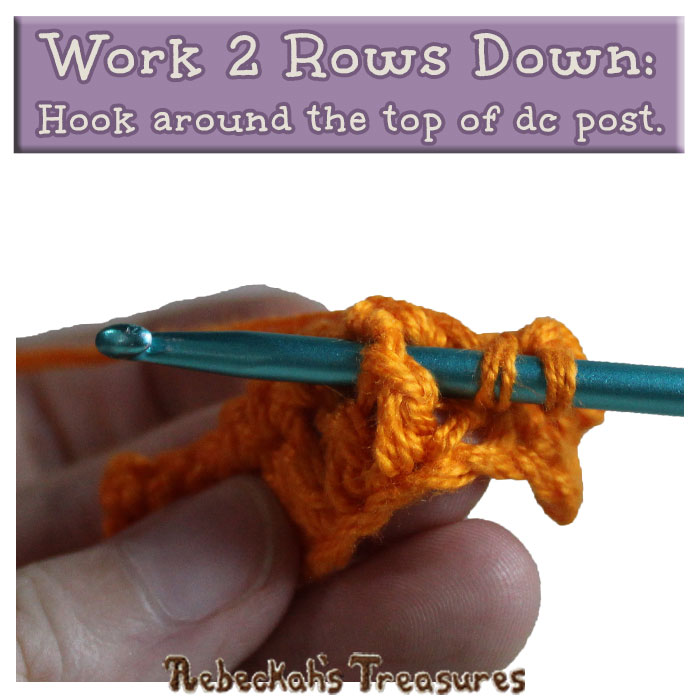
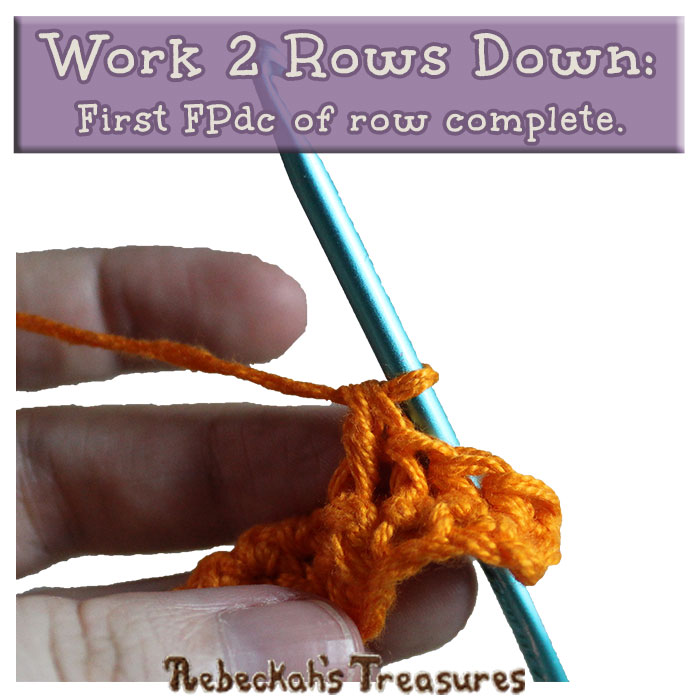
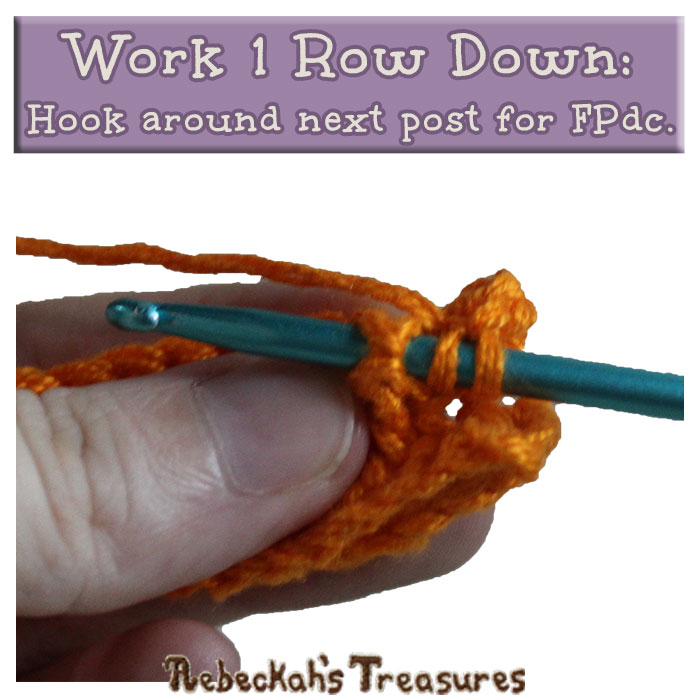
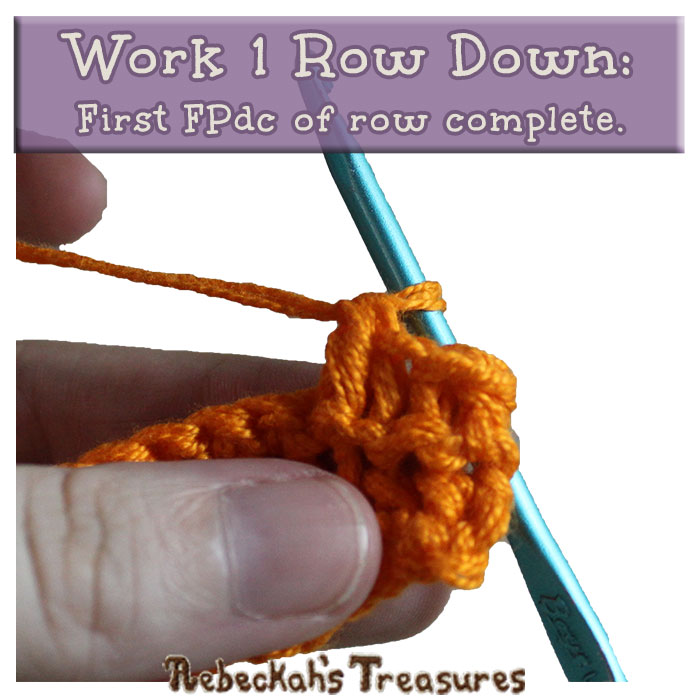
*FPdc = Work exactly like the FPsc, but use a dc stitch instead of a sc stitch.
ch 60 in orange...
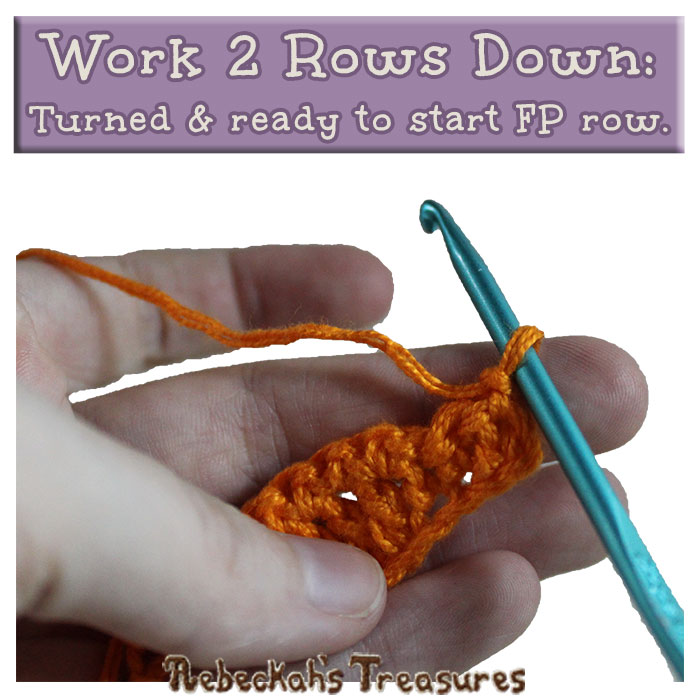
Row 1: sc into the 2nd ch from hook & across the next 2 chs, dc 53, sc 3, ch 1, turn (59 sts). Row 2: sl st 3, sc 53, sl st 3, ch 1, turn (59 sts). Row 3: work 2 rows down into the prev odd row (see tall ridge notes for more tips) → FPsc 3, FPdc 53, FPsc 3, ch 1, turn (59 sts). *Click on images to enlarge them...
Row 4: sc 8, [sk 1 st, sc 5] 2 times, sk 1 st, sc 20, [sk 1 st, sc 5] 2 times, sk 1 st, sc 2, sl st 3, ch 1, turn (53 sts).
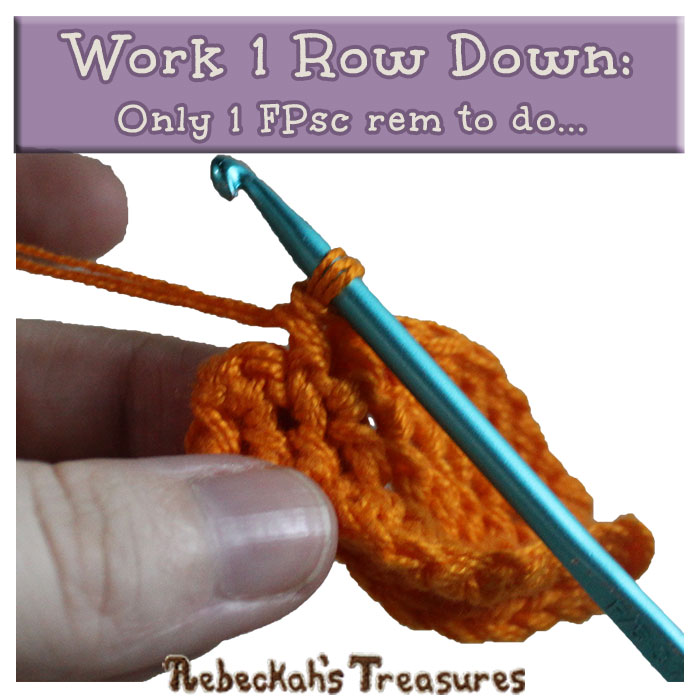
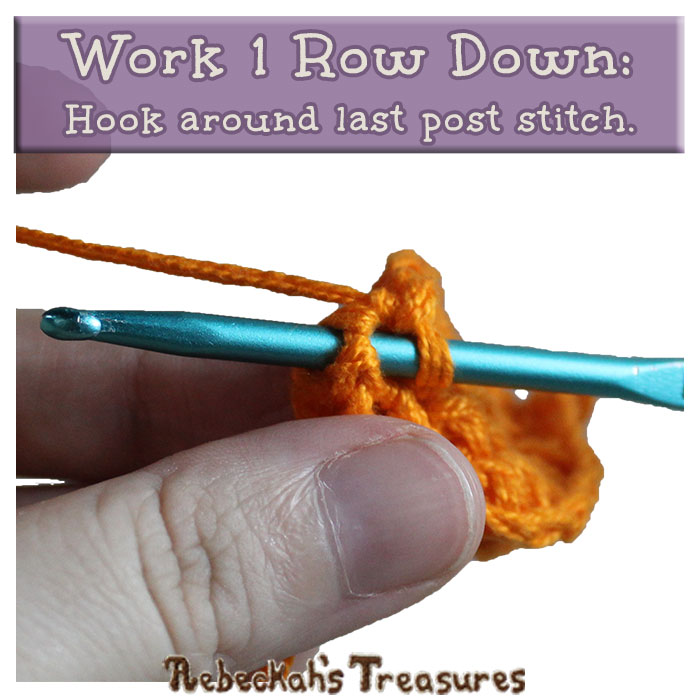
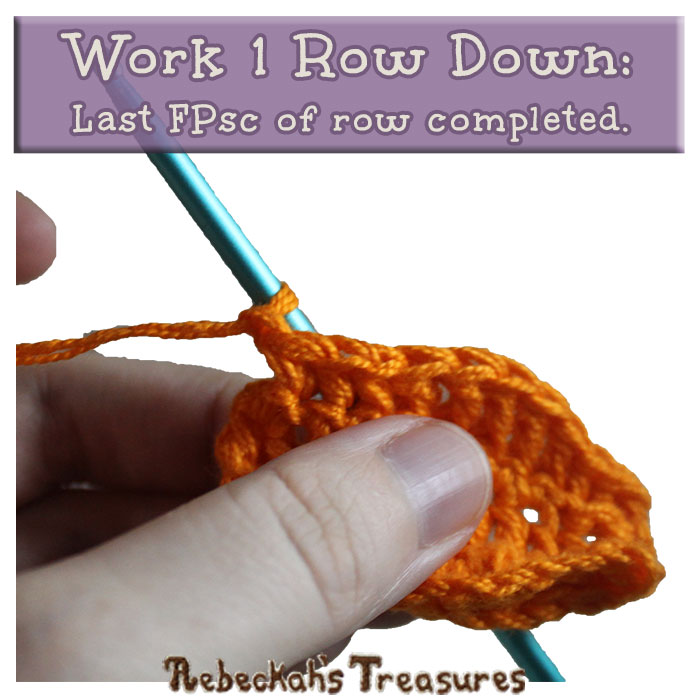
Row 5: work 1 row down into the prev row crocheted (see short ridge notes for more tips) → FPsc 3, FPdc 47, FPsc 3, ch 1, turn (53 sts).
Row 6: sc 7, [sk 1 st, sc 6] 2 times, sk 1 st, sc 10, [sk 1 st, sc 6] 2 times, sk 1 st, sc 3, sl st 3, ch 1, turn (47 sts).
Row 7: work 1 row down into the prev row crocheted (short) → FPsc 3, FPdc 41, FPsc 3, ch 1, turn (47 sts). Row 8: sl st 3, sc 41, sl st 3, ch 1, turn (47 sts). Row 9: work 2 rows down into the prev odd row (tall) → FPsc 3, FPdc 41, FPsc 3, ch 1, turn (47 sts). Row 10: sc 6, [sk 1 st, sc 5] 2 times, sk 1 st, sc 10, [sk 1 st, sc 5] 2 times, sk 1 st, sc 2, sl st 3, ch 1, turn (41 sts). Row 11: work 1 row down into the prev row crocheted (short) → FPsc 3, FPdc 35, FPsc 3, ch 1, turn (41 sts). Row 12: sc 38, sl st 3, ch 1, turn (41 sts). Row 13: work 1 row down into the prev row crocheted (short) → FPsc 3, FPdc 35, FPsc 3, ch 1, turn (41 sts). Row 14: sl st 3, sc 35, sl st 3, ch 1, turn (41 sts). Row 15: work 2 rows down into the prev odd row (tall) → FPsc 3, FPdc 35, FPsc 3, ch 1, turn (41 sts). Row 16: sc 8, [sk 1 st, sc 4] 2 times, sk 1 st, sc 6, [sk 1 st, sc 4] 2 times, sk 1 st, sc 2, sl st 3, ch 1, turn (35 sts). Row 17: work 1 row down into the prev row crocheted (short) → FPsc 3, FPdc 29, FPsc 3, ch 1, turn (35 sts). Row 18: sc 32, sl st 3, ch 1, turn (35 sts). Row 19: rep row 17. Row 20: sl st 3, sc 29, sl st 3, ch 1, turn (35 sts).
Row 21: work 2 rows down into the prev odd row (tall) → FPsc 3, FPdc 29, FPsc 3, ch 1, turn (35 sts).
Row 22: sc 7, [2 sc into the next st, sc 3] 2 times, 2 sc into the next st, sc 5, [2 sc into the next st, sc 3] 2 times, 2 sc into the next st, sc 2, sl st 3, ch 1, turn (41 sts). Row 23-27: rep rows 11-15. Row 28: sc 5, [2 sc into the next st, sc 4] 2 times, 2 sc into the next st, sc 9, [2 sc into the next st, sc 4] 2 times, 2 sc into the next st, sc 2, sl st 3, ch 1, turn (47 sts). Row 29: work 1 row down into the prev row crocheted (short) → FPsc 3, FPdc 41, FPsc 3, ch 1, turn (47 sts). Row 30: sc 44, sl st 3, ch 1, turn (47 sts). Row 31-33: rep rows 7-9. Row 34: sc 6, [2 sc into the next st, sc 5] 2 times, 2 sc into the next st, sc 9, [2 sc into the next st, sc 5] 2 times, 2 sc into the next st, sc 5, sl st 3, ch 1, turn (53 sts). Row 35: work 2 rows down into the prev odd row (tall) → FPsc 3, FPdc 47, FPsc 3, ch 1, turn (53 sts). Row 36: sc 7, [2 sc into the next st, sc 4] 2 times, 2 sc into the next st, sc 19, [2 sc into the next st, sc 4] 2 times, 2 sc into the next st, sc 2, sl st 3, ch 1, turn (59 sts). Row 37: work 1 row down into the prev row crocheted (short) → FPsc 3, FPdc 53, FPsc 3, ch 1, turn (59 sts). Row 38: sc 56, sl st 3, ch 1, do not turn (59 sts).
Part 2 – Top Shaping Detail Instructions:
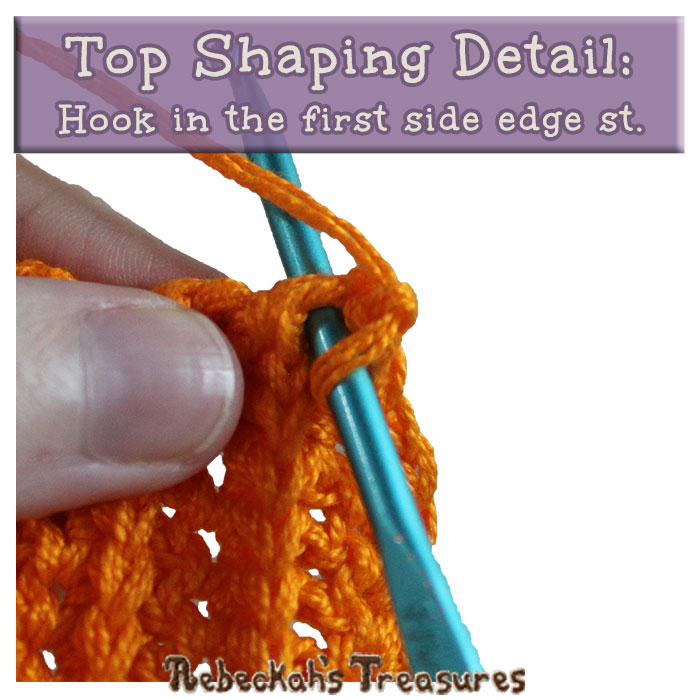
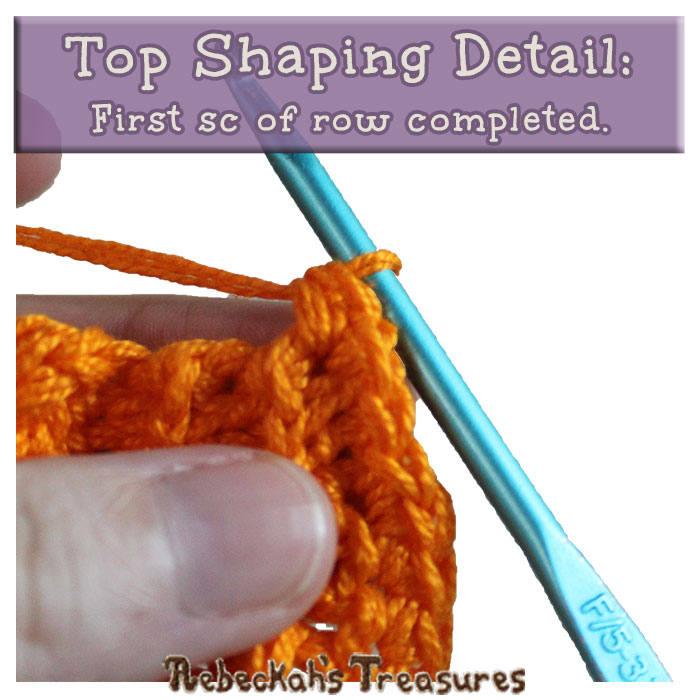
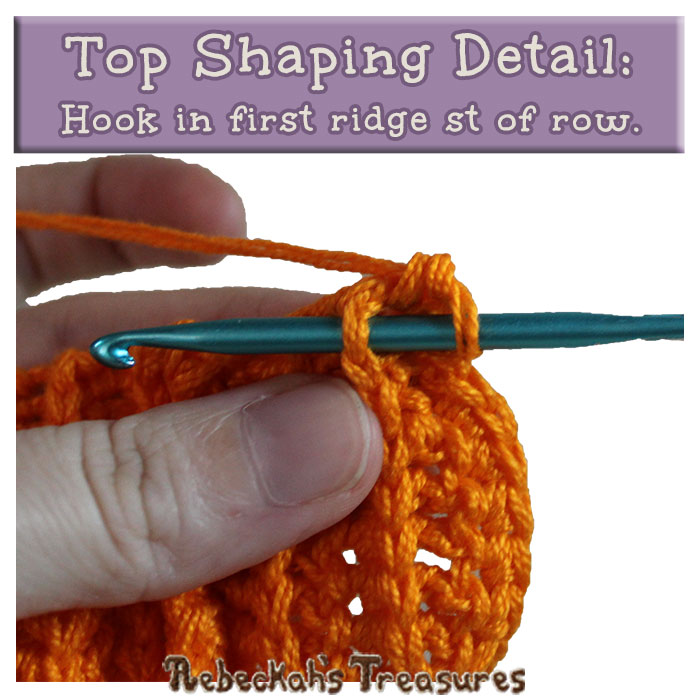
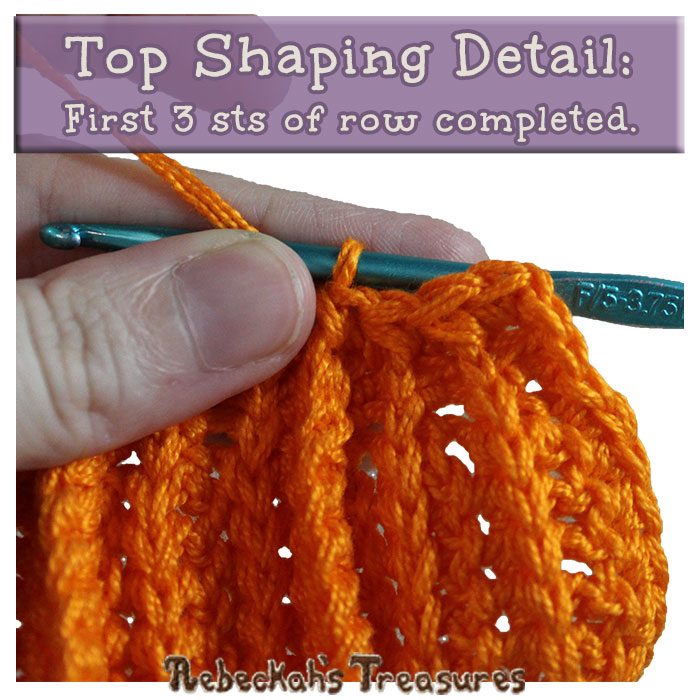
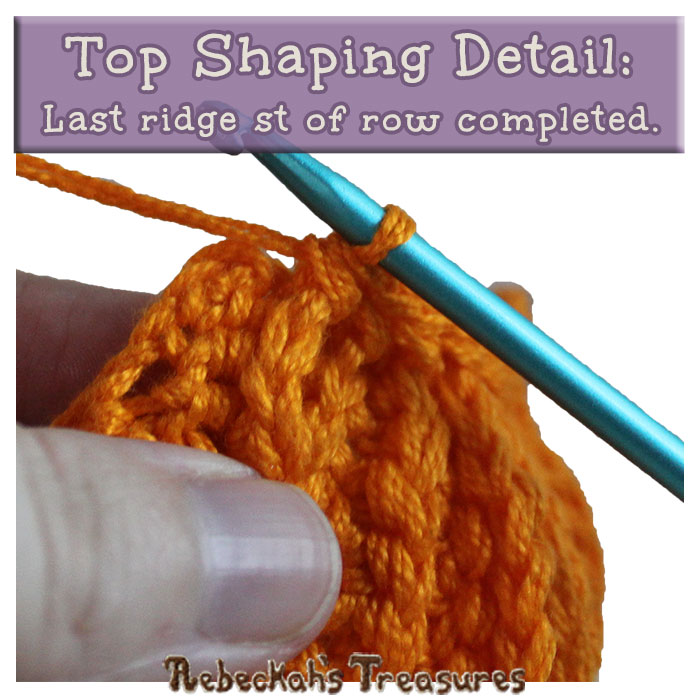
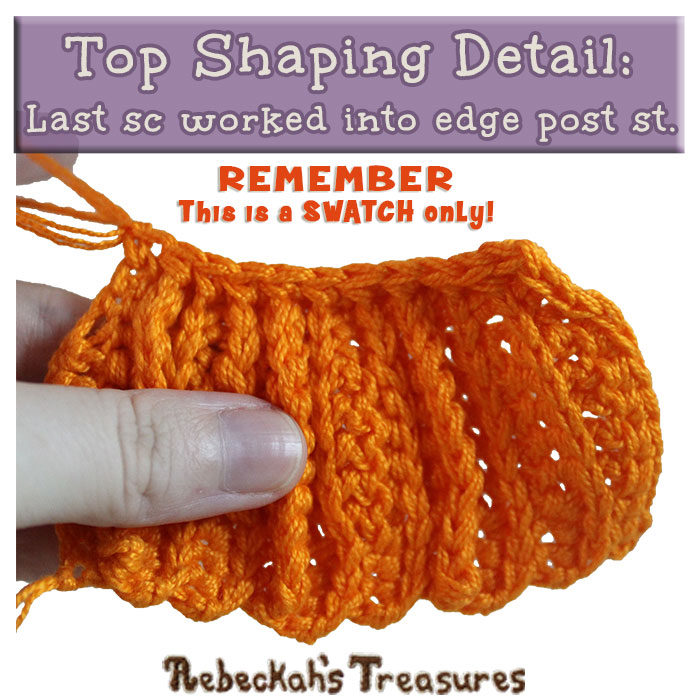
The top shaping detail is worked along the shorter side’s edge rows in a single row, and is a continuum of the first part. *TIP: The shorter side is the side with more slip stitches. *Side facing you = RS.
VERY IMPORTANT NOTES Terminology before you continue to row 39:
Continuing where you left off, work row 39 along the top side edge of the coaster base rows…
Row 39: RS faces you, sk the sps between ridges → sc 1 into the side edge of row 38, sc 1 into each ridge st across the rows for a total of 18 sts, sc 1 into the side edge of row 1, ch 1, f/o (20 sts).
Part 3 – Bottom Shaping Detail Instructions:
The bottom shaping detail is worked along the other side’s edge rows in a single row. *Side facing you = RS.
Special Abbreviation Instructions for the Row 1 of Part 3:
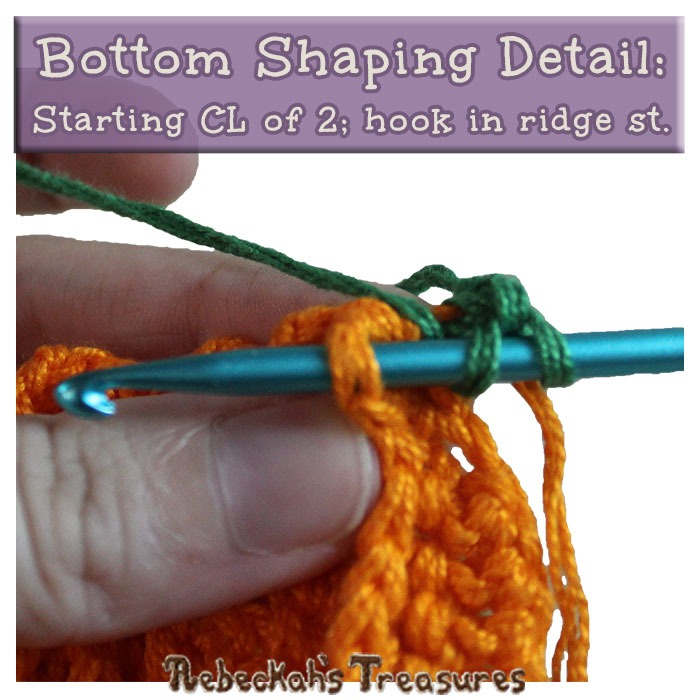
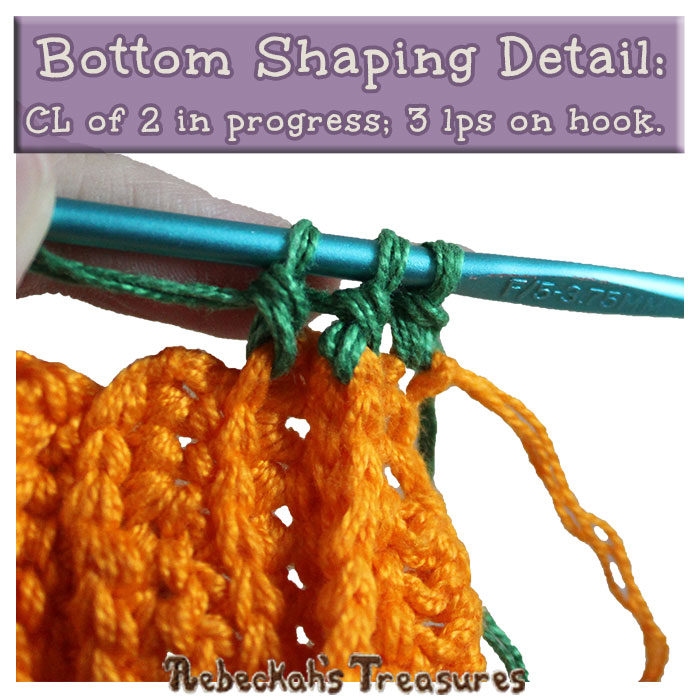
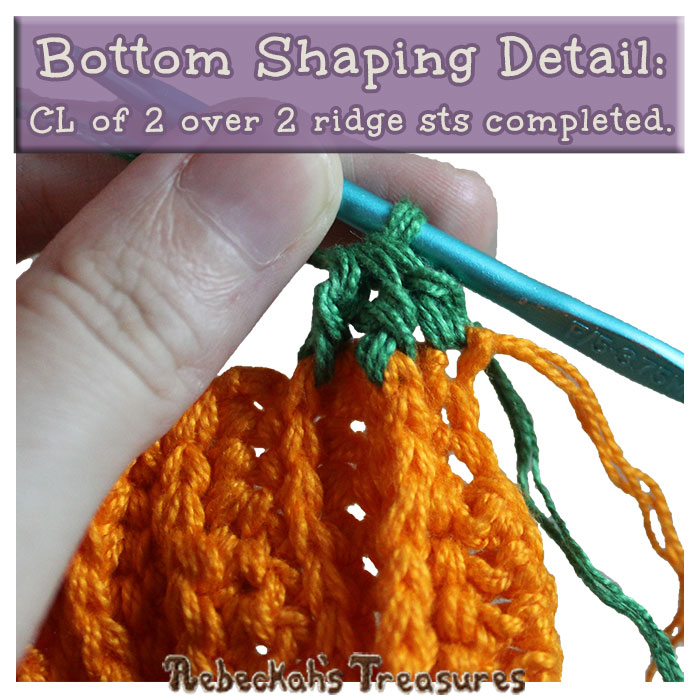
*CL of 2 (a.k.a. cluster of 2 double crochet stitches or a variation of a dc2tog) = leaving the last 2 lps from each st on the hook, work 1 dc into each of the next 2 sts, yo & pull though all 3 lps. See how here...
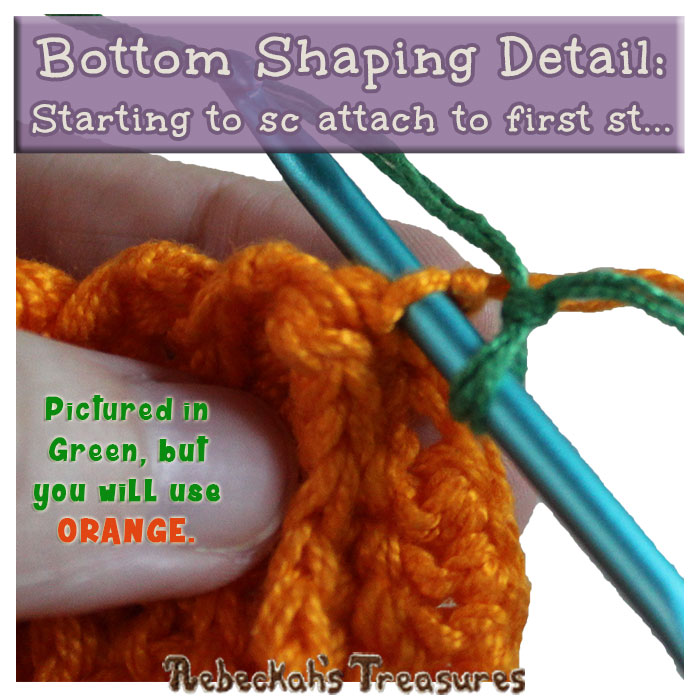
Make a slip knot in orange. Then, rotate the coaster clockwise, so the opposite side is at the top...
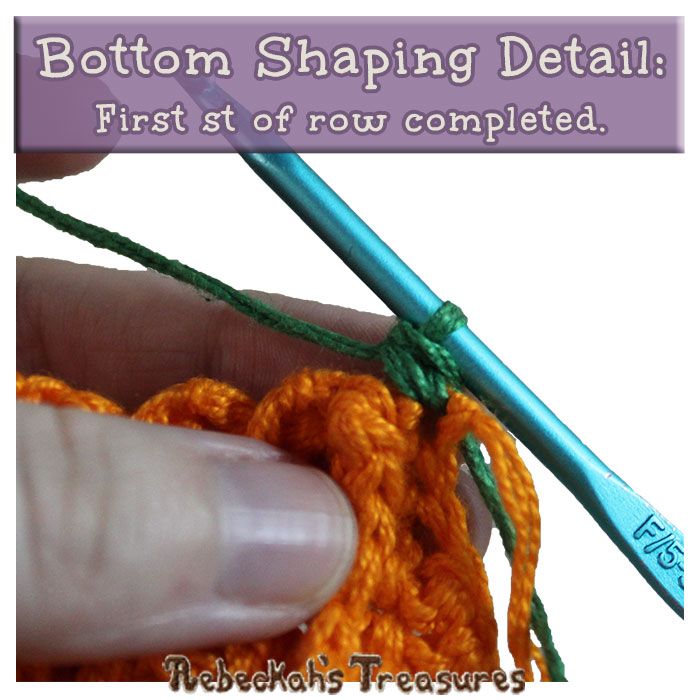
Row 1: RS faces you, sk the sps between ridges → sc attach to the side edge of the first sc, [CL of 2, hdc 1] 3 times, [hdc 1, CL of 2] 3 times, sc 1 into the side edge of the last st, ch 1, f/o (14 sts). Tutorials for this row are shown in green for easy visual, but use the same colour as the base.
Part 4 – Pumpkin Coaster Base Instructions:
All that remains, is to add the pumpkin stem and the optional leaf-vine. It is worked along the top of the coaster in the same direction as row 39. *Side facing you = RS. Make a slip knot in green. Then, rotate the coaster clockwise, so the top-side is at the top again... Pumpkin Stem Row: RS faces you → skipping the first 4 sts of row 39, sl st attach to the next avail st (or rather the 5th st from the start of the row), sl st 2, sc 2, start pumpkin stem → ch 12, dc into the 4th ch from hook & across the next 2 chs, hdc 3, [sc 2, sl st 2 across rem chs, sc 2, ch 1, turn, sk 2 sts, sl st 2, sc 2, hdc 3, dc 3, turn, work a standing dc or ch 3, dc 2, hdc 3, sc 2, sl st 2] 2 times – end pumpkin stem, sc 2, sl st 3, ch 1, turn or f/o here if you would prefer to omit the leaf-vine (1 stem + 5 sts on either side).
Special Abbreviation Instructions for the Leaf-Vine:
*CL of 3 (a.k.a. cluster of 3 double crochet stitches or a variations of a dc3tog) = leaving the last 2 lps from each st on the hook, work 1 dc into each of the next 3 sts, yo & pull though all 4 lps. *Note: This is worked just like a CL of 2 like in this video tutorial here, but over 3 sts instead of 2.
Leaf-Vine - optional: continue where you left off → sl st 3, ch 21, *sl st into the 2nd ch from hook, CL of 3, hdc 1, sc 1, sl st 1,** [ch 12, sl st into the 2nd ch from hook, 3 dc into the next st, hdc 1, sc 1, sl st 4, ch 8, rep from * to **, sl st 10] 2 times, sl st join to the next st, f/o (1 vine with 5 leaves).
Weave in all ends. Fold vines down so they rest against the coaster, and block according to your preference.
Share pictures of your Autumn Delights Pumpkins! TAG @beckastreasures via Instagram or Twitter; ADD your project to Ravelry; or JOIN one of my Crocheting Treasures groups
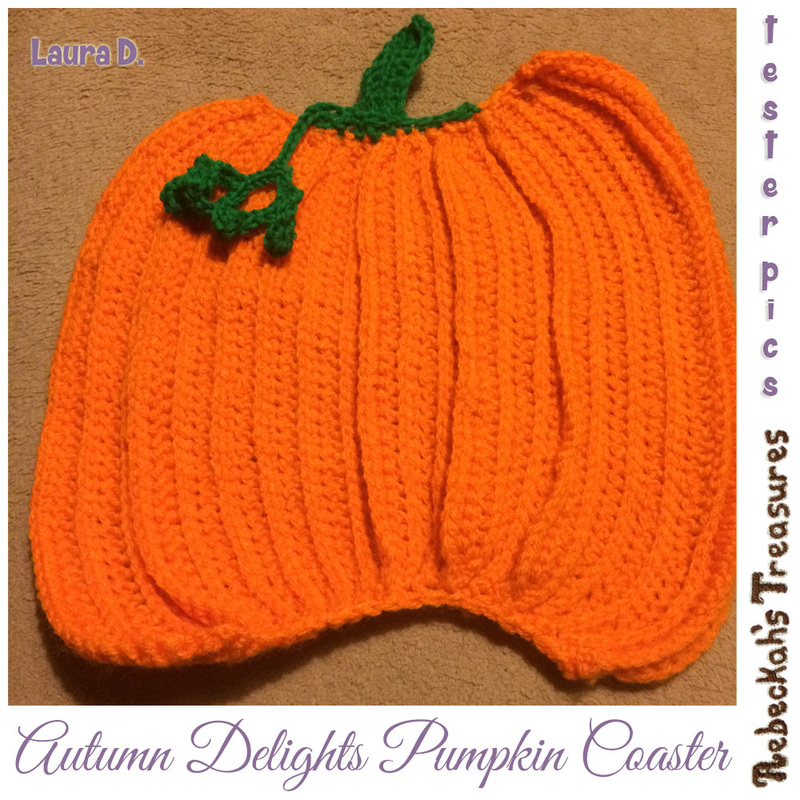
Thanks Laura D. for testing the Autumn Delights Pumpkin Coaster crochet pattern for me, and thanks to both Margie E. and Theresa P. for your help tech editing this pattern too
Hello Visitor and Welcome to Rebeckah's Treasures... I am a Norwegian/Canadian currently studying Midwifery in the UK. I love to crochet! At Rebeckah's Treasures, I share my crochet patterns and treasures. I hope they inspire you to crochet your own little treasures too... 
Comments
|
Hello, my name is Rebeckah.
I hope my crochet inspires you to create your very own treasures! Learn more about me... Categories
All
Archives
October 2021
© 2012-2021 Rebeckah Ferger
All rights reserved. Disclaimer: This website makes use of sponsored and/or affiliate links. Please see this page for more information.
|
- Home
-
-
- Special Offers
- New Releases
- Accessory Crochet Patterns
- Afghan Square Crochet Patterns
- Amigurumi Crochet Patterns
- Applique Crochet Patterns
- Baby Crochet Patterns
- Dolly Crochet Patterns
- Fashion Doll Crochet Patterns
- Free Downloads
- Holiday Crochet Patterns
- Tapestry Crochet Patterns
- Under the Sea Crochet Patterns
- Wedding Crochet Patterns
- Disclaimer and FAQs
-
-
- Free Crochet Patterns
- New Free Releases
- Free Accessory Crochet Patterns
- Free Afghan Square Crochet Patterns
- Free Amigurumi Crochet Patterns
- Free Applique Crochet Patterns
- Free Baby Crochet Patterns
- Free Dolly Crochet Patterns
- Free Fashion Doll Crochet Patterns
- Free Guest Crochet Patterns
- Free Holiday Crochet Patterns
- Free Tapestry Crochet Patterns
- Free Under the Sea Crochet Patterns
- Free Wedding Crochet Patterns
- Free Crochet Patterns Coming Soon
Welcome Visitor! I hope you enjoy my treasures.












 RSS Feed
