|
Disclaimer: This website makes use of sponsored and/or affiliate links. Please see this page for more information.
Are you looking for an easy crochet pattern to dress your naked dolls? Look no further...
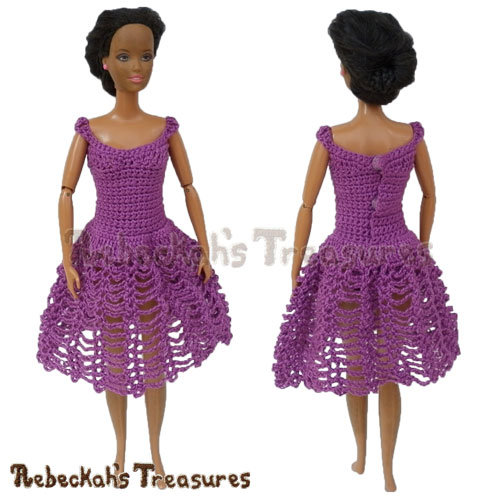
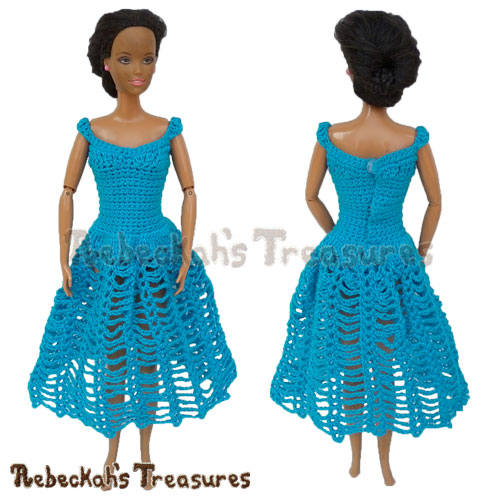
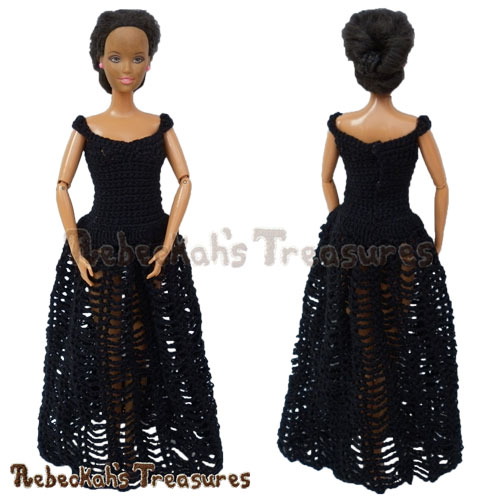
8 in 1 Brassieres to Dresses for 11½" fashion dolls is a fun, free crochet pattern with a rainbow of possibilities. Crochet all sorts of lovely blouses and dresses for your dolls today!
3 years ago, I started my journey of creating crochet patterns for you. One of my first designs was called 8 in 1 Fashion Doll Clothes. Since creating the original design, it has received much positive feedback from you, so I decided to give her a fresh look.
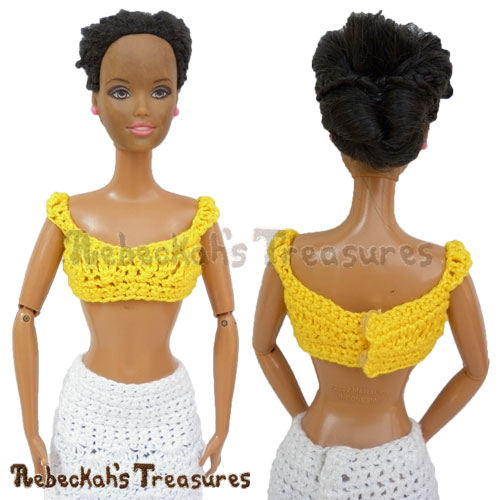
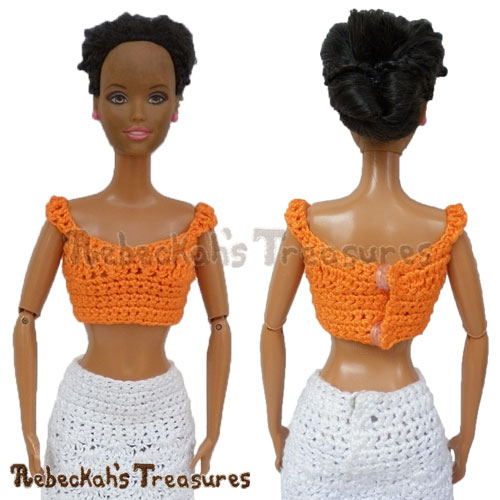
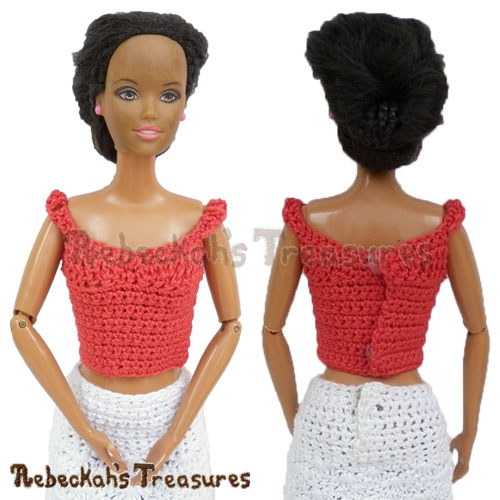
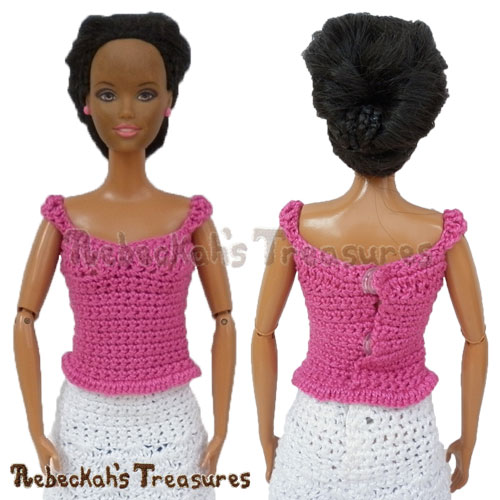
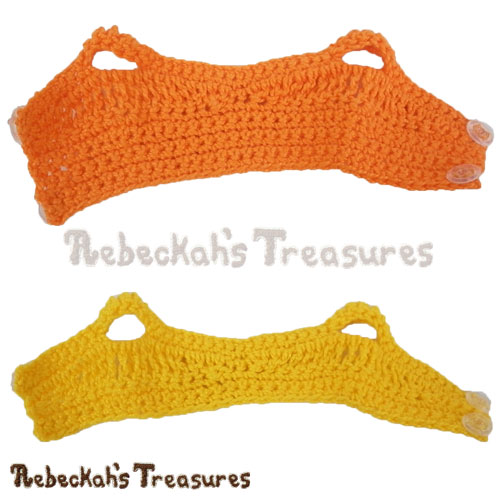
This revised edition of the pattern better showcases the different looks that can be achieved with this elegant design, including two brassieres, two blouses and four dress lengths. Also, it addresses the issue of fit many of you saw when crocheting the original. The original version has two extra decrease rows, which gives it a much tighter fit. This version eliminates the last two decrease rows and maintains a snug fit all the same. If you find you want a tighter fit, you can follow rows 7-17 on the original version for those rows on this version. Additionally, this revised edition includes a photo tutorial to better show you how to work the overlap section, where you switch from working in rows to rounds. I hope these revisions will help more of you to create wonderful and stylish attire for fashion dolls!
This pattern is copyrighted to Rebeckah Ferger of www.rebeckahstreasures.com. It is for personal use only. No part of this pattern may be copied or distributed in any way. If you sell what you make from this pattern, please credit me as the designer. All rights reserved, 2016.
You'll Need:
– up to about 250m (37 grams / 1oz) - for dresses
Abbreviations: ~USA Terminology Used~
*...** - repeat instructions between the two asterisks as directed ~ I always highlight the repeat directions for this in purple so it is easier to spot.
(...) - work the stitches between the parentheses into the space as directed [...] - work stitches between the brackets how ever many times called for ch - chain CL of 2 - cluster of 2 dc (instructions are included below or see the video tutorial here) dc - double crochet FL - front loop f/o - fasten off hdc - half double crochet prev - previous rem - remaining rep - repeat rnd - round RS - right side sc - single crochet sc2tog - single crochet 2 stitches together sk - skip sl st - slip stitch sp(s) - space(s) st(s) - stitch(es) tog - together tr - treble/triple crochet WS - wrong side Gauge:
16 single crochet stitches x 20 rows = 2” (5 cm).
Sizing:
Designed to fit the 2002 model of the 11½” Barbie fashion doll by Mattel, but it should fit most Barbie doll models.
Pattern Notes:
All pieces are worked from the top down. This allows for multiple pieces of attire in one pattern. Fasten off at the end of any row after row 6. Suggestions are included below...
You should be familiar with basic crochet stitches (chs, sl sts, sc, hdc, dc, tr), working in rows, rounds, and how to do increases and decreases. A special stitch you should be familiar with is a variation of the dc2tog by means of the cluster stitch. Decreases or tog sts are best worked by using the invisible decrease technique, where you only work in the front or back loops of a stitch. If you are unfamiliar with this technique, see my video tutorial here... Attire Instructions:
Make 1
This pattern begins by working in rows, where the EVEN rows = RS. For this section, the left side of the top will have three extra sts – these are part of the overlap where the fastenings will go. They will rest under the right side of the top when both sides are fastened tog. Later, you will switch to working one turning rnd before making a final switch to working in non-continuous rnds, where the Side facing you = RS. ch 54... row 1: work this row in the bottom loop (a.k.a. back hump) of the chs – sc in 2nd ch from hook & in the next 11 chs, *hdc, dc, tr 3, dc, hdc,** sc 18, rep from * to **, sc 9, ch 1, turn (53 sts). *The rep section (*hdc, dc, tr 3, dc, hdc,**) creates the capped sleeves. Change the sts between the asterisks to sc for a narrow sleeve strap instead. row 2: sc 9, ch 4, sk 7 sts, sc 18, ch 4, sk 7 sts, sc 12, ch 1, turn (47 sts). CL of 3 (a.k.a. cluster of 2) = leaving the last 2 lps from each st on the hook – work a dc into the next 2 sts (you should have 3 lps on hook), yo, draw thru all 3 lps.See how here...
row 3: sc 4, *CL of 2 twice, tr 12, CL of 2 twice,** sc 2, rep from * to **, sc, ch 1, turn (39 sts).
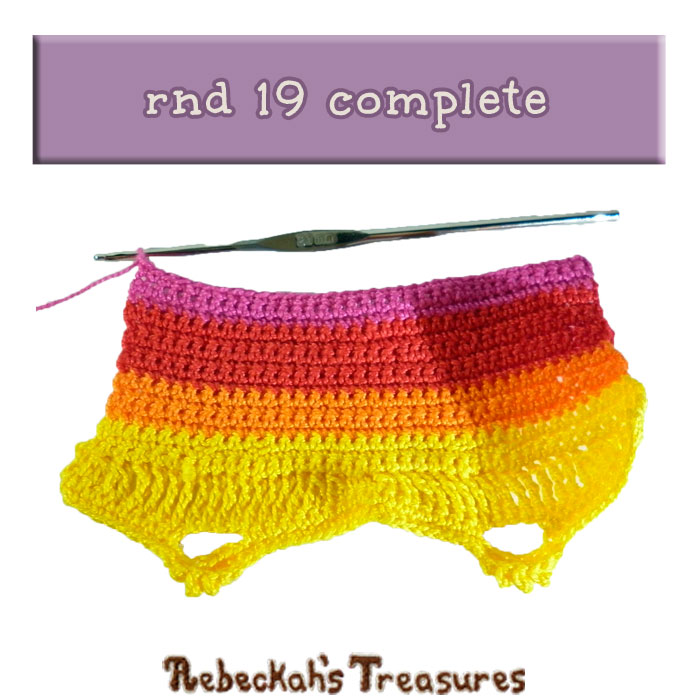
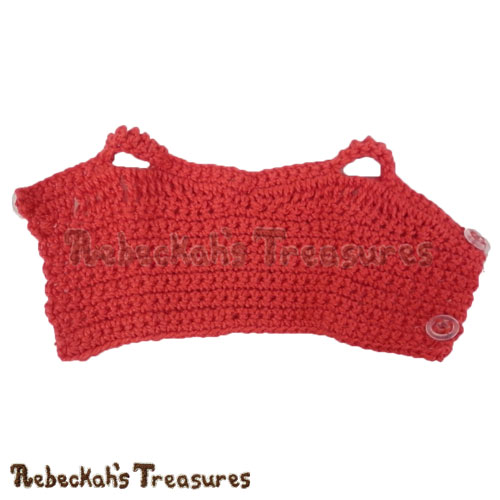
row 4-5: sc 39, ch 1, turn – 2 rows (39 sts). row 6: sc 6, *sc2tog in FL, sc 2, sc2tog in FL,** sc 12, rep from * to **, sc 9, ch 1, turn (35 sts). *Stop and f/o here for Brassiere A (yellow). row 7-19: sc 35, ch 1, turn – 13 rows, do not turn after row 19 (35 sts). *Stop and f/o after rows 10 and 16 for Brassiere B (orange) and Blouse C (red), respectively. *Click on the following images to enlarge them.
Switching to a turning rnd to join the overlap...
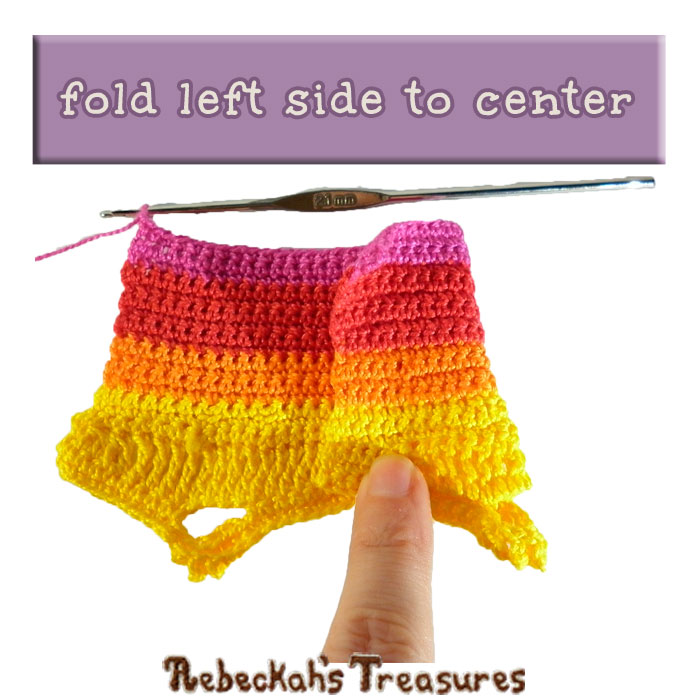
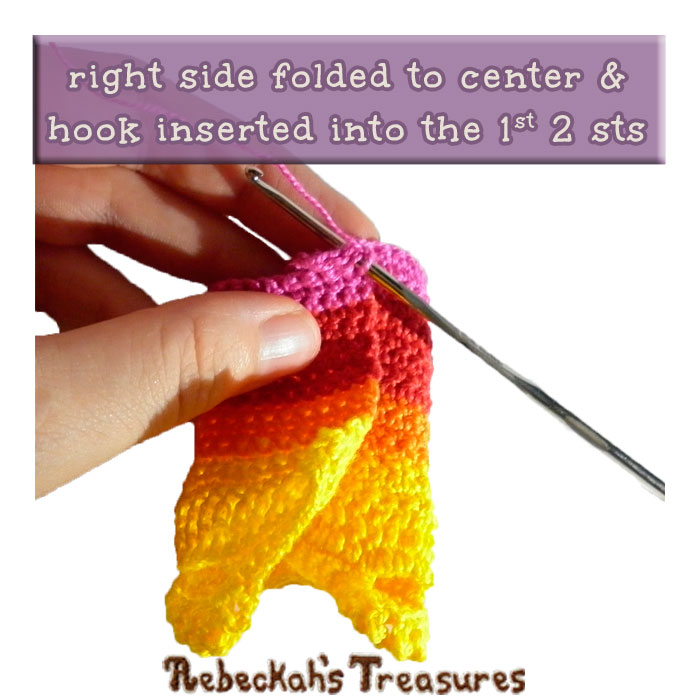
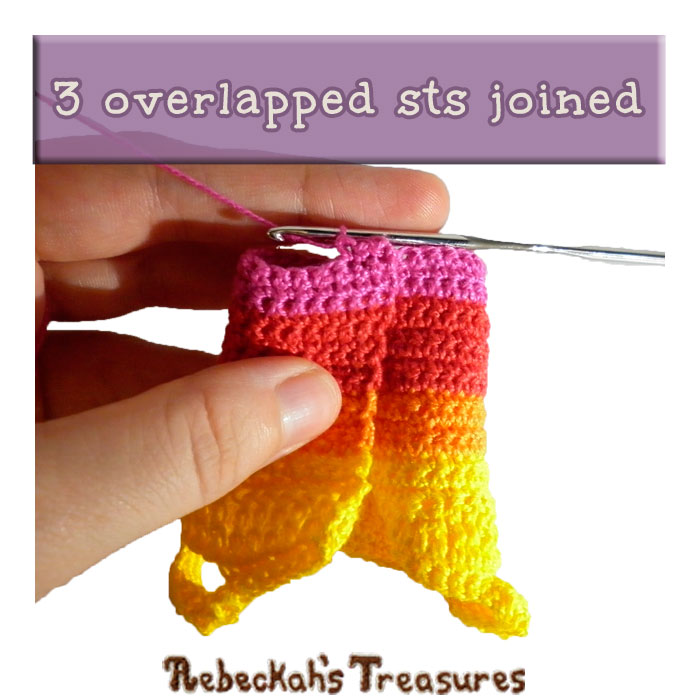
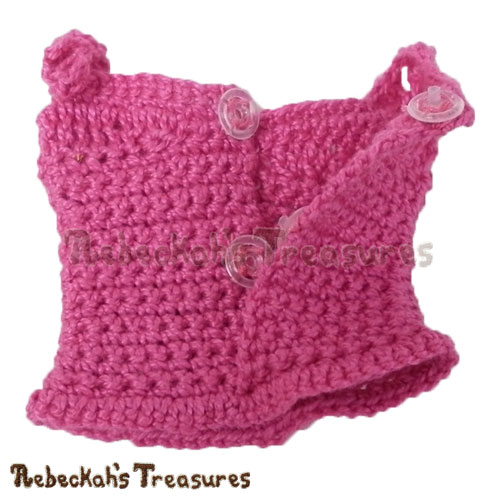
rnd 20: with WS facing you & last row at the top → Fold left side of the top (on your right) to the center of the top. Next, fold the right side of the top (on your left) to the center of the top and place it on top of the left side, so that 3 sts of both sides overlap (this overlap process functions as the turn you did not do after row 19). Begin crocheting rnd 20 → sc 3 over the overlapped sts so that both sides are joined tog and so that one sc is worked into 2 sts (one from each side) at the same time for each overlapped st, sc 29 over the rem sts, sl st join to the first st made in this rnd (from here on, simply – sl st join), ch 1, turn (32 sts). *See photo tutorial on how to work the overlap below... *Click on the following images to enlarge them.
Switching to non-continuous rnds...
rnd 21: sc 2 in each st around, sl st join, ch 1, turn (64 sts). *Stop and f/o here for Blouse D (pink). rnd 22: sl st into the first st, so that the first tr of this rnd will line up properly without a huge gap between the first sts → ch 4 or work a chainless starting tr, tr, [dc 4, tr 4] x 7, dc 4, tr 2, sl st join, do not turn (64 sts). *From here on, do not turn at the end of rnds. See how to do a chainless starting tr by Moogly here. rnd 23: the last sl st join from rnd 22 counts as skipping the first st of this rnd (it will be skipped over again at the end of this rnd), [sc, ch 3, sc, ch 5, sk 2 sts] x 16, sl st join, ch 1 (32 ch-sps). *From here on, keep a stitch marker in the first ch-sp, so you don’t loose track of the rnd’s start. rnd 24: [(sc, ch 3, sc) into the ch-3-sp, ch 5, sk the ch-5-sp] x 16, sl st join, ch 1 (32 ch-sps). *You will only work directly into the ch-3-sps from the prev rnd. All other sts and ch-sps will be skipped. rnd 25+: rep rnd 24 until you reach your desired length, f/o. *See suggestions on next page... Suggested Dress Lengths / Stopping Points: Fasten off after the end of the suggested rnd for the dress length of choosing. The number of ch rnds counting from rnd 23 is also included to help you count the rnds quickly.
*Click on the following images to enlarge them.
Weave in all ends and sew two snaps or fastener of choosing onto the overlap section.
*Click on the following images to enlarge them.
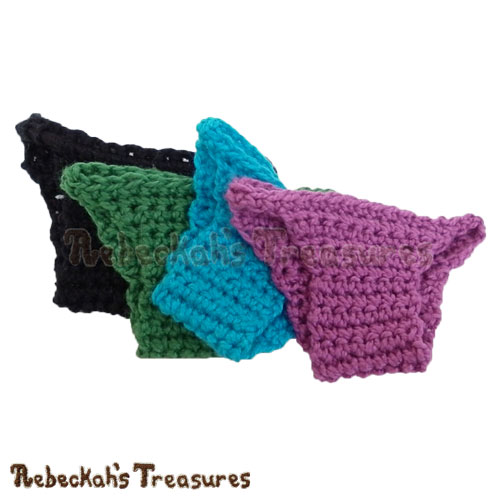
Looking for undergarments to go with your 8 in 1 dresses? Try these fashion doll panties!

Hello Visitor and Welcome to Rebeckah's Treasures... I am a Norwegian/Canadian currently studying Midwifery in the UK. I love to crochet! At Rebeckah's Treasures, I share my crochet patterns and treasures. I hope they inspire you to crochet your own little treasures too... 
Comments
|
Hello, my name is Rebeckah.
I hope my crochet inspires you to create your very own treasures! Learn more about me... Categories
All
Archives
October 2021
© 2012-2021 Rebeckah Ferger
All rights reserved. Disclaimer: This website makes use of sponsored and/or affiliate links. Please see this page for more information.
|
- Home
-
-
- Special Offers
- New Releases
- Accessory Crochet Patterns
- Afghan Square Crochet Patterns
- Amigurumi Crochet Patterns
- Applique Crochet Patterns
- Baby Crochet Patterns
- Dolly Crochet Patterns
- Fashion Doll Crochet Patterns
- Free Downloads
- Holiday Crochet Patterns
- Tapestry Crochet Patterns
- Under the Sea Crochet Patterns
- Wedding Crochet Patterns
- Disclaimer and FAQs
-
-
- Free Crochet Patterns
- New Free Releases
- Free Accessory Crochet Patterns
- Free Afghan Square Crochet Patterns
- Free Amigurumi Crochet Patterns
- Free Applique Crochet Patterns
- Free Baby Crochet Patterns
- Free Dolly Crochet Patterns
- Free Fashion Doll Crochet Patterns
- Free Guest Crochet Patterns
- Free Holiday Crochet Patterns
- Free Tapestry Crochet Patterns
- Free Under the Sea Crochet Patterns
- Free Wedding Crochet Patterns
- Free Crochet Patterns Coming Soon
Welcome Visitor! I hope you enjoy my treasures.











 RSS Feed
